# How to Add Permissions to Group
Solodev features a permissions management system that allows administrators to specify the ‘Actions’ and ‘Resources’ available to specific users and groups. Solodev supports granular permissions so that administrators can create a permission system as broad or as detailed as needed. In this article, you will learn how to specify permissions available to a given group.
## Prerequisites
- You will need to add a user to your Solodev CMS.
- You will need to create a group.
## Assign permissions to group
**Step 1**. Click **Groups** located under the Organization section of the Solodev Dashboard and click on the group you wish to grant specific permissions to.
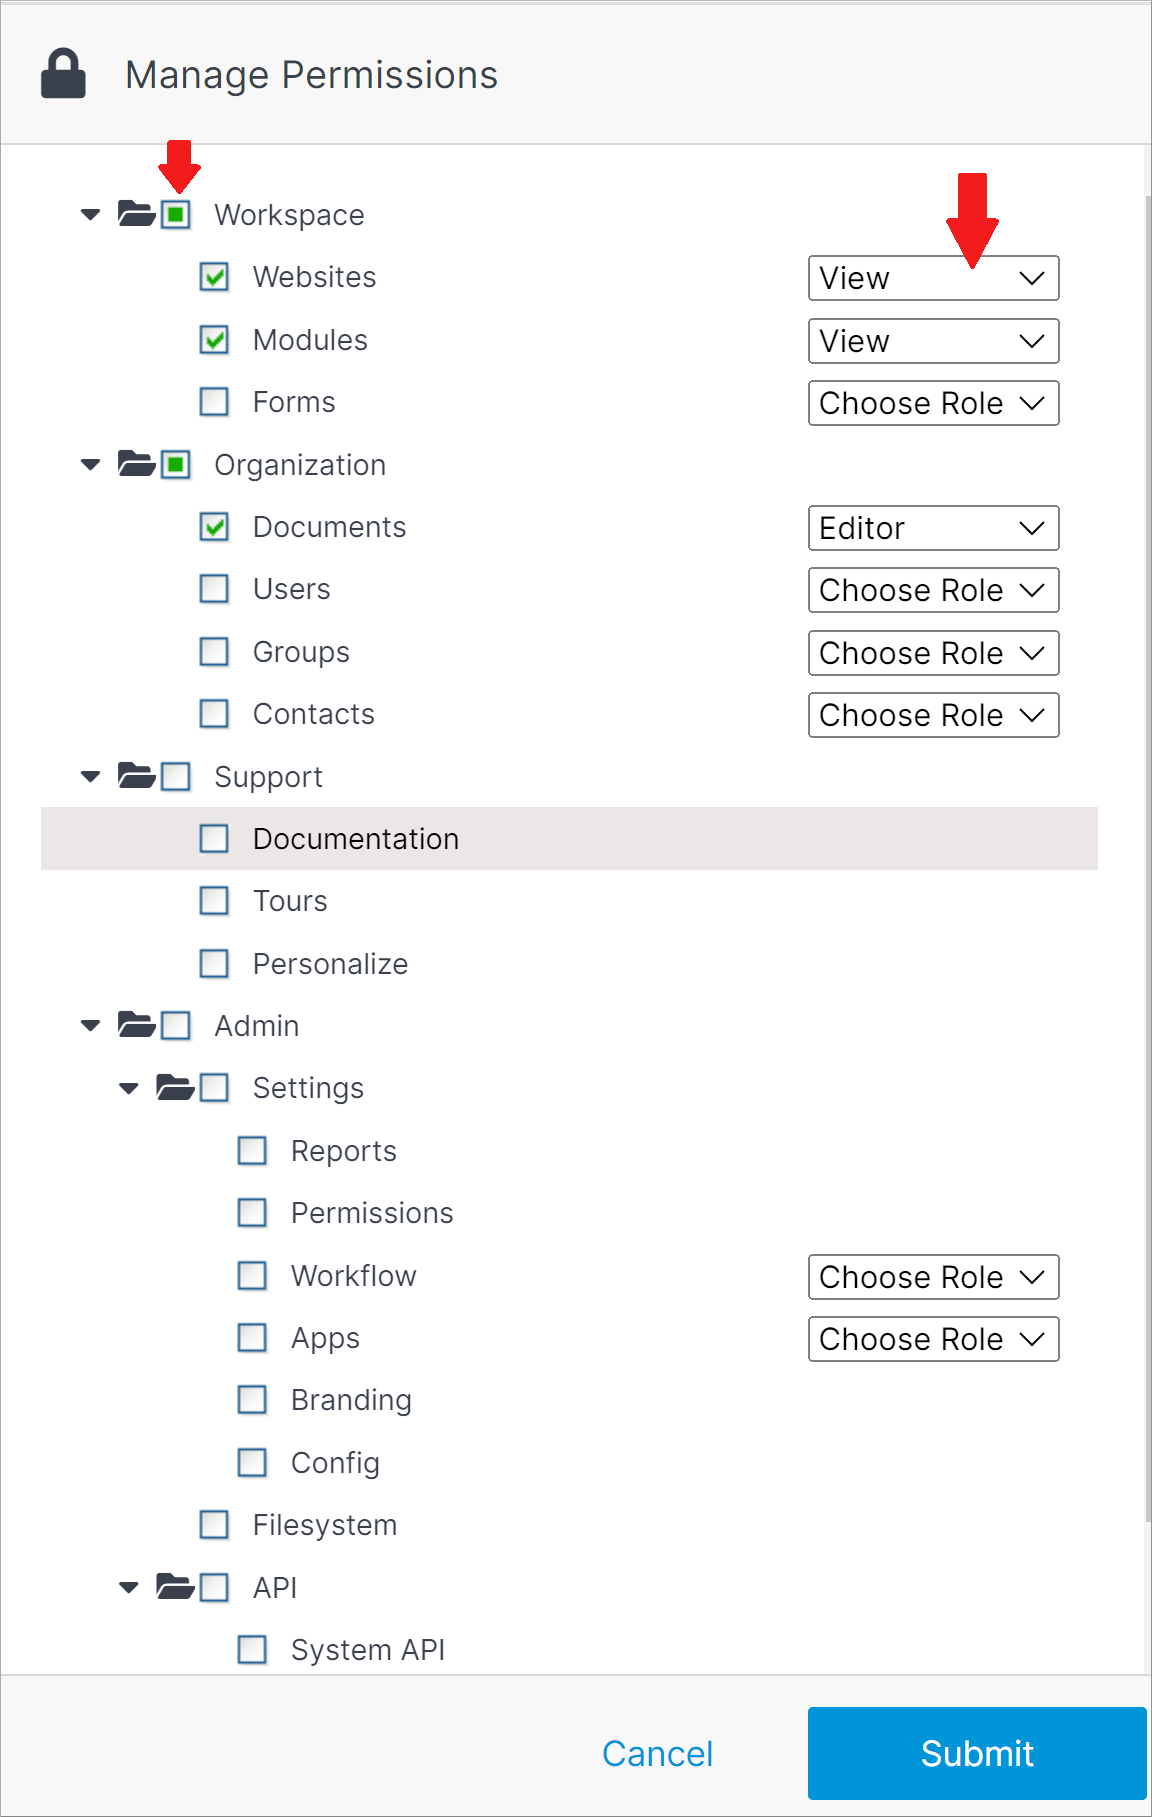
**Step 2**. Click the **Manage** button, and specify places and levels of access you wish to grant to a group by clicking next to the components and choosing the roles from the dropdown menu.
 !!! Note:
A group or group member can be assigned one of four roles in Solodev CMS:
- **View**: Allows a member to see items and content.
- **Stager**: Enables a member to create or modify content but not publish.
- **Editor**: Gives a member the ability to view, create, edit, and publish.
- **Admin**: Provides full editing control and management of group members.
!!!
**Step 3** . Once you have completed all the fields, click Submit to apply your changes.
!!! Note:
A group or group member can be assigned one of four roles in Solodev CMS:
- **View**: Allows a member to see items and content.
- **Stager**: Enables a member to create or modify content but not publish.
- **Editor**: Gives a member the ability to view, create, edit, and publish.
- **Admin**: Provides full editing control and management of group members.
!!!
**Step 3** . Once you have completed all the fields, click Submit to apply your changes.