#
Add Website
Solodev is a multi-site platform. You can efficiently run as many websites and apps in one place with a single login and switch between websites. Each website is self-contained, meaning they have separate sources such as files and folders. When adding websites, each website will be installed from scratch with its theme resources, but they can share resources. There is also no FTP, hidden files, or need to log into the server.
In order to switch between different websites, simply click on "Websites" on the Tree and click on the website you'd like to customize.
Before moving forward in Solodev, you must first buy a domain that will eventually point to your Solodev deployment. Notable domain providers include GoDaddy.com, NameCheap.com, NetworkSolutions.com, and BlueHost.com.
Once you have your domain name, connect your domain to Solodev by following the instructions below:
#
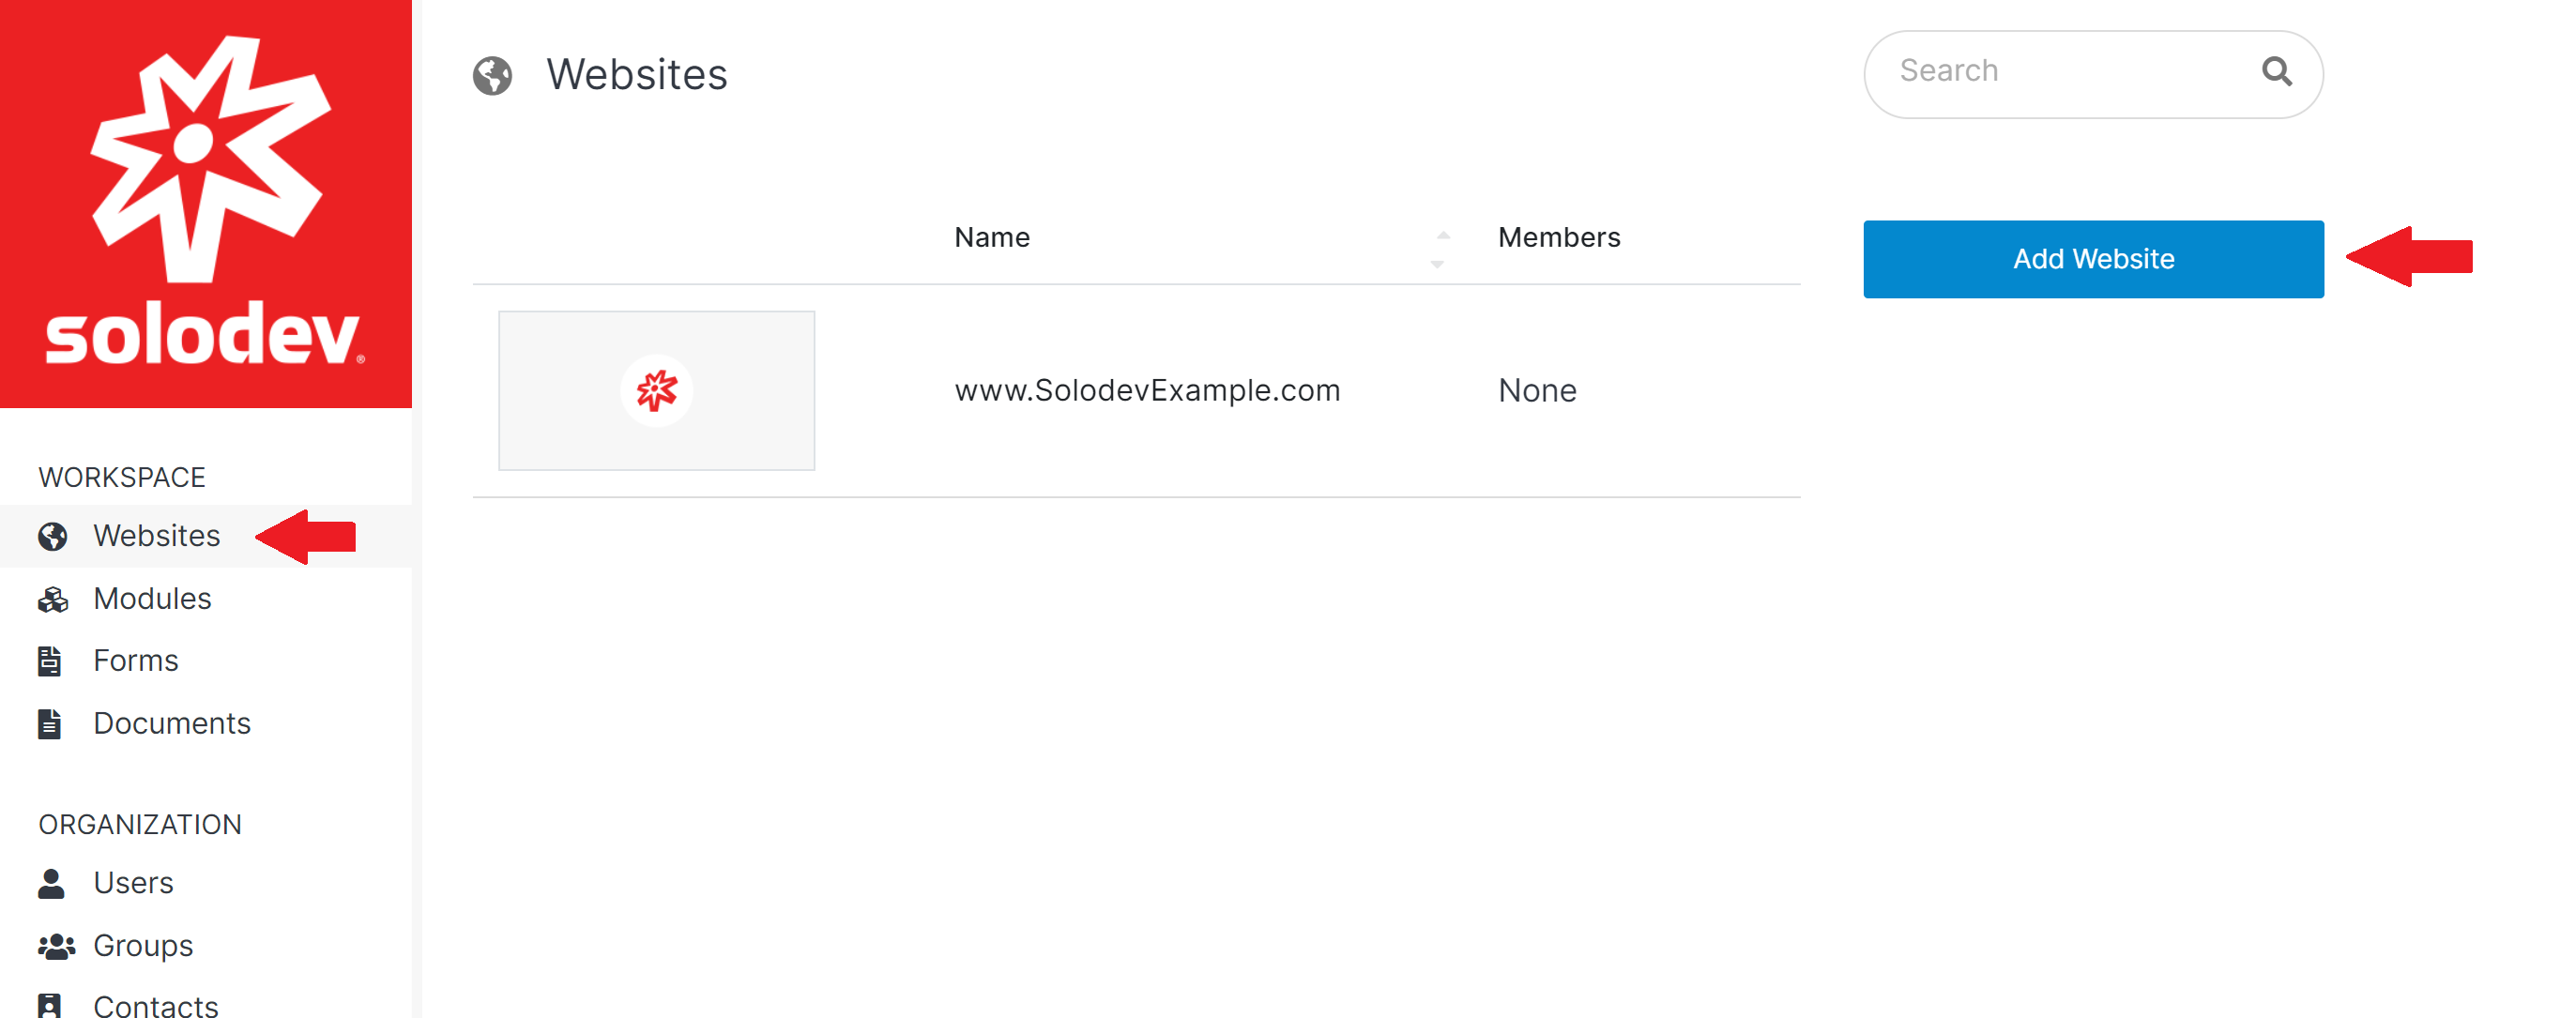
Step 1 - Add your Domain to Solodev
On the left side, click on Websites then click on Add Website button.
#
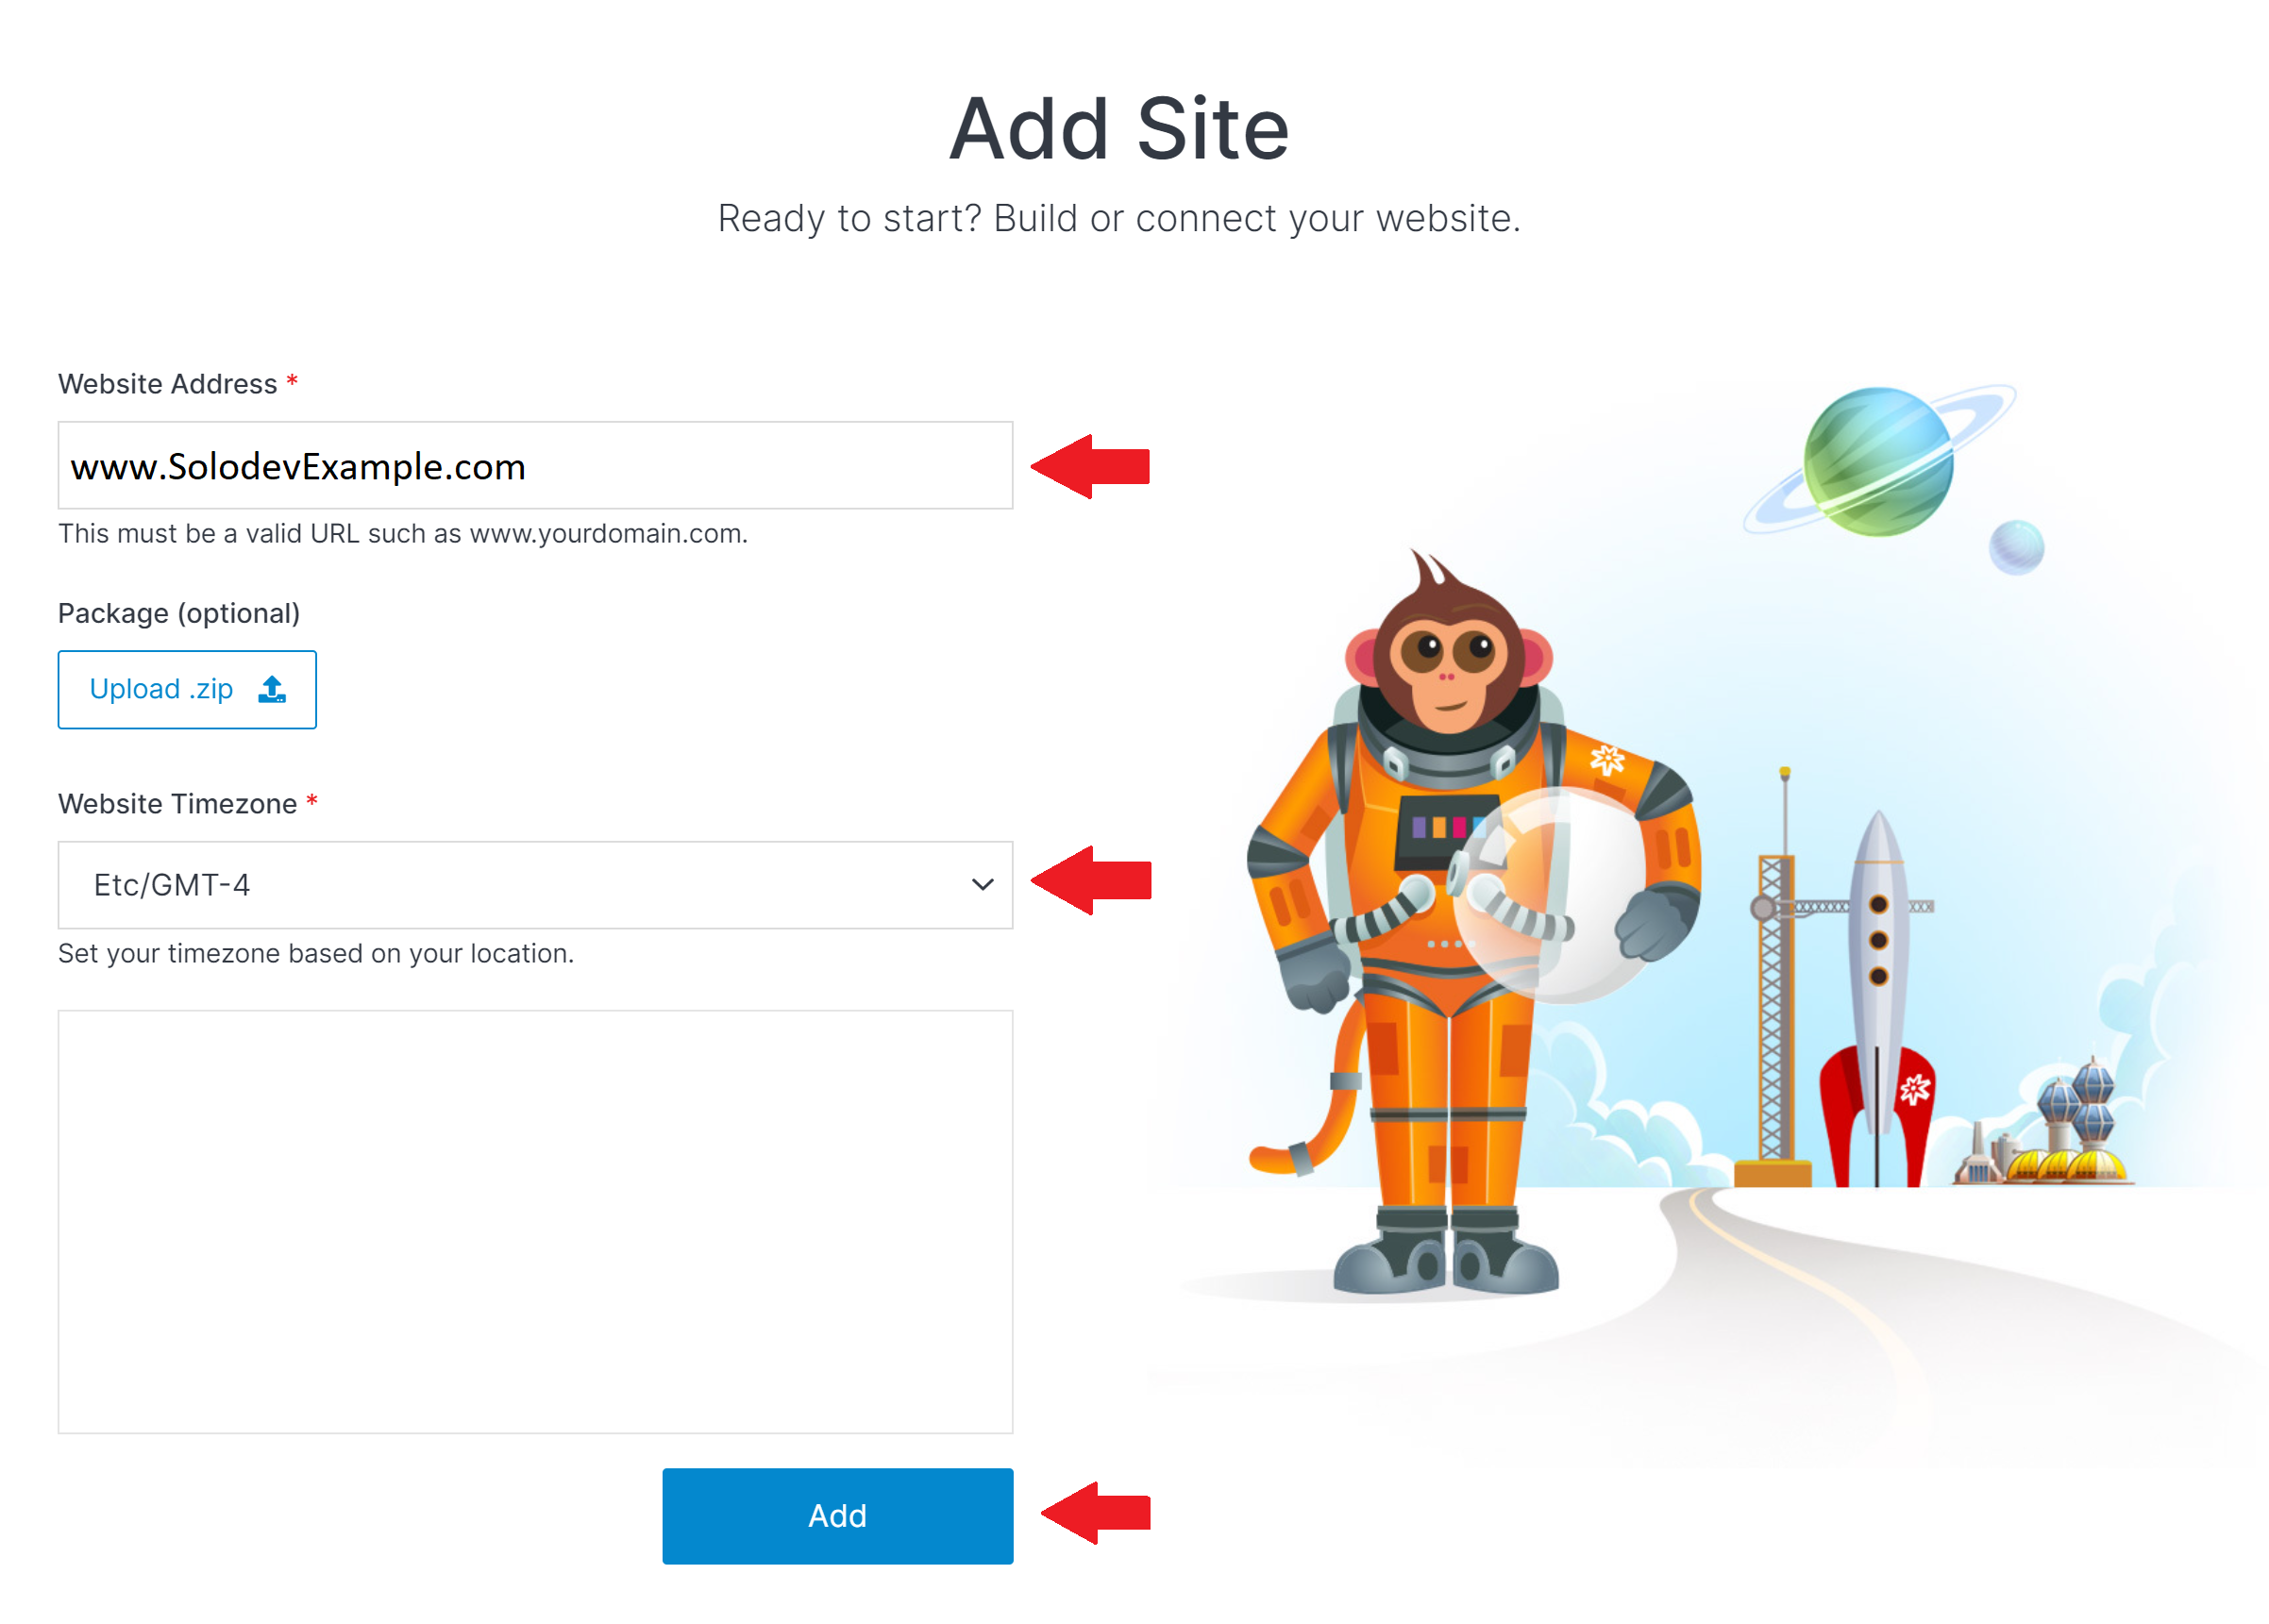
Step 2 - Fill out the Fields
In the Your Website Address section, type in your URL and the domain name of your newly added website. Then select your timezone. Once you're done, click Add.
You can choose the optional packages to be installed during this process. You can also add a description of your page.
After that, log into your account, and you'll see that the website has been added to your website's folder.
