#
How to connect a module to a website
In the previous tutorial, you learned how to install a blog module in your CMS and create a repeater and detail template. In this tutorial, you will now learn how to connect your detail page to the blog module, so you can begin adding content to it and dynamically generating posts.
#
Prerequisites
- You will need to complete the previous How to create a module in your CMS tutorial.
- You will need to be familiar with using shortcodes.
- For the examples in this tutorial, we will continue using the Solodev SpaceJet theme package for images and assets.
- As you are building with this tutorial, you can refer to the Solodev SpaceJet website to compare your progress.
#
How to add a detail template
The detail template shows the specifics of an individual entry from a repeater template. An example would be clicking on an individual blog entry from a list of entries to see the entire blog post. The detail page is a subpage of its parent page on the repeater template.
Step 1: Under the blog folder in web files > content add a file for the module detail called detail.tpl.
Step 2: Add the code below for the blog detail, and click Publish. This code contains shortcodes to show your blog content, for more information on shortcodes, please click here.
[entry]
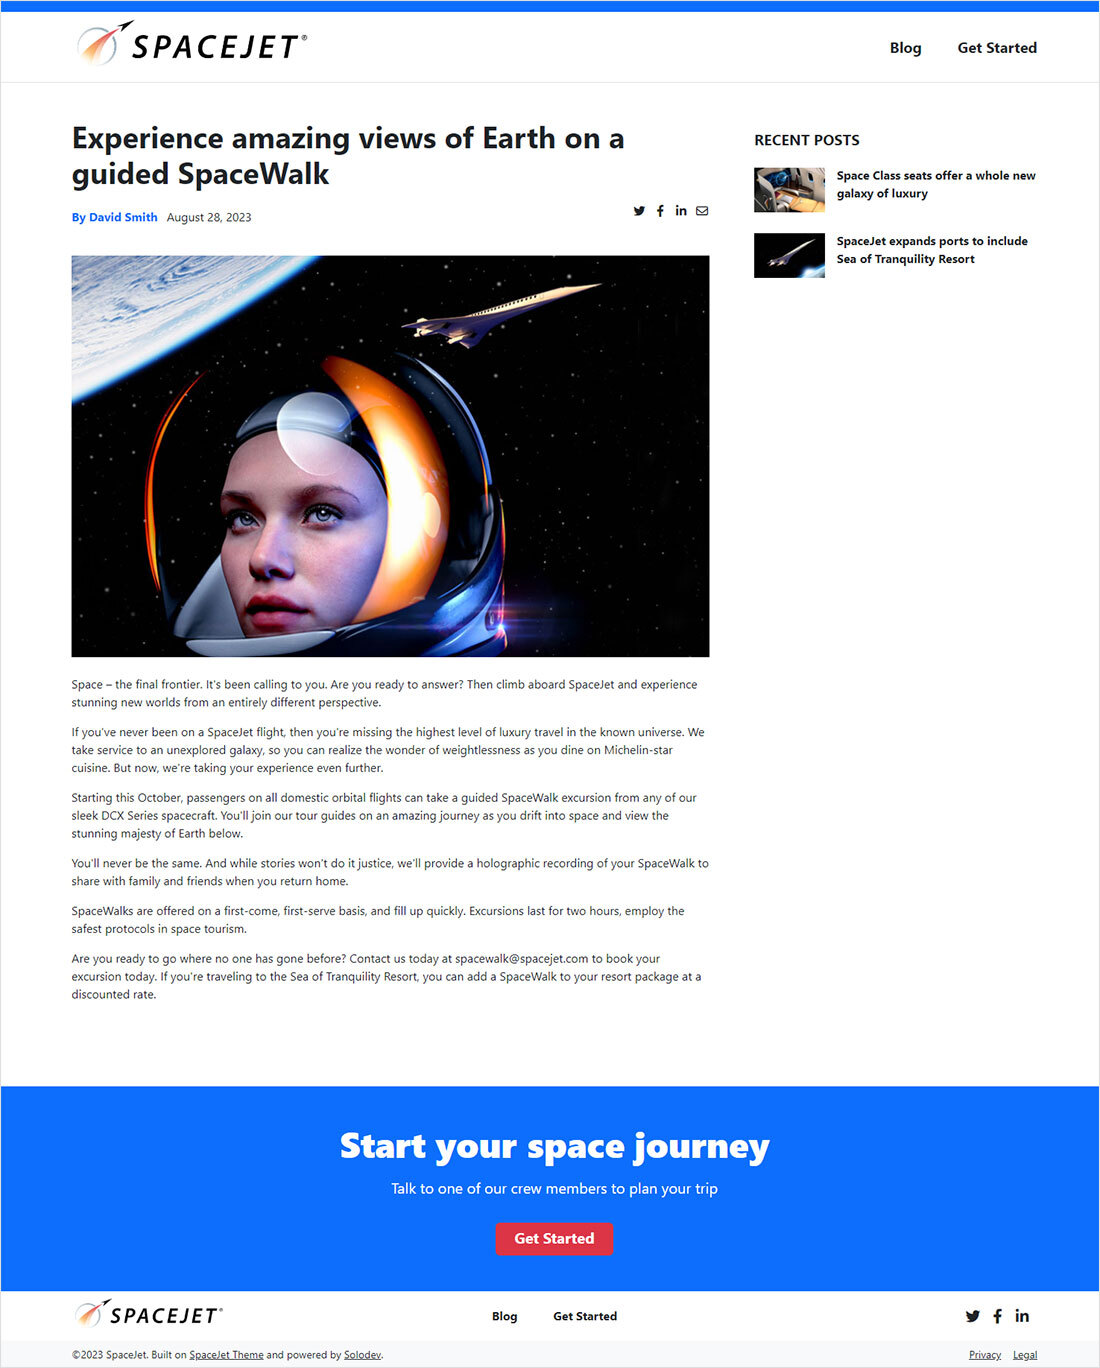
<h1><strong>{{event_title}}</strong></h1>
<div class="d-flex align-items-center justify-content-between">
<p class="mb-0 mt-3">
<span class="text-primary"><strong>[is_set value={{post_author}}]By David Smith[/is_set]</strong> [is_set value={{post_author}}]</span>
<span class="ps-2">[/is_set][print_date format="F d, Y" timestamp="{{start_time}}"][is_set value={{post_author}}]</span>[/is_set]
</p>
<ul class="list-unstyled d-flex justify-content-end mb-0">
<li><a href="" class="text-dark text-decoration-none"><span class="fa-fw fa-brands me-2 fa-twitter"></span><span class="sr-only">Twitter</span></a></li>
<li><a href="" class="text-dark text-decoration-none"><span class="fa-fw fa-brands me-2 fa-facebook-f"></span><span class="sr-only">Facebook</span></a></li>
<li><a href="" class="text-dark text-decoration-none"><span class="fa-fw fa-brands me-2 fa-linkedin-in"></span><span class="sr-only">Linkedin</span></a></li>
<li><a href="" class="text-dark text-decoration-none"><span class="fa-fw fa-regular fa-envelope"></span><span class="sr-only">Email</span></a></li>
</ul>
</div>
<div class="mt-3">
[is_set value={{post_image_alt}}]
<img alt="{{post_image_alt}}" src="[get_asset_file_url id='{{post_image}}']" class="w-100 my-4">
[/is_set]
[is_empty value={{post_image_alt}}]
<img alt="{{event_title}}" src="[get_asset_file_url id='{{post_image}}']" class="w-100 my-4">
[/is_empty]
{{post_content}}
</div>
[/entry]Step 3: Under www > blog add a page called detail.stml.
Step 4: Add the detail.tpl to the detail.stml.
Step 5: Publish your page.
#
Mapping the detail page to the module
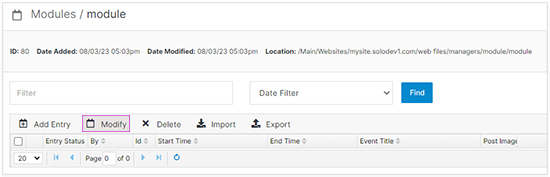
Step 1. Go to the module and click modify.
Step 2. On the Website Properties accordion, under Detail Page Template, click Browse, from the www folder, select the detail page you just created.
Step 3. Under Detail Folder Location, click Browse, select the www folder your detail page is and click Submit.
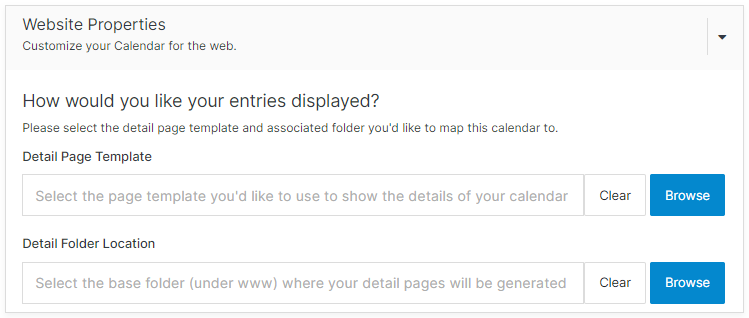
Step 4. Under Detail Folder Location, click Browse, select the www folder your detail page in and click Submit.
Step 5: After mapping your detail page, you need to republish your entry for it to know where to go. For this, go back to your module and click on the entry you created and click Save.
Congratulations! You have created your first blog module. Have fun creating posts.