#
Alert
Boost user engagement with eye-catching, personalized alert notifications.
The Solodev Alert Module effortlessly manage and display alerts on your website. Customize messages to match your needs and make sure your audience never misses an important update.
Create and manage alerts with ease - Set up alerts quickly through an intuitive module. Easily update or remove messages as your needs change.
Fully customizable display and behavior - Control exactly when alerts appear and how long they stay visible. Tailor the experience to suit different types of messages and user needs.
Keep your users informed in real-time - Make sure visitors never miss important updates, announcements, or warnings. Whether it’s system maintenance or promotional messages, deliver them instantly and reliably.
#
Prerequisites
- Have a Solodev CMS.
- Have a Website.
Note:
We use Bootstrap 5 in our packages. You can update your code to match your own framework, styles, or preferences as needed.
#
Step-by-Step Setup Guide
These steps will guide you through the process of installing the Alert Module and getting it live on your page.
- Navigate to Modules
- In your CMS dashboard, click Modules in the left navigation menu
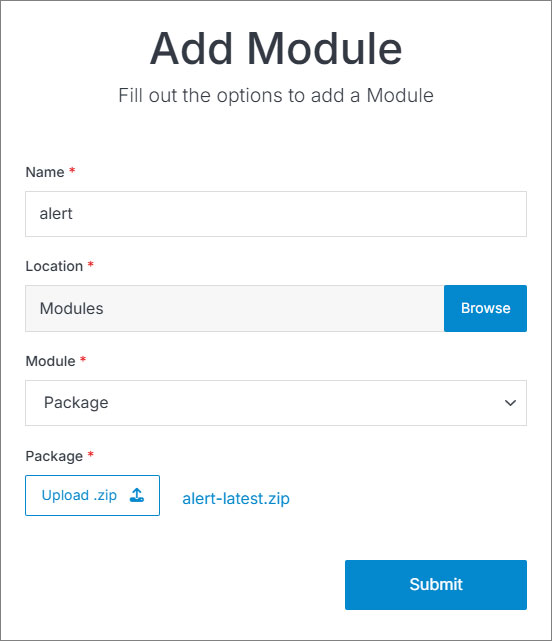
- Click the Add Module button
- Give your alert module a name
- Select from the three options:
- Datatable: Creates a simple data table structure
- Module: Builds a custom module from scratch
- Package: Installs a pre-built module from a zip file
- For the purpose of this tutorial, select Package: and use this zip file .
- Click Submit.
Note:
The alert module comes with a pre-configured entry that you can customize by accessing the module entry.
- Navigate to
Websites > example.com > web files > content
- Create a folder called
alert - In the alert folder, create a new code file named
alert-bar.tpl
- Add the alert code using the example template provided below.
[repeater id="" limit="0,1" display_type="news"]
  <div class="text-center bg-primary py-2">
    <div class="container">
      [is_set value="{{alert_link}}"]
        [cond type="is" subject="{{alert_link_external}}" value="1"]
          <a href="{{alert_link}}" class="text-white" target="_blank" rel="noopener noreferrer">{{event_title}}</a>
        [/cond]
        [cond type="is_not" subject="{{alert_link_external}}" value="1"]
          <a href="{{alert_link}}" class="text-white">{{event_title}}</a>
        [/cond]
      [/is_set]

      [is_empty value="{{alert_link}}"]
        <span class="text-white">{{event_title}}</span>
      [/is_empty]
    </div>
  </div>
[/repeater]
Important!
You need to add the ID number of your alert module to the repeater shortcode within the id="" attribute.
Click Publish.
Open your homepage
index.stmlor the desired page where you want to add the alert bar.Insert your alert-bar file into the page.
Click Publish.
Go to your website and refresh the page to see your alert bar in action.

#
Support
Support for Alert Module is handled directly through Solodev's global help desk. For more information regarding support queries, go to www.solodev.com.
Note:
To learn more about shortcodes and how they work, visit our shortcodes documentation.