#
Blog
Share stories, insights, and ideas with beautifully structured blog content.
The Solodev Blog Module makes it easy to create, organize, and publish posts on your website. Add featured images, videos, and categories to enrich your articles and keep your audience connected.
Create and manage blog posts with ease – Draft, edit, and schedule content quickly through an intuitive module. Keep your publishing blog on track and ensure your readers always see fresh updates.
Fully customizable structure and categories – Organize posts by category and feature them with images or video. Control how articles are displayed and make it easy for readers to discover related content.
Keep your audience engaged with timely content – Share news, tutorials, and thought leadership on schedule. Deliver stories that inform, inspire, and keep your community connected.
#
Prerequisites
- Have a Solodev CMS.
- Have a Website.
Note:
We use Bootstrap 5 in our packages. You can update your code to match your own framework, styles, or preferences as needed.
#
Step-by-Step Setup Guide
These steps will guide you through the process of installing the Blog Module and adding it to your page.
- Navigate to Modules
- In your CMS dashboard, click Modules in the left navigation menu
- Click the Add Module button
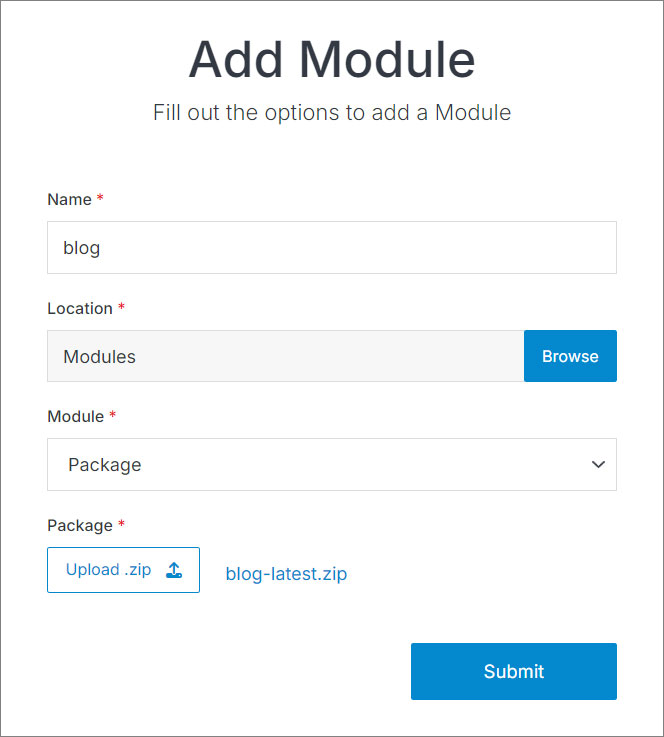
- Give your blog module a name
- Select from the three options:
- Datatable: Creates a simple data table structure
- Module: Builds a custom module from scratch
- Package: Installs a pre-built module from a zip file
- In this case, select Package: and use this zip file .
- Click Submit.
Note:
The blog module comes with pre-configured entries that you can customize by accessing the module entries.
- Navigate to
Websites > example.com > web files > content
- Create a folder called
blog - In the blog folder, create a new code file called
blog-repeater.tpl
- Add the blog code using the example template provided below.
<div class="container my-6">
<div class="row text-center justify-content-center">
<div class="col-md-8 col-xxl-7">
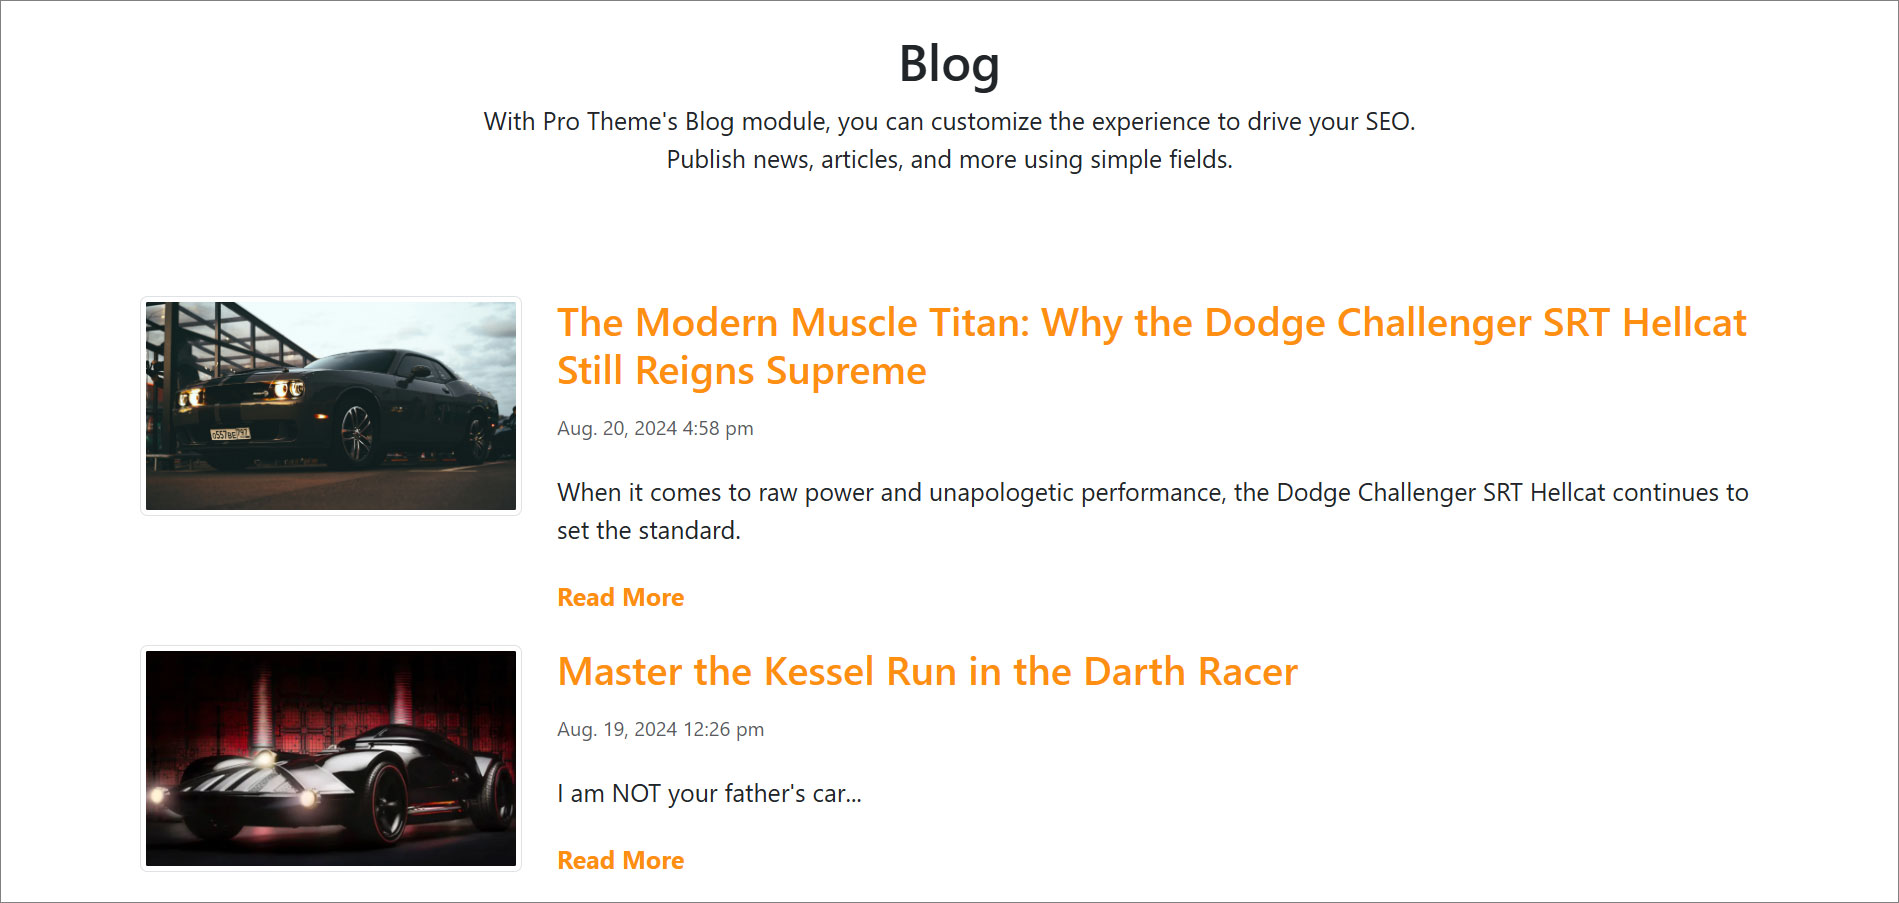
<h1>Blog</h1>
<p class="fs-5">With the Blog module, you can customize the experience to drive your SEO. Publish news, articles, and more using simple fields.</p>
</div>
</div>
<div class="mt-5">
[repeater id="" order="start_time desc"]
<div class="row border-bottom py-4">
<div class="col-lg-3">
[is_set value="{{post_image}}"]
<img alt="{{event_title}}" src="[get_asset_file_url id='{{post_image}}']" class="w-100">
[/is_set]
[is_empty value="{{post_image}}"]
<img alt="{{event_title}}" class="w-100" src="/_/images/blog-1.png" />
[/is_empty]
</div>
<div class="col-lg-9 ps-lg-3 mt-4 mt-lg-0">
<h2><a aria-label="Read more" href="{{path}}">{{event_title}}</a></h2>
<p class="text-muted fs-6">[print_date format="M. d, Y g:i a" timestamp="{{start_time}}"]</p>
<p>{{post_intro}}</p>
<p><a aria-label="Read more" href="{{path}}"><strong>Read More</strong></a></p>
</div>
</div>
[/repeater]
</div>
</div>Important!
You need to add the ID number of your calendar module to the repeater shortcode within the id="" attribute.
Click Publish.
Navigate to
Websites > example.com > www
- Create a folder called
blog - In the blog folder, create a page called
index.stml - Give your page a Title, and select a Template (optional)
Insert your blog repeater file into the page you just created.
Click Publish.
Go to your website and refresh the page to see your blog in action.
Navigate to
web files > content > blogand create a new code file calledblog-detail.tpl.Add the blog detail code using the example template provided below.
<div class="container py-4">
<div class="py-3">
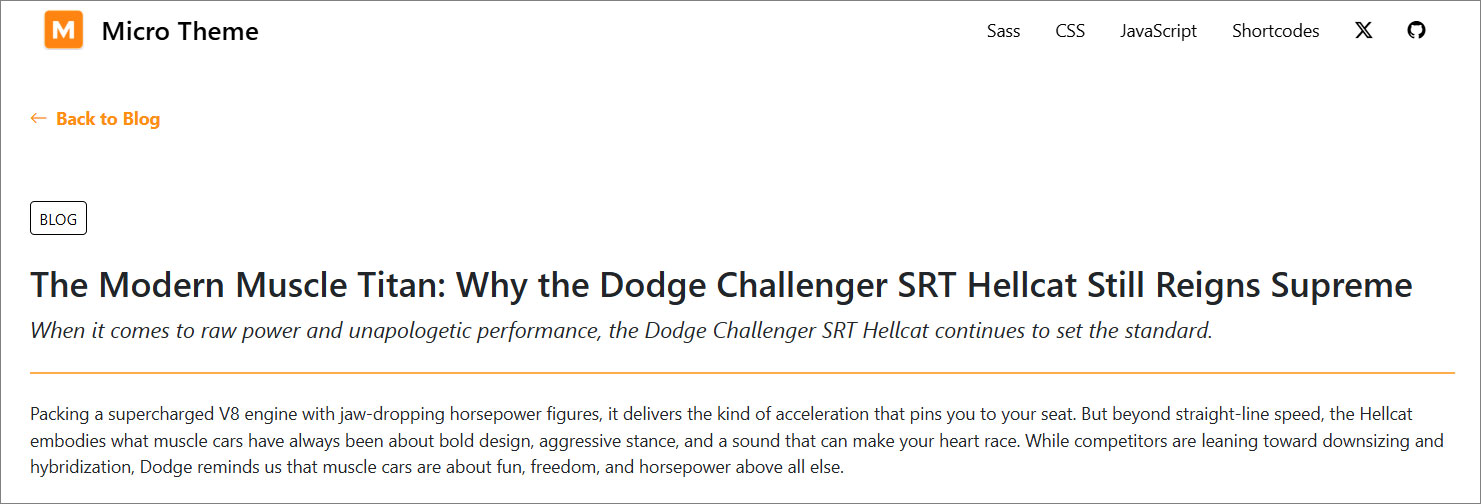
<a href="/blog/"><strong><span class="bi bi-arrow-left pe-2"></span>Back to Blog</strong></a>
</div>
<article>
[entry]
<h1 class="h2 mt-4">{{event_title}}</h1>
<p class="mt-1"><em>{{post_intro}}</em></p>
<hr class="border-top border-primary border-2 opacity-75">
<div class="mt-4">
{{post_content}}
</div>
[/entry]
</article>
</div>Click Publish.
Navigate to
www > blogand create a new page calleddetail.stml. Select a template (optional).Insert your blog detail file into the page you just created.
Click Publish.
Map your Module to your page:
- In your Module, click Modify
- Under Websites Properties
- On Detail Page Template, select the .stml file for your detail page
- Under Detail Folder Location, select the folder where your detail file is located
- Click Submit
Important!
If you already have entries added to your module, you will need to resave them to generate the path. To do this, go to Modify, scroll to Advanced, check the Resave All Entries option, and then click Submit
- Go to your website, refresh the blog page, and click on an entry
#
Support
Support for Blog Module is handled directly through Solodev's global help desk. For more information regarding support queries, go to www.solodev.com.
Note:
To learn more about shortcodes and how they work, visit our shortcodes documentation.
See also
Modules are versatile components designed to enhance and extend the core functionality of your website. They serve as building blocks that allow
Solodev is an enterprise content management system (CMS) and customer experience platform that empowers individuals and teams to collaborate on their