#
Components
Before you can build your website you first need to deconstruct your designs into common elements that can then be turned into theme templates. This process involves identifying common areas of the site that will be present across all pages of a website as well as design elements which are unique to specific pages. In identifying these components, you will be able to clearly structure your theme.
In Solodev, there are three kinds of templates:
Base Template: The base template is the most important template in that it contains the essential resources that will be included in every web page on your website. A base template typically consists of a header and footer, references to asset files, and dynamic divs to place content. Note that any changes you make the base template will reflect your entire website.
Interior Template: The interior template is typically placed in the base template and serves as the interior of a "Section" of your website. The benefit in a content template is it can be re-used for sections of your website that require multiple pages, allowing you to re-use your content template to build out your web pages.
Sectional Template: A sectional template is a high level overview page with links to different sections of your website. Sectional templates can be used "at will" and there are 1,000s of iterations of what a sectional template should look like. For example, recent blog posts, recent news and testimonials sections on a homepage are sectional templates.
You can find more detailed information about the templates over here:
#
Create a base template
The base template is the most important template in that it contains the essential resources that will be included in every web page on your website. A base template typically consists of a header and footer, references to asset files, and dynamic divs to place content. Note that any changes you make the base template will reflect your entire website. In this article we will show you how to build a base template and demonstrate its value in a real world situation.
Note:
Your base template contains your core includes (CSS, JavaScript, Fonts, Images), a header and footer, and dynamic divs (drop zones) in between to insert HTML content.
#
Step 1 - Create a Base Template file
Open the templates folder and on the right side, click on Add File. Name the file "baseTemplate.tpl" and click Publish.
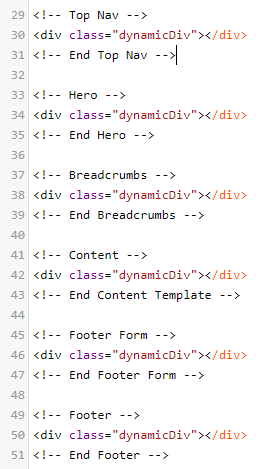
Below is the code of a sample base template. It includes the code for Google Analytics (Google Analytics code need to be on every page), a dynamicDiv class for the top navigation, hero, breadcrumbs, content, footer contact form and footer.
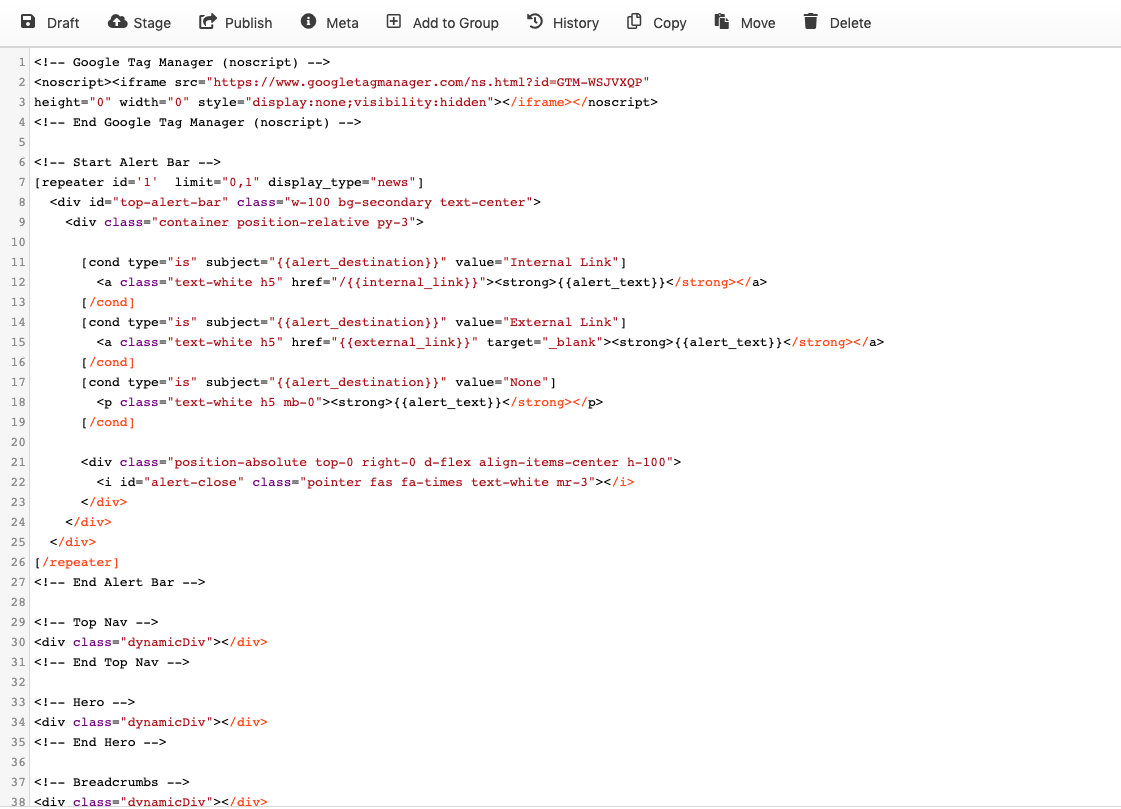
We'll talk in detail about the Dynamic Divs in the next article. In Solodev, Dynamic Divs make laying out web pages easy and completely customizable while removing the need to duplicate HTML. Dynamic Divs allow you to use HTML markup to create drop zones where you can insert content onto a web page.
#
Step 2 - Create a Page using baseTemplate.tpl
We created a base template and added code in it but in order to get it to display on the website, we actually need to create a page to put the template in. As an example, let's create a homepage. Since the homepage is the first and the default page when the website is opened, we will create an index.stml right inside the www folder. The homepage shouldn't be inside any subfolders.
Go to the www directory and on the right-side menu, click on Add Page.
#
Step 2.1 - Name your page index.stml and put the title as "Index Page".
If you'd like to, you can add a description of the page. Click Publish.
#
Step 2.2 - Select the index.html page
On the tree, select the index.stml page you created, select the drop zone until it is blue as shown below.
#
Step 2.3 - Insert the baseTemplate.tpl in the page
Find and click on the baseTemplate.tpl file from the left tree and it will be placed on the page.
#
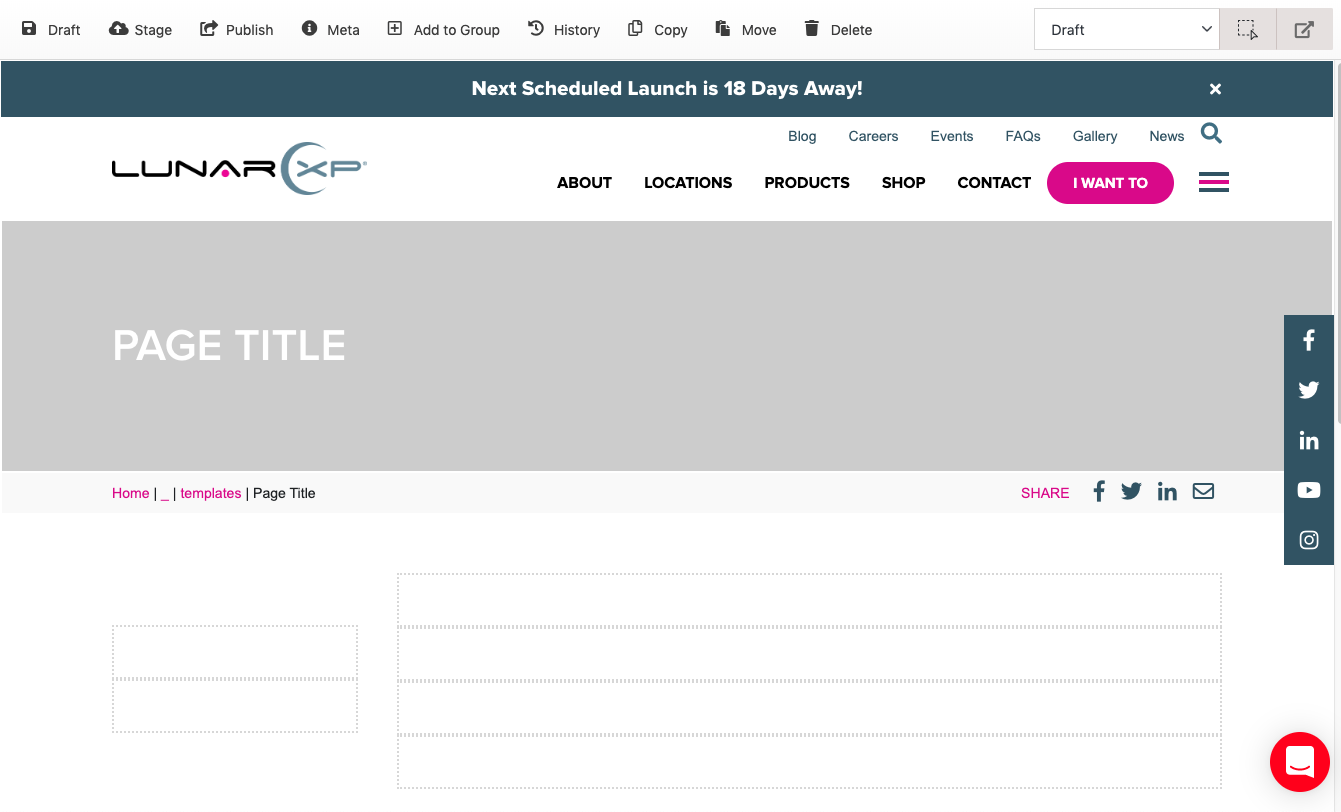
Step 2.4 - Click Publish and you can begin adding content
Note:
The page we just created will be used on every page of the site as a template. Now let's insert some HTML content in the drop zones and publish our first page using our base template.
#
Step 3 - Select the first dynamic div and select home-ships.tpl from the left tree
Note:
Although this was a simple example of creating a base template and then using it to create a page, it is important to understand the advantages of using a base template. First and foremost, it speeds up development time and negates the need for duplicate HTML. This allows you to rapidly build web pages without having to hardcode the same HTML over and over again.
#
Create an interior template
The interior template is typically placed in the base template and serves as the interior of a "Section" of your website. The benefit in a content template is it can be re-used for sections of your website that require multiple pages, allowing you to re-use your content template to build out your web pages. In this article we will show you how to create a content template that we will re-use to create pages for difference services.
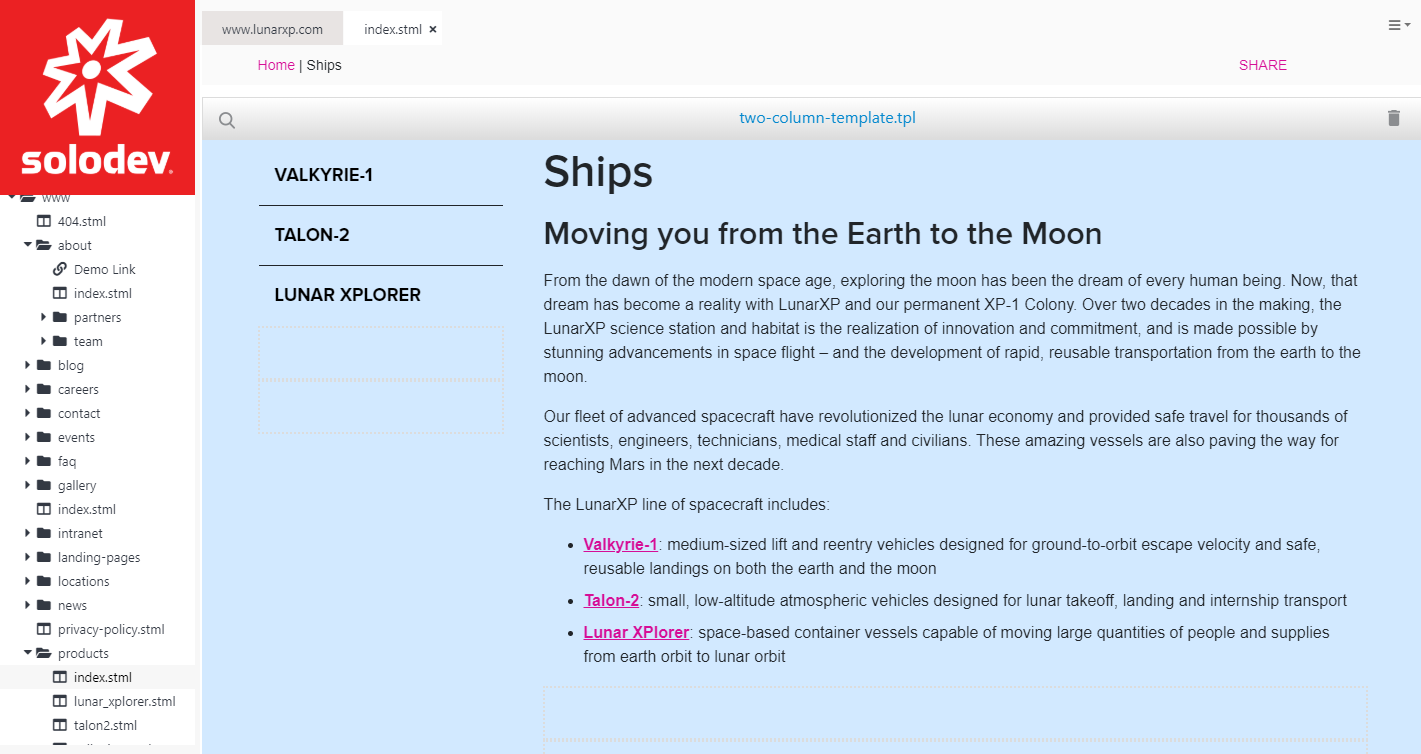
Below is a screenshot of a two-column template in Solodev:
Note:
In the screenshot above the base template is still in place and there are other templates added as well such as breadcrumbs. The interior and sectional templates are added inside the base template.
The two-column template we have has a left navigation and a content area on the right. It can be used for any page that has multiple links and descriptions.
Here's the code for the two-column template:
<section class="container py-5" id="maincontent">
  <div class="row">
    <div class="col-md-8 col-lg-9 order-md-1">
      <div class="dynamicDiv"></div>
      <div class="dynamicDiv"></div>
      <div class="dynamicDiv"></div>
      <div class="dynamicDiv"></div>
    </div>

    <aside class="col-md-4 col-lg-3 order-md-0 mt-3 mt-md-0 pr-4">
      <div class="dynamicDiv"></div>
      <div class="dynamicDiv"></div>
      <div class="dynamicDiv"></div>
    </aside>
  </div>
</section>
Note:
We're using Bootstrap for the website so the template above also contains Bootstrap elements.
Other interior template examples we have are the one-column template, full-width template and so on.
#
How to Create an Interior Template?
An interior template is created the same way the base template is created. Even though it is not necessary, you can create a folder and organize the different kinds of templates over there. In our example, we created a folder titled content and put the interior templates inside that folder.
#
Step 1 - Create the folder for the template
Go to the web files folder on the tree. Inside the web files folder, go to the templates folder. Click "Add a folder" button. Give a name to your folder and hit Submit.
#
Step 2 - Create the file for the template
Go to the folder you created and on the right side menu, click on "Add a file", name the file as you wish i.e. two-column-template.tpl. Hit the submit button. Click on the file and add your code. When you're done, click on "Publish".
#
Step 3 - Add a Page
Go to the www directory and on the right-side menu, click on Add Page.
#
Step 3.1 - Name your page and publish it
If you'd like to, you can add a description of the page. Click Publish.
#
Step 3.2 - Select the index.stml page
On the tree, select the index.stml page you created, select the drop zone until it is blue as shown below.
#
Step 2.3 - Insert the interior template in the page
Find and click on the template file from the left tree and it will be placed on the page.
#
Create a sectional template
A sectional template is a high level overview page with links to different sections of your website. Sectional templates can be used "at will" and there are 1,000s of iterations of what a sectional template should look like. For example, recent blog posts, recent news and testimonials sections on a homepage are sectional templates.
Below is a screenshot of a sectional template in Solodev:

Note:
As you can see, sectional templates contain a lot of content, most of which direct you to other sections of the website such as the Recent Events, Blog, Photo Gallery sections. Everything on this page lives somewhere else on the website and the sectional template is the page that users will likely use as a starting point to decide where to go next.
#
Creating a Sectional Template
In order to add a Sectional Template, we first need to add a page then insert the template into the page.
#
Step 1 - Add a Page
Go to the www folder. On the side menu, click on "Add Page"
#
Step 2 - Name the page and click Save
#
Step 3 - Add the base template to your drop zone. Click Publish
Go to the www folder and select the sectional template stml file you created. Then go to the web files folder and under the templates folder, find the basetemplate.tpl. Inside the sectional template file click and select the drop zone until it is blue then click on the basetemplate.tpl to insert it in the sectional template page.
#
Step 4 - Add the top level templates
Since components such as the navigation, hero section etc. will be at the top of the page, begin by adding them first:
#
Step 5 - Add the sectional content templates
In the screenshot above, we have sectional templates such as recent blog posts, recent news and the testimonials section. Let's see how we can select and them to the sectional page.
Here is the list of the sectional template files we'd like to add by order:
Recent news
Blog
About boxes (Meet Out Team, Latest Events, Photo Gallery)
With the sectional stml page open, we go to the web files folder then select the template files and click on the blue zones inside the sectional page to place them inside the page respectively.
#
Step 6 - Add the remaining templates
These templates will come after the sectional templates towards the bottom of the page such as a contact form at the end, the footer etc.