#
How to add a page to a website
Once you have set up a new website in your Solodev CMS, you can begin creating pages to build out your experience. In this tutorial, you will learn how to add a page to your site.
#
Prerequisites
- You will need to complete the How to add a website tutorial.
- As you are building with this tutorial, you can refer to the Solodev SpaceJet website to compare your progress.
#
How to add a page to a website
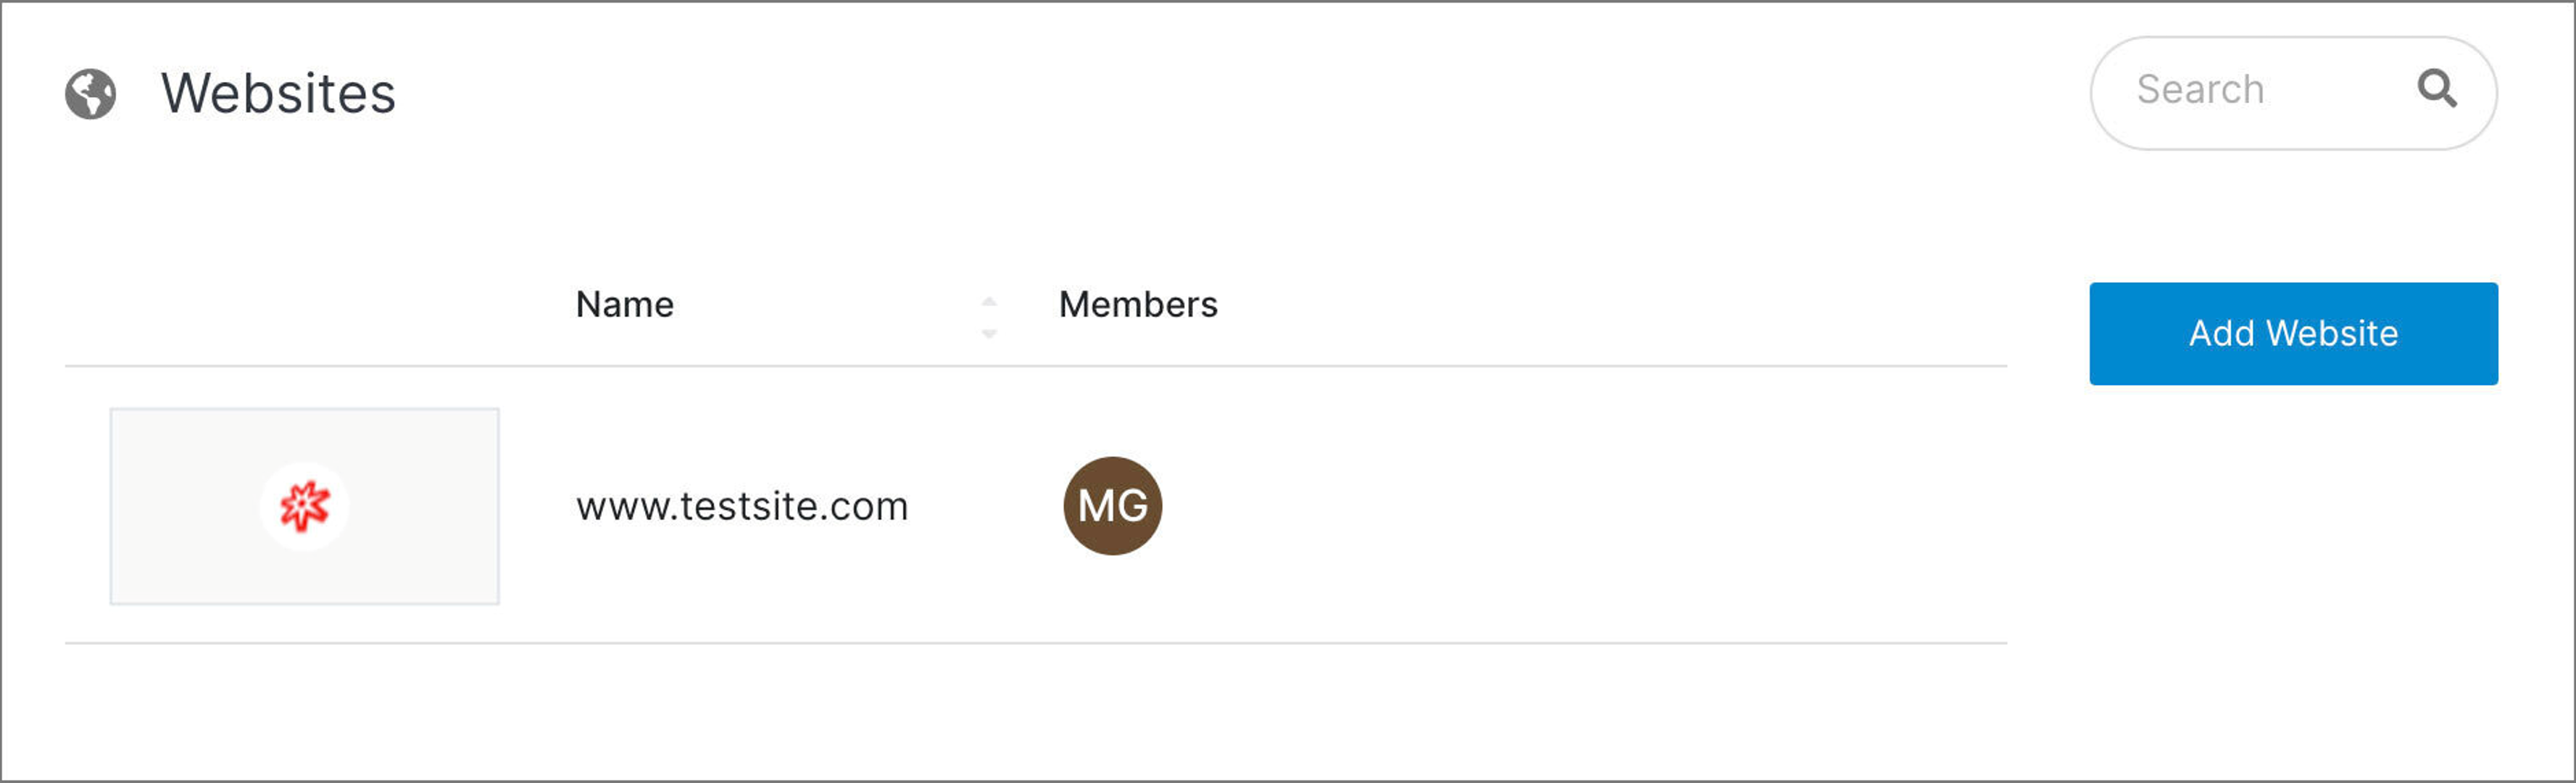
Step 1: From your main dashboard, click Websites.
Step 2: On the Websites dashboard, select the site where you want to add a page.
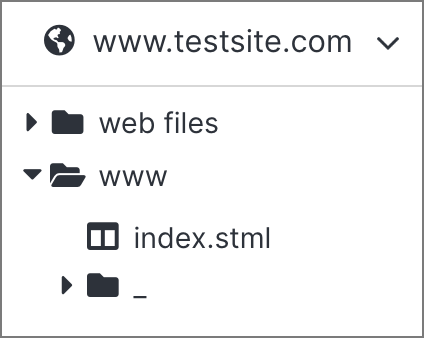
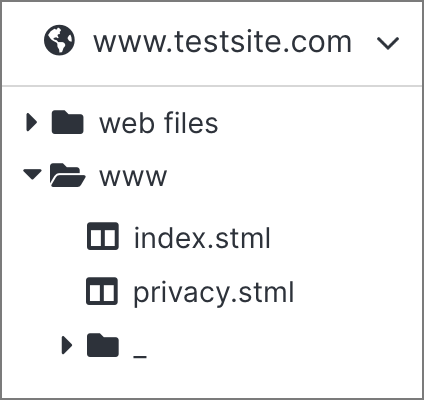
Step 3: From the left-hand menu, click on the www folder. It should contain your index.stml and the “_” folder your created in the previous tutorial.
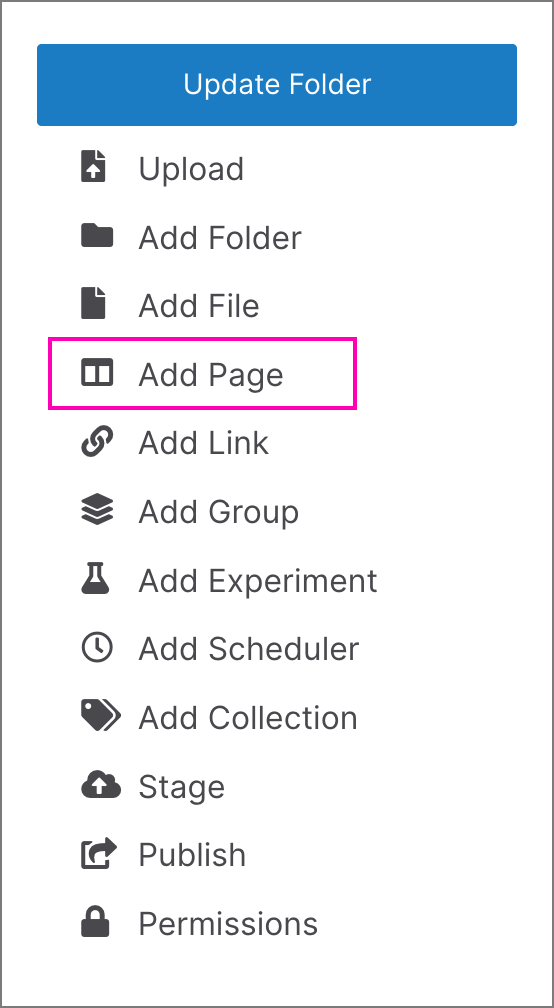
Step 4: From the right-hand menu, click Add Page.
Step 5: In the Add Page window at the right, provide a Name for your page. In this example, we are adding a Privacy page from the SpaceJet theme that will feature the site’s privacy statement and disclaimer details.
Note:
Page names should be in all lower-cased letters and numerals, and multiple words should be separated by a hyphen (for example: my-page.stml). Also, remember you can leave .stml out and the system will add it for you, so it is not required
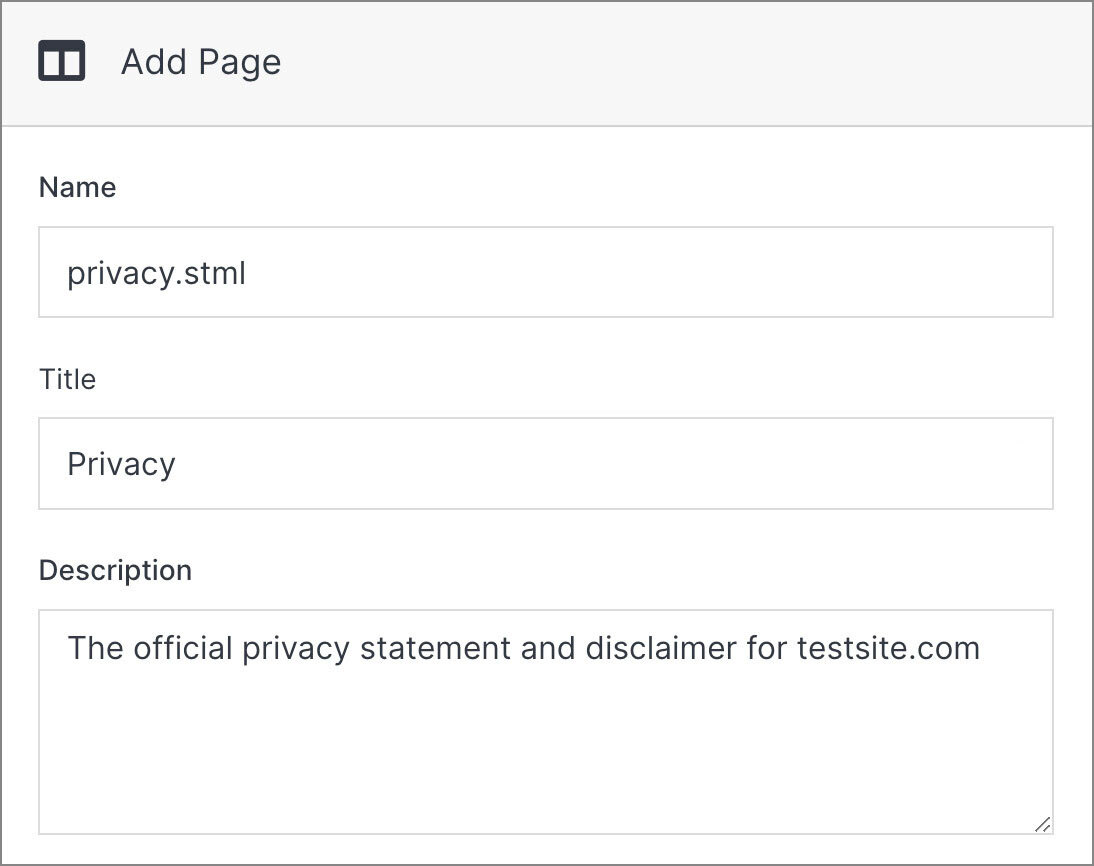
Step 6: Next, add a Title, which will appear in your page meta, as well as a Description to improve the searchability of your page in the file system. Both are optional, but highly recommended.
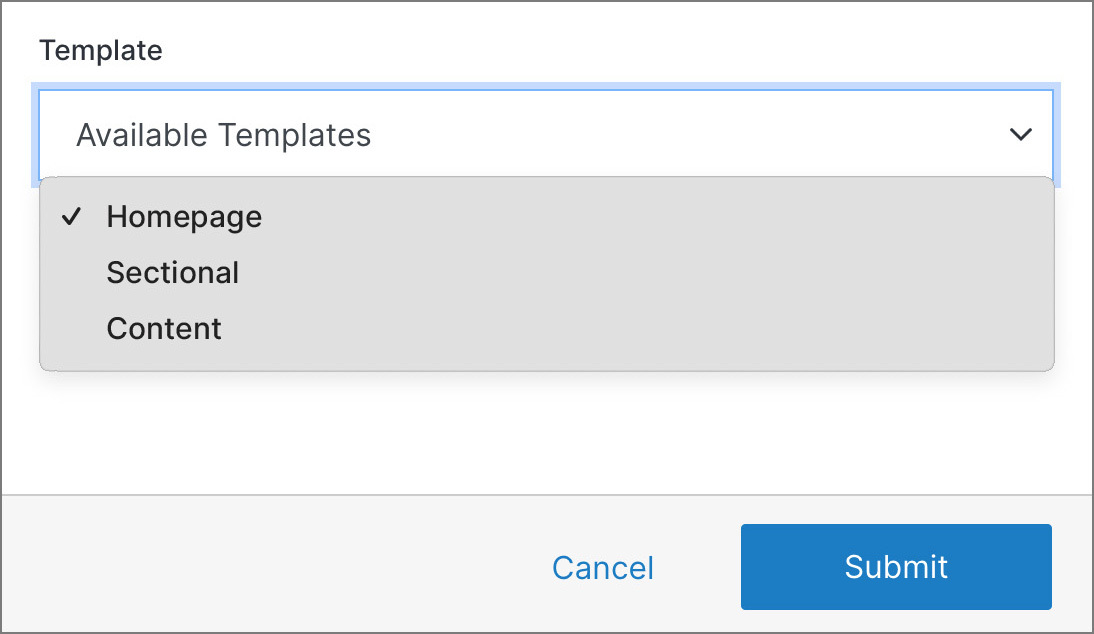
Step 7: At the bottom of the Add Page window, select an available Template for your page from the dropdown menu.
Note:
To add reusable page templates to your website, read the How to create a page template tutorial.
Step 8: Once complete, click Submit.
Congratulations! You have just added your first page to your website. From your site’s dashboard, you should now see the page appear under the www folder.
#
Next steps
- In the following tutorial, you will learn how to create a page template that can be reused on new pages across your website.
- If you are ready to add more advanced styling to your pages, you can read how to add SCSS to your website .