#
How to Add a Website
The most basic yet important function in Solodev is adding a website to your CMS. In this article, you will learn how to create a fresh site from scratch, add the essential files and folders, and prepare your site for building pages.
Note:
Solodev is a native multi-site platform, allowing you to run multiple websites and apps with one license and manage it all from a single login. Each site is self-contained, but resources like files and images can be shared across sites.
#
Prerequisites
- You will need a valid Fully Qualified Domain Name such as www.testsite.com for your new site. If you do not currently own a FQDN, you can purchase one through a domain registrar such as GoDaddy.com.
- Once you have a FQDN, you need to point your domain’s DNS records to the server where your Solodev CMS is hosted on AWS. Visit your registrar’s website for instructions. To locate your server’s IP address in AWS, review the Quickstart for CMS for EKS, CMS Enterprise, CMS Professional, or CMS Micro.
- Before getting started on any new website, it is highly recommended that you have an approved design prototype and sitemap to guide your development.
#
Adding a site
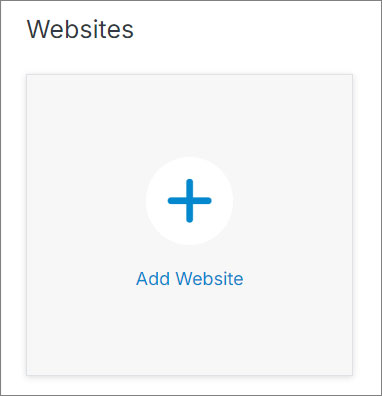
- Log into your Solodev CMS. On the main dashboard, click "Add Website".
Note:
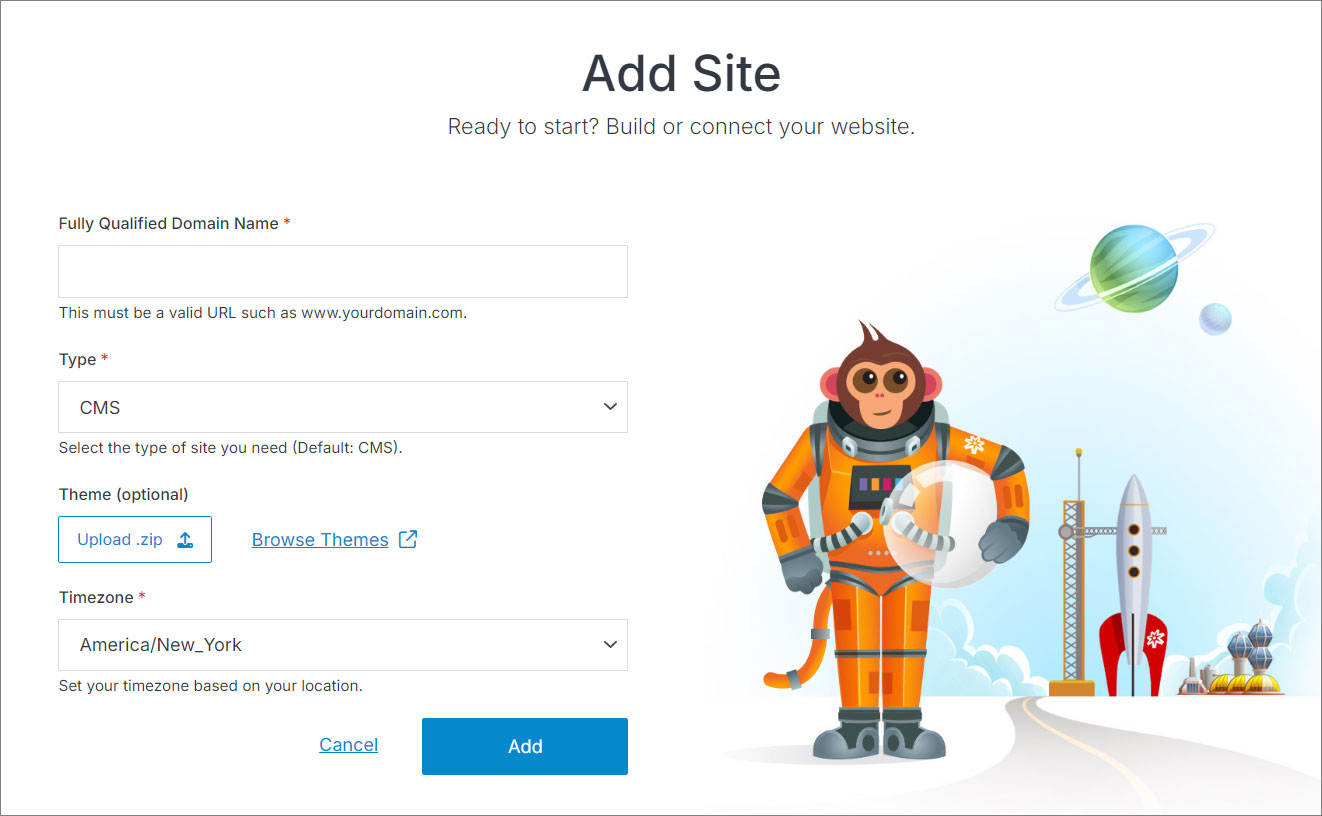
When adding a new site, you also have the option to upload a ready-made theme package, complete with all the necessary templates, folders, and files.
- In the form fields, enter your Fully Qualified Domain Name (e.g., www.testsite.com), select the type of website, upload a theme, and choose your timezone. Click Add.
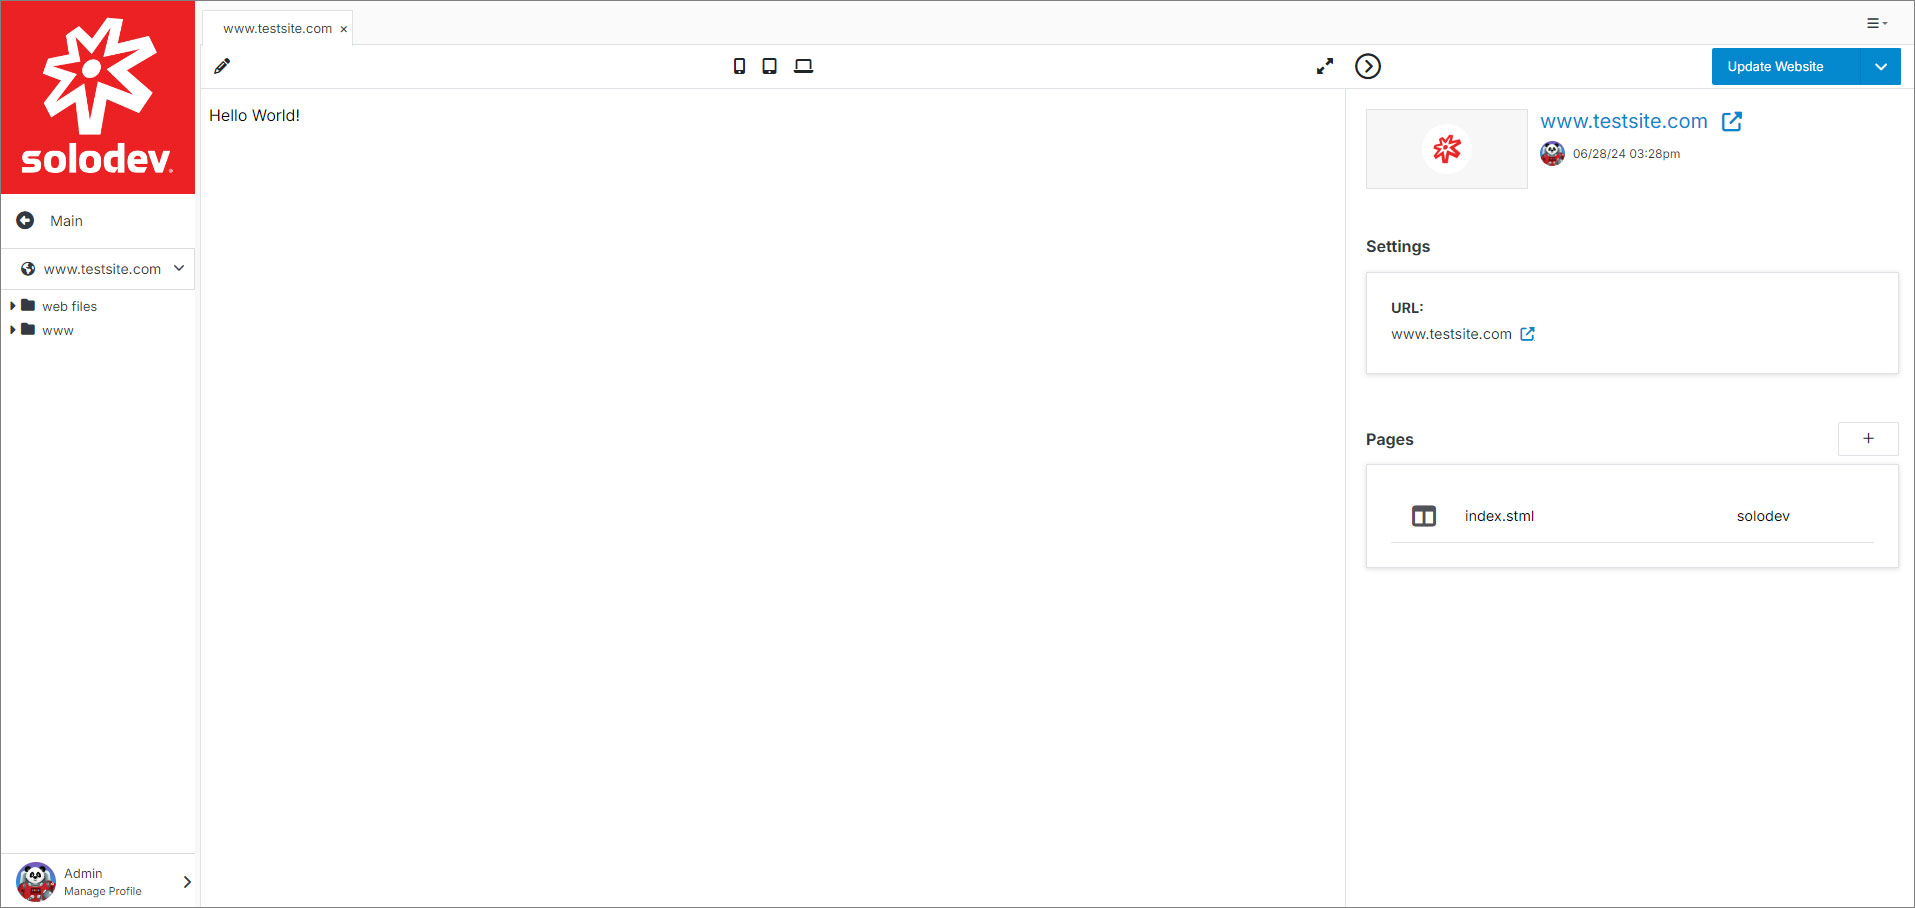
Once your website is created, you will be automatically directed to the Websites dashboard in your CMS, where your new site will appear at the top of the table.