#
Add Module
A module can be added to any website in Solodev. In this article, you will learn how to install a module, how to add both a repeater and detail template, and how to map a detail page to your module.
#
Prerequisites
- You will need to add a website to your Solodev CMS.
- You will need to add a page.
- You will need to be familiar with using shortcodes.
#
Install Module
Step 1. Click Modules located under the Workspace section of the Solodev Dashboard and click the Add Module in the top right corner.
Step 2. Fill out the Add Module form.
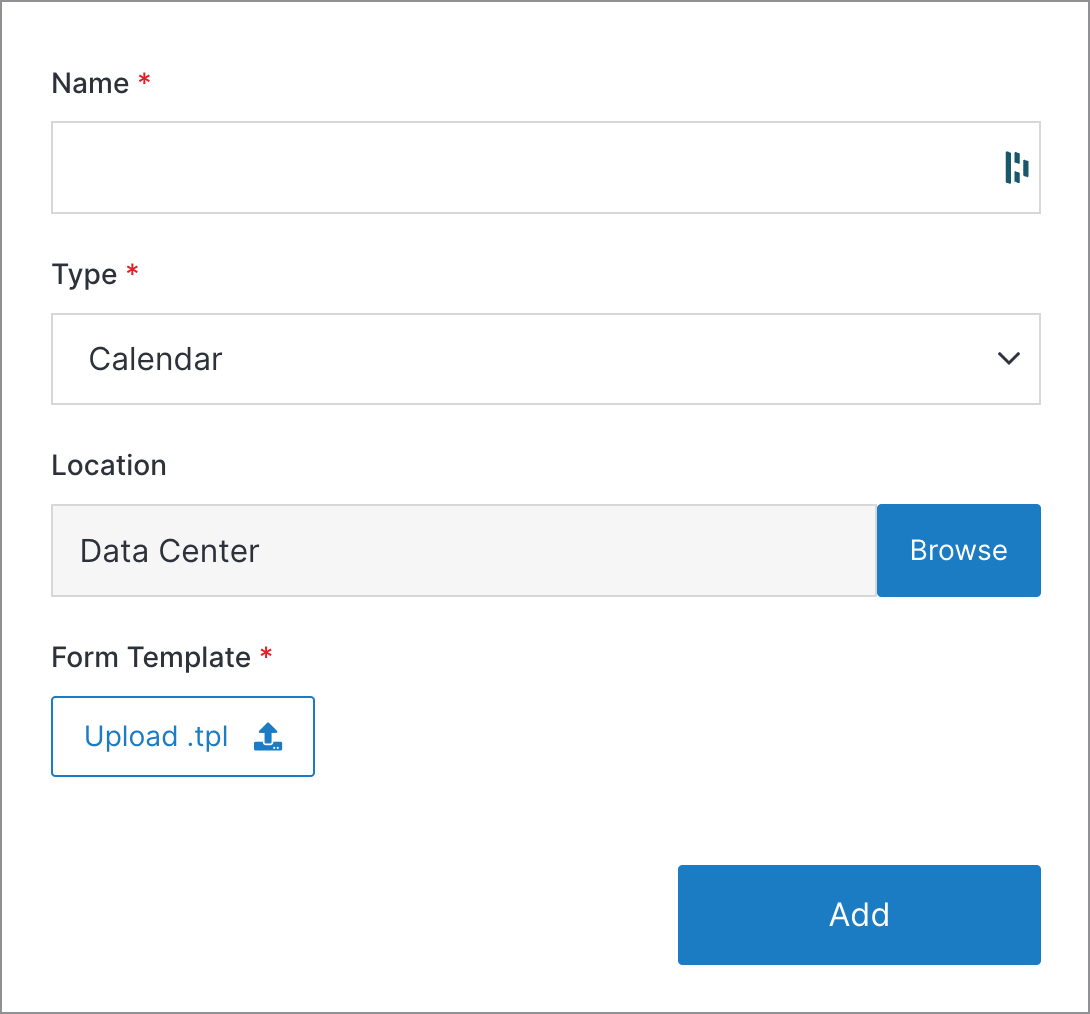
Note:
Solodev recommends installing modules into the web files -> managers folder. Below is a sample code for a basic blog module.
<div class="mb-3">
  <label class="control-label mt-2" for="post_author">Blog Author</label>
  <p class="card-subtitle">(Optional) The author of the blog.</p>
  <input type="text" class="form-control" name="post_author" id="post_author">
</div>
<div class="row mb-3">
  <div class="col-md-6">
    <label class="control-label" for="post_image">Listing Image</label>
    <p class="card-subtitle mt-0">(Required) The image that appears in the post and normal blogroll feed. Dimensions: 951px by 561px.</p>
    <input type="file" class="file_upload" name="post_image" id="post_image">
  </div>
  <div class="col-md-6">
    <label class="control-label" for="post_image_alt">Listing Image Alt Tag</label>
    <p class="card-subtitle mt-0">(Optional) The image's alt tag used for ADA compliance.</p>
    <input type="text" class="form-control" name="post_image_alt" id="post_image_alt">
  </div>
</div>
<div class="mb-3">
  <label class="control-label" for="post_content">Content</label>
  <p class="card-subtitle">(Required) The main content section for an article.</p>
  <textarea class="wysiwyg form-control" name="post_content" id="post_content"></textarea>
</div>
#
Repeater Template
The repeater template, although optional, displays all entries in the module used. The repeater is written in Solodev shortcodes and refers to the user interface template, printing fields in the form of PHP variables through an $item array.
Step 1. Add a file for the module repeater.
Step 2. Link the repeater to the page you would like your module to be.
Provided below is a sample of a blog repeater code. For more information on shortcodes, please click here.
<div class="my-5">
  <div class="container">
    <div class="text-center">
      <h2 class="display-5 fw-bolder"><strong>Blog</strong></h2>
      <p>Learn what's happening on the final frontier</p>
    </div>
    <div class="row row-cols-1 row-cols-md-2 row-cols-lg-3 g-5 mt-4">
      [repeater id='' display_type="news"]
        <div class="col mt-4">
          <div class="card rounded-5 shadow">
            [is_set value=]
              <img alt="" src="[get_asset_file_url id='']" class="img-fluid rounded-top-5">
            [/is_set]
            [is_empty value=]
              <img alt="" src="[get_asset_file_url id='']" class="img-fluid rounded-top-5">
            [/is_empty]
            <div class="card-body p-4">
              <p class="pt-1">[print_date format="F d, Y" timestamp=""]</p>
              <h3 class="mt-3 fw-bolder"><strong></strong></h3>
              <a href="" class="btn fs-6 btn-danger text-white my-3"><strong>Learn More</strong></a>
            </div>
          </div>
        </div>
      [/repeater]
    </div>
  </div>
</div>
Note:
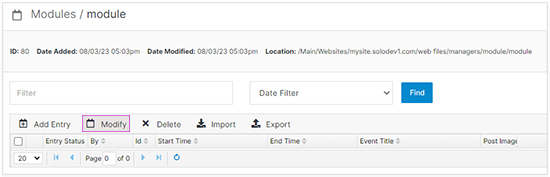
The repeater id is the id of the module located on the module table view.
#
Detail Template
The detail template shows the specifics of an individual entry from a repeater template. An example would be clicking on an individual blog entry from a list of entries to see the entire blog post. The detail page is a subpage of its parent page on the repeater template.
Step 1. Add a file for the module detail.
Step 2. Link the detail to the page you would like your module to be.
Provided below is a sample of a detail code. For more information on shortcodes, please click here.
[entry]
  <h1><strong></strong></h1>

  <div class="d-flex align-items-center justify-content-between">
    <p class="mb-0 mt-3">
      <span class="text-primary"><strong>[is_set value=]By David Smith[/is_set]</strong> [is_set value=]</span>
      <span class="ps-2">[/is_set][print_date format="F d, Y" timestamp=""][is_set value=]</span>[/is_set]
    </p>
    <ul class="list-unstyled d-flex justify-content-end mb-0">
      <li><a href="" class="text-dark text-decoration-none"><span class="fa-fw fa-brands me-2 fa-twitter"></span><span class="sr-only">Twitter</span></a></li>
      <li><a href="" class="text-dark text-decoration-none"><span class="fa-fw fa-brands me-2 fa-facebook-f"></span><span class="sr-only">Facebook</span></a></li>
      <li><a href="" class="text-dark text-decoration-none"><span class="fa-fw fa-brands me-2 fa-linkedin-in"></span><span class="sr-only">Linkedin</span></a></li>
      <li><a href="" class="text-dark text-decoration-none"><span class="fa-fw fa-regular fa-envelope"></span><span class="sr-only">Email</span></a></li>
    </ul>
  </div>

  <div class="mt-3">

    [is_set value=]
      <img alt="" src="[get_asset_file_url id='']" class="w-100 my-4">
    [/is_set]
    [is_empty value=]
      <img alt="" src="[get_asset_file_url id='']" class="w-100 my-4">
    [/is_empty]


  </div>
[/entry]
#
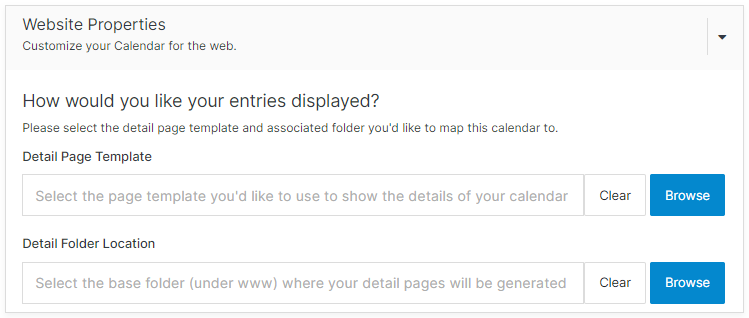
Mapping the detail page to the module
Step 1. Go to the module and click modify.
Step 2. On the Website Properties accordion, under Detail Page Template, click Browse, select the detail page you want the entries to show on.
Step 3. On Detail Folder Location, from the tree select the folder your detail page is on and click Submit.