#
How to add a form to a page
In Solodev, you can add a form to a web page to collect information for almost any kind of application. This includes contact forms, order forms, newsletter subscriptions, product registrations, and more. In this tutorial, you will learn the different ways to create a form using Solodev and how to add it to your web page.
#
Prerequisites
- You will need to add a website to your Solodev CMS.
- After selecting a website, you will need to add a page for your form.
- You will need to be familiar with using shortcodes.
#
Form options
From the main dashboard, there are three ways to add a form to Solodev:
Form Studio: Solodev’s drag-and-drop Form Studio lets you build your own custom forms with granular control – without touching a line of code. Instantly add text, images, input fields, radio buttons, and more. Save your form and apply it to your page in minutes.
Upload Template: If you already have an existing template for your form, you can upload it directly as a .tpl file into Solodev and apply it to your page.
Upload HTML: If you prefer working in raw HTML, you can code your own form and upload to Solodev.
#
Building a form with Form Studio
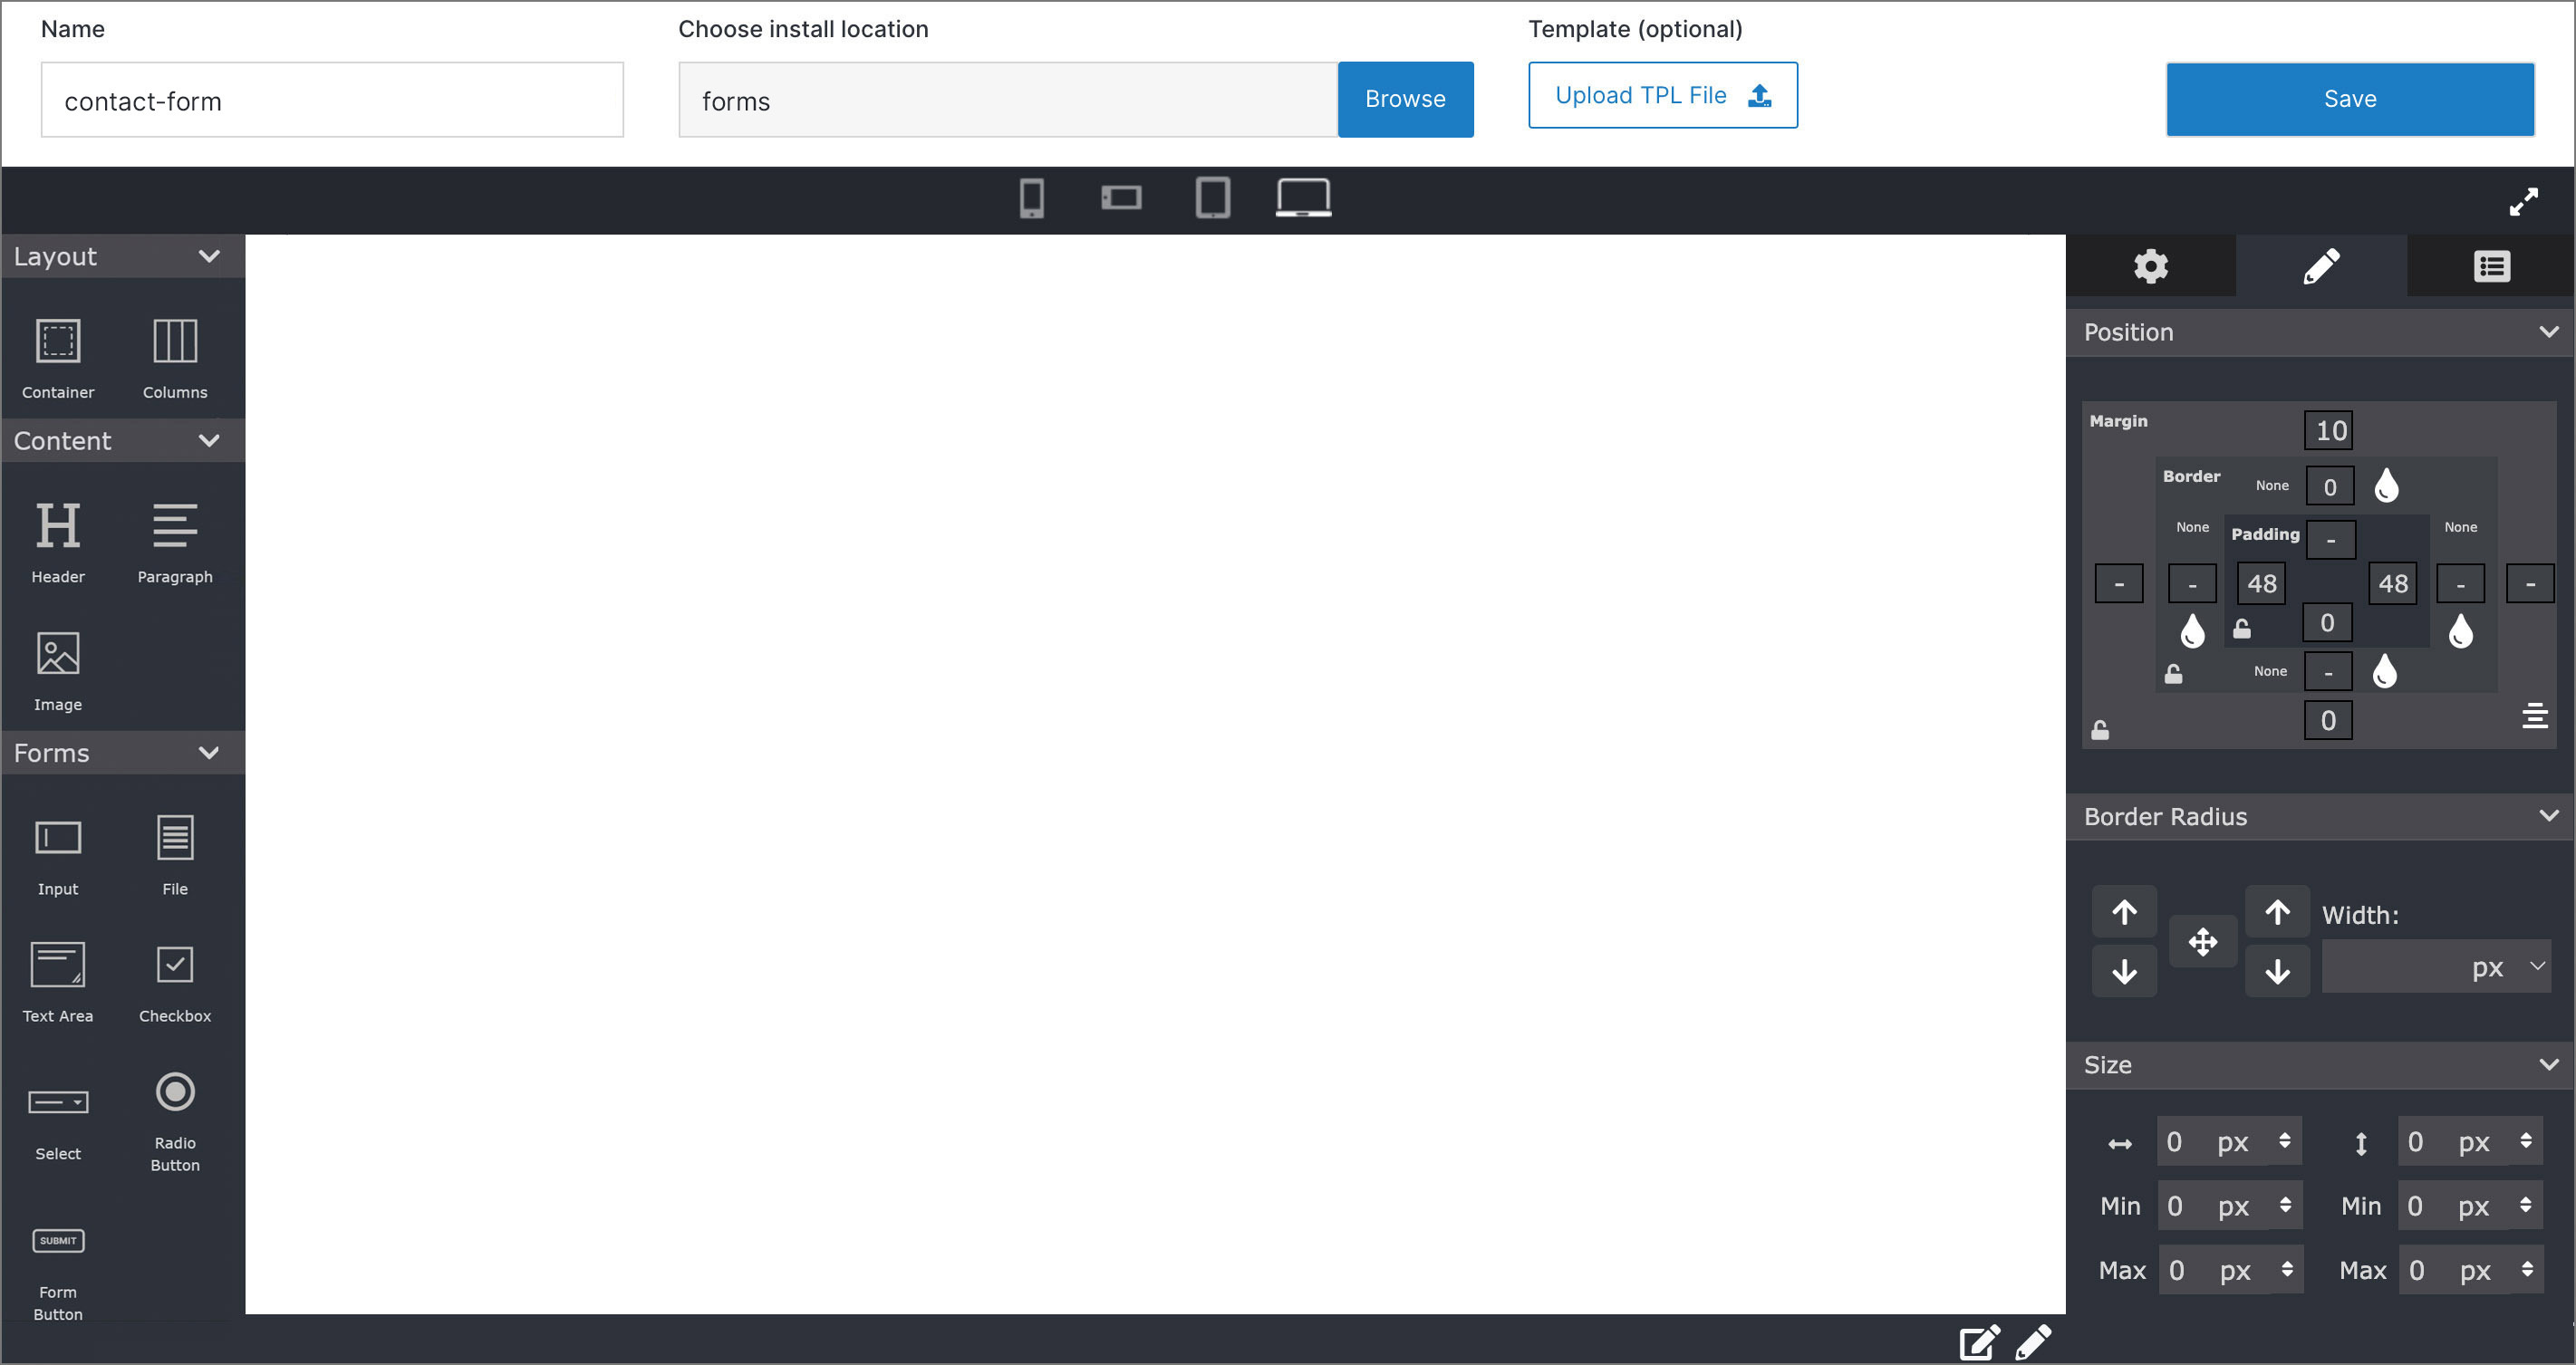
Form Studio is a built-in drag-and-drop WYSIWYG editor that allows you to directly compose your own custom form. The visual editor consists of a left toolbar for dragging layout, content, and form components onto the canvas in the center. See table below for details.
The right toolbar enables you to control the text, styling, and specific details of the components in your form. Under the Settings icon, you can adjust your form header, links, and other details.
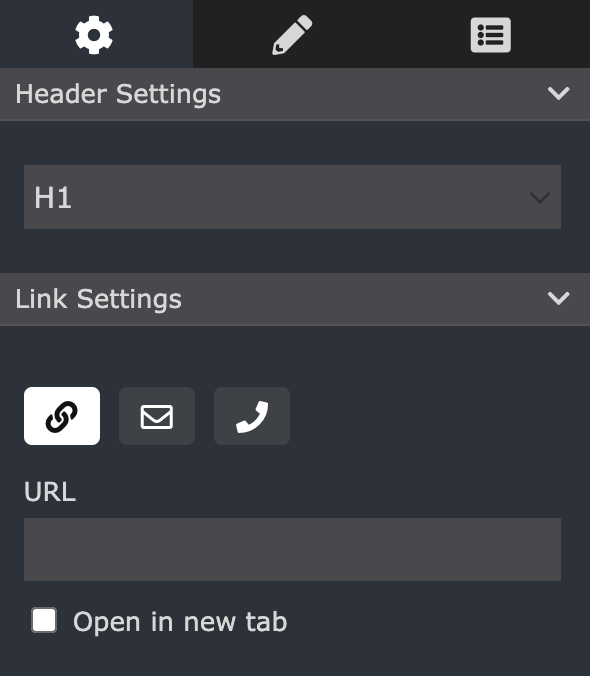
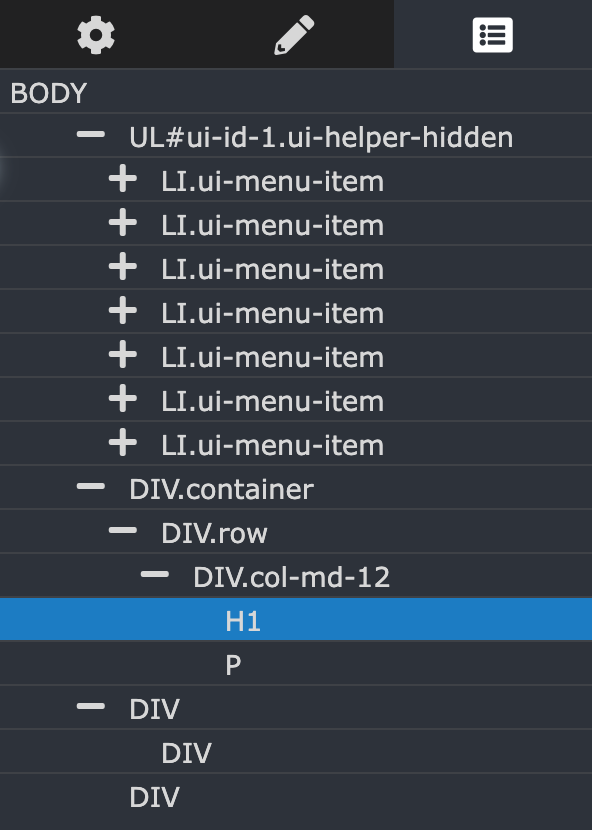
Using the Pencil icon, you can customize attributes such as layout, position, border radius, size, typography, and background components by entering values or clicking/dragging arrows. The right toolbar also provides Body attributes that detail the components in each div.
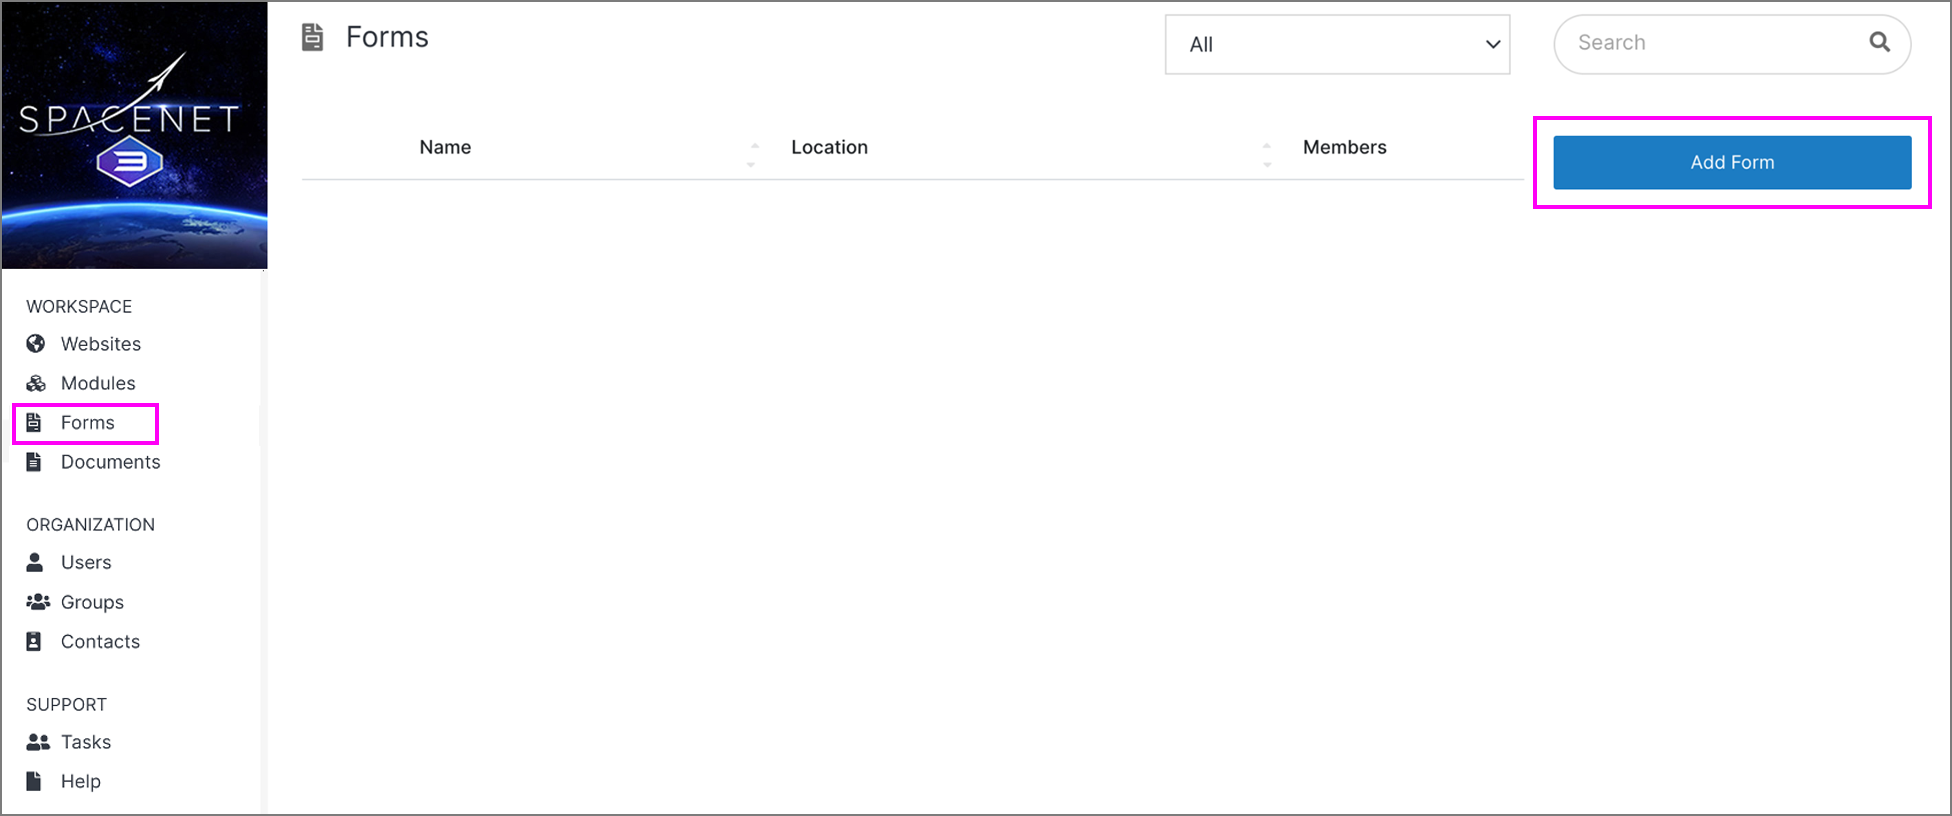
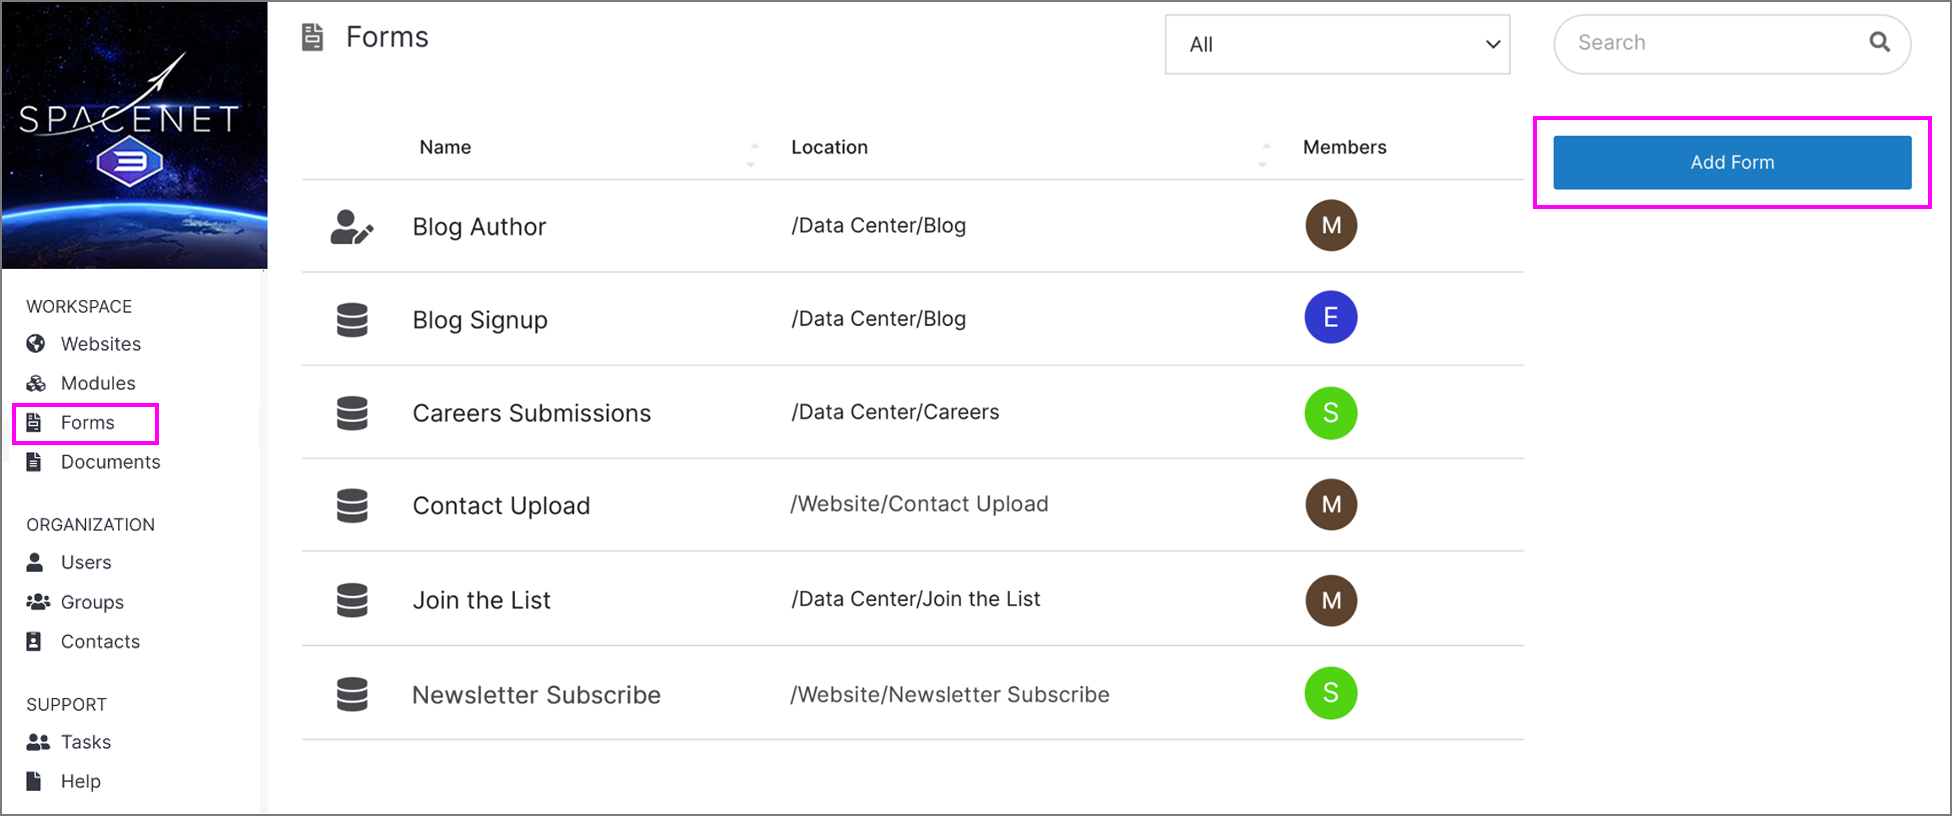
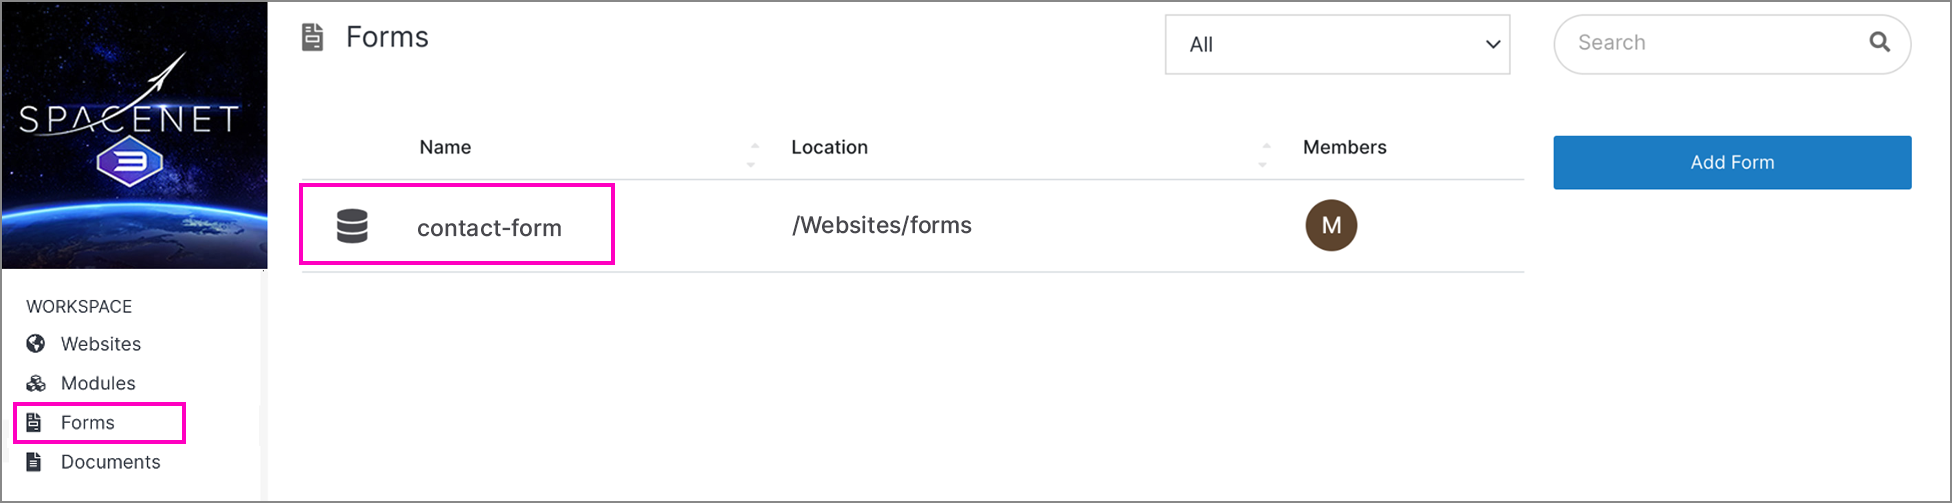
Step 1: From your main CMS dashboard, click Forms in the left-hand menu.
Step 2: On the main forms dashboard, click Add Form.
Step 3: First, provide a name to your form in the Name field. For this example, call it contact-form.
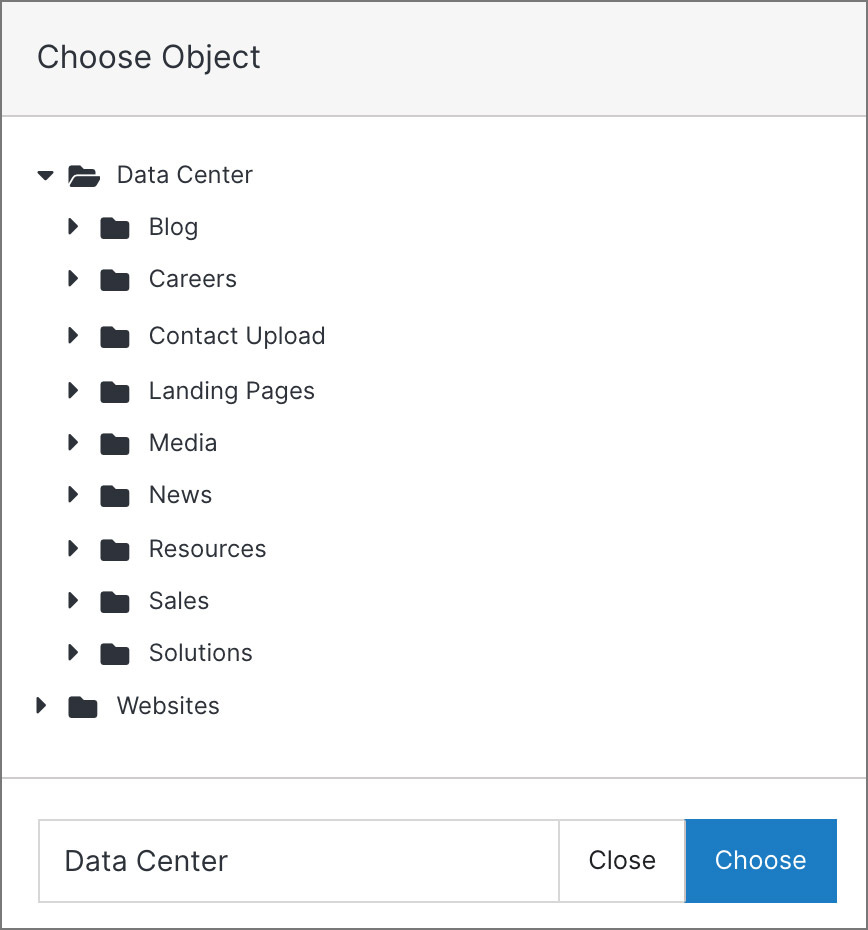
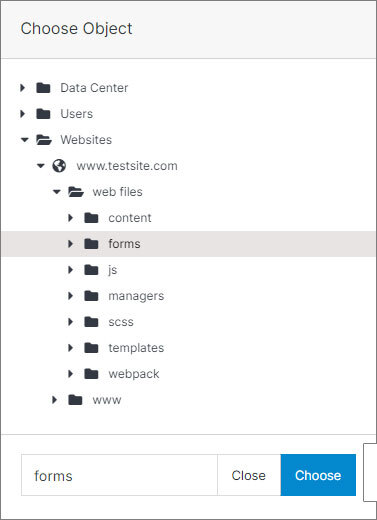
Step 4: Pick an install location in Solodev by clicking Browse. Select an object and click Choose.
Note:
It is recommended that you save your form in the forms folder under web files, so you have easy access to the form data table.
Step 5: Use the drag-and-drop Form Studio tools to build your form. As with previous lessons, you can use the SpaceJet theme sample as a guide for creating the fields as shown:
#
Layout
#
Content
#
Forms
Step 4: Click and hold the form element, then drag it to the desired location on the form canvas.
Step 5: Adjust the element's position and spacing if needed by dragging it to a new location or aligning it with other elements.
Step 6: Customize the element properties, such as label text, input type, and validation rules, using the properties panel on the right.
Step 7: Save your changes by clicking the Save button to store the template.
#
How to upload a form template (.tpl)
If you have a pre-built form template available – perhaps from a previous website project – you also have the option to upload it directly to Solodev and add it to a page.
Note:
To use the upload template option, your form file must be in a .tpl file format.
Step 1: From your main CMS dashboard, click Forms in the left-hand menu.
Step 2: On the main forms dashboard, click Add Form.
Step 3: In the header at the top of the Form Builder screen, provide a name to your form in the Name field.
Step 4: To the right of the Name field, locate where it says Template (Optional). Click the button that reads Upload TPL file.

Step 5: Pick an install location in Solodev by clicking Browse. Then, select a specific destination (labeled object) and click Choose to select the folder.
Step 6: Once complete, click Save.
#
How to add a form using HTML
In Solodev, you also have the option of adding your own custom form code using HTML.
Step 1: From your main CMS dashboard, click Forms in the left-hand menu.
Step 2: On the main forms dashboard, click Add Form.
Step 3: In the Form Studio dashboard, locate and click the Code button in the lower right corner.

Step 4: Add your HTML code to the code editor.
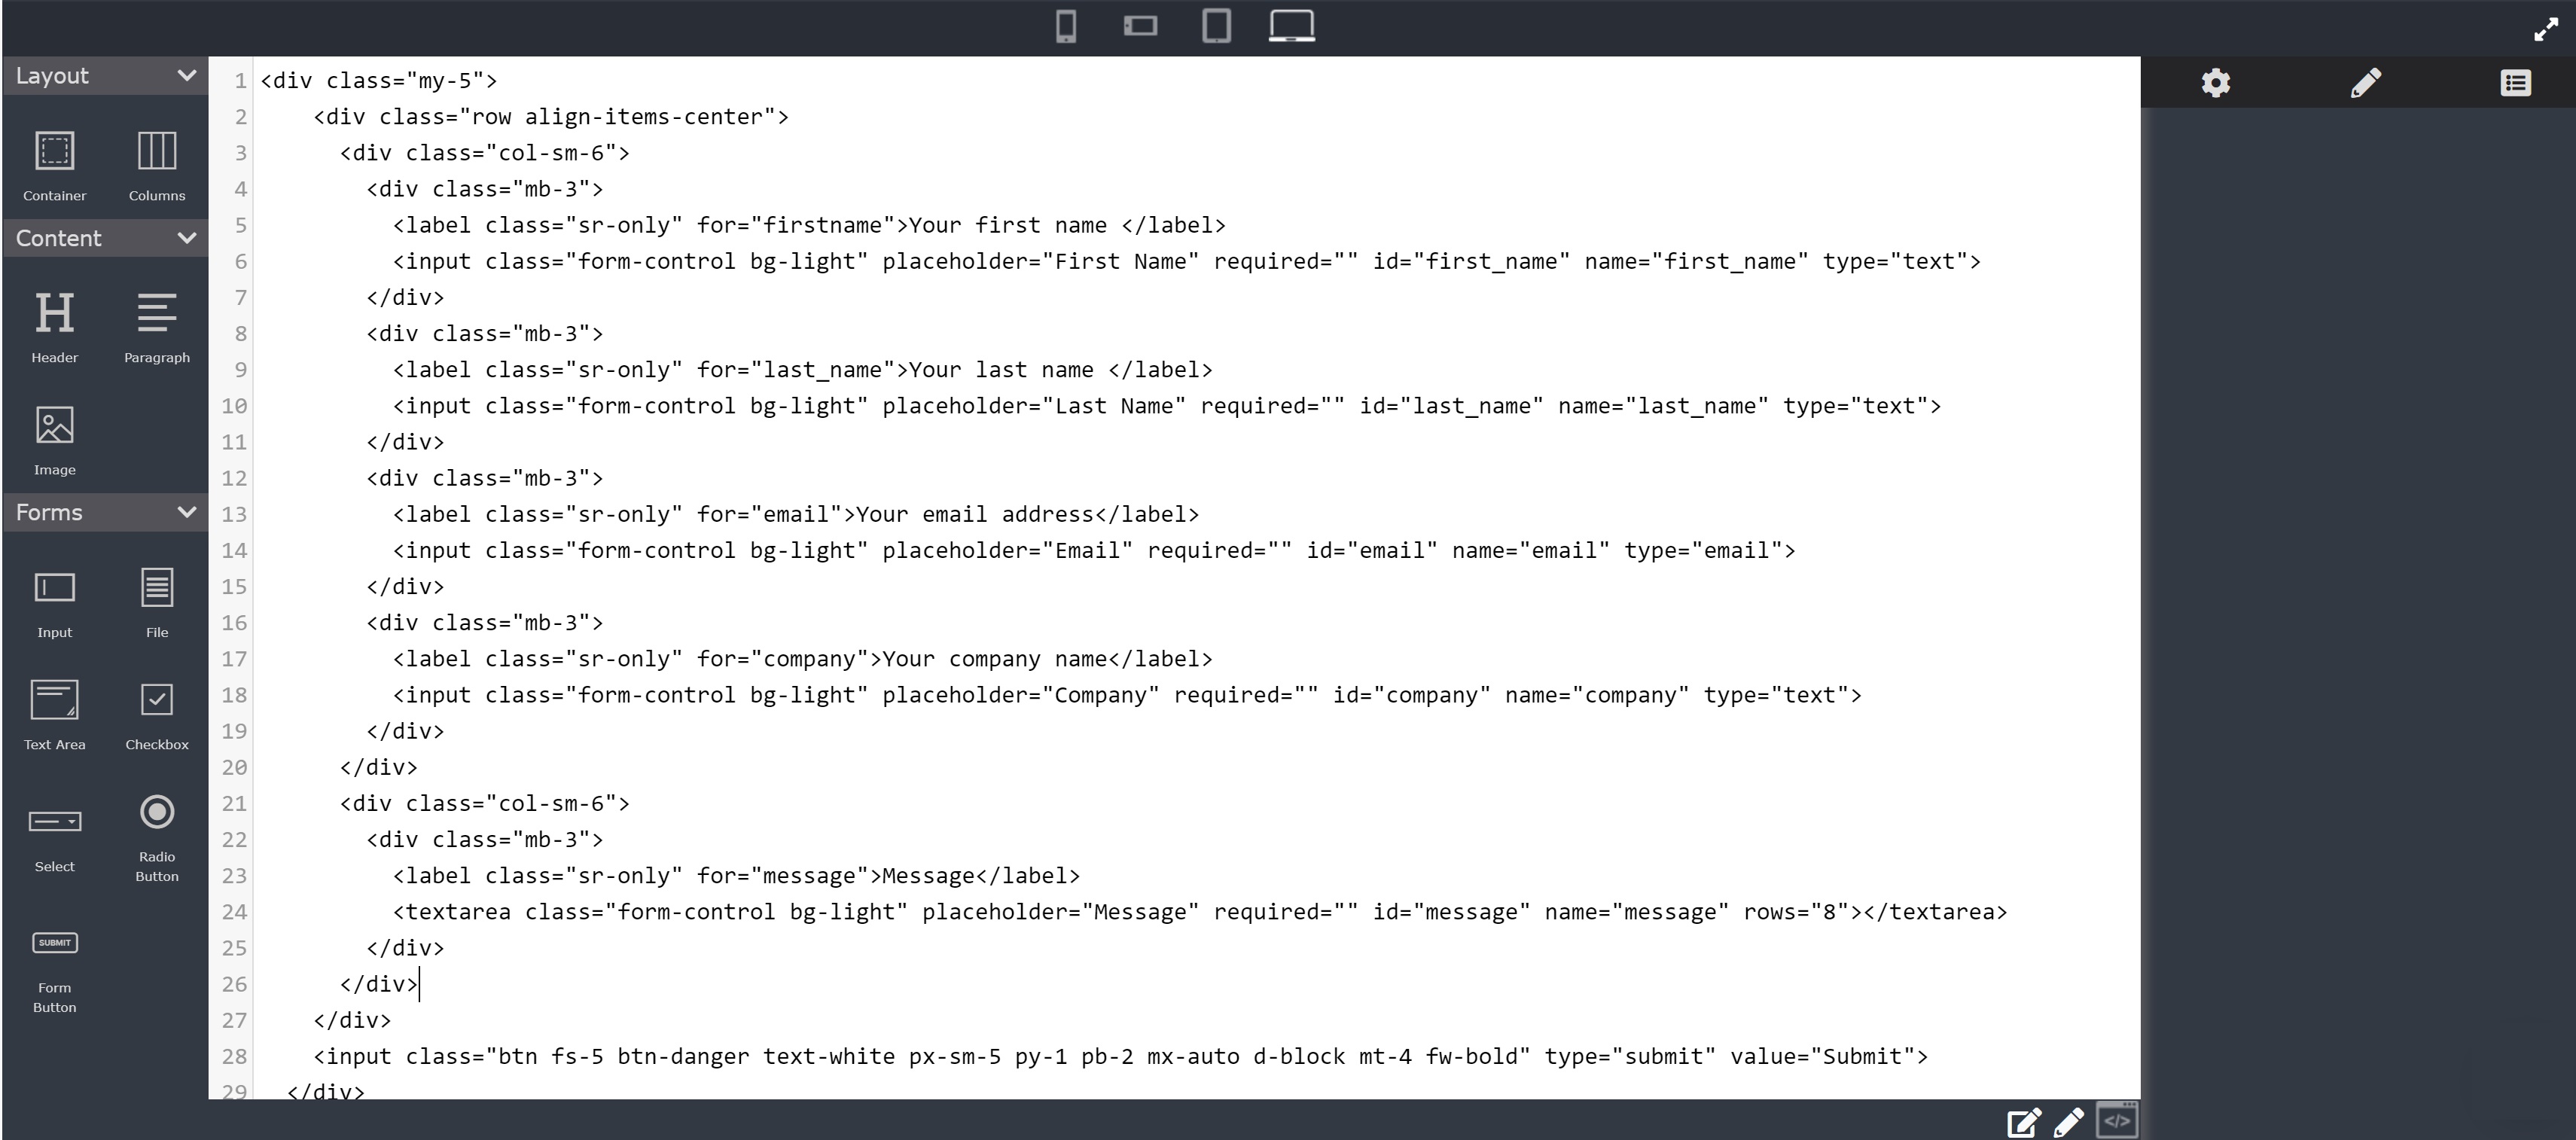
Step 5: Once complete, click Save.
Note:
You can use the sample code below to match the SpaceJet theme.
<div class="my-5">
    <div class="row align-items-center">
      <div class="col-sm-6">
        <div class="mb-3">
          <label class="sr-only" for="firstname">Your first name </label>
          <input class="form-control bg-light" placeholder="First Name" required="" id="first_name" name="first_name" type="text">
        </div>
        <div class="mb-3">
          <label class="sr-only" for="last_name">Your last name </label>
          <input class="form-control bg-light" placeholder="Last Name" required="" id="last_name" name="last_name" type="text">
        </div>
        <div class="mb-3">
          <label class="sr-only" for="email">Your email address</label>
          <input class="form-control bg-light" placeholder="Email" required="" id="email" name="email" type="email">
        </div>
        <div class="mb-3">
          <label class="sr-only" for="company">Your company name</label>
          <input class="form-control bg-light" placeholder="Company" required="" id="company" name="company" type="text">
        </div>
      </div>
      <div class="col-sm-6">
        <div class="mb-3">
          <label class="sr-only" for="message">Message</label>
          <textarea class="form-control bg-light" placeholder="Message" required="" id="message" name="message" rows="8"></textarea>
        </div>
      </div>
    </div>
    <input class="btn fs-5 btn-danger text-white px-sm-5 py-1 pb-2 mx-auto d-block mt-4 fw-bold" type="submit" value="Submit">
  </div>
#
How to add a form to a page
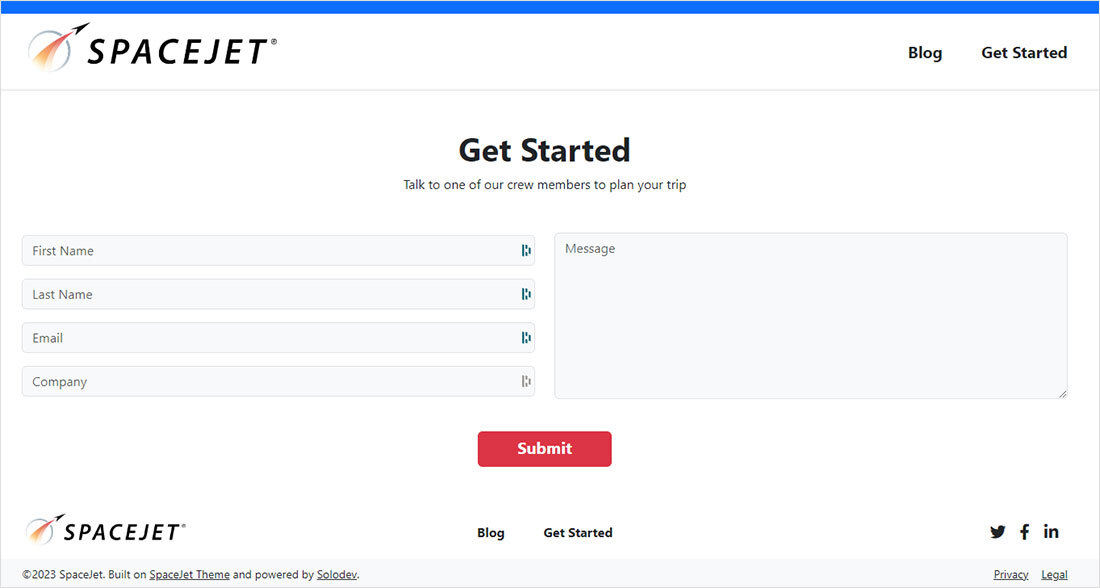
Once you have created or uploaded your form to Solodev, you are now ready to add it to a page. While a form can be added to any page on your website, we are going to use the SpaceJet “Get Started” page, which provides a contact form for visitors. For this application, we are using a Solodev data table form.
Note:
For this lesson, you will need to create a new folder and page for your contact form. For additional details, refer to the Add Folder and Add Page articles.
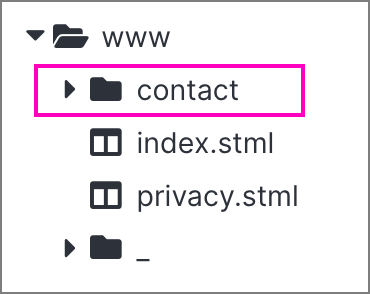
Step 1: From your main dashboard, click on the www folder in the left-hand menu.
Step 2: Using the right-hand menu, click Add Folder. Name the folder contact.
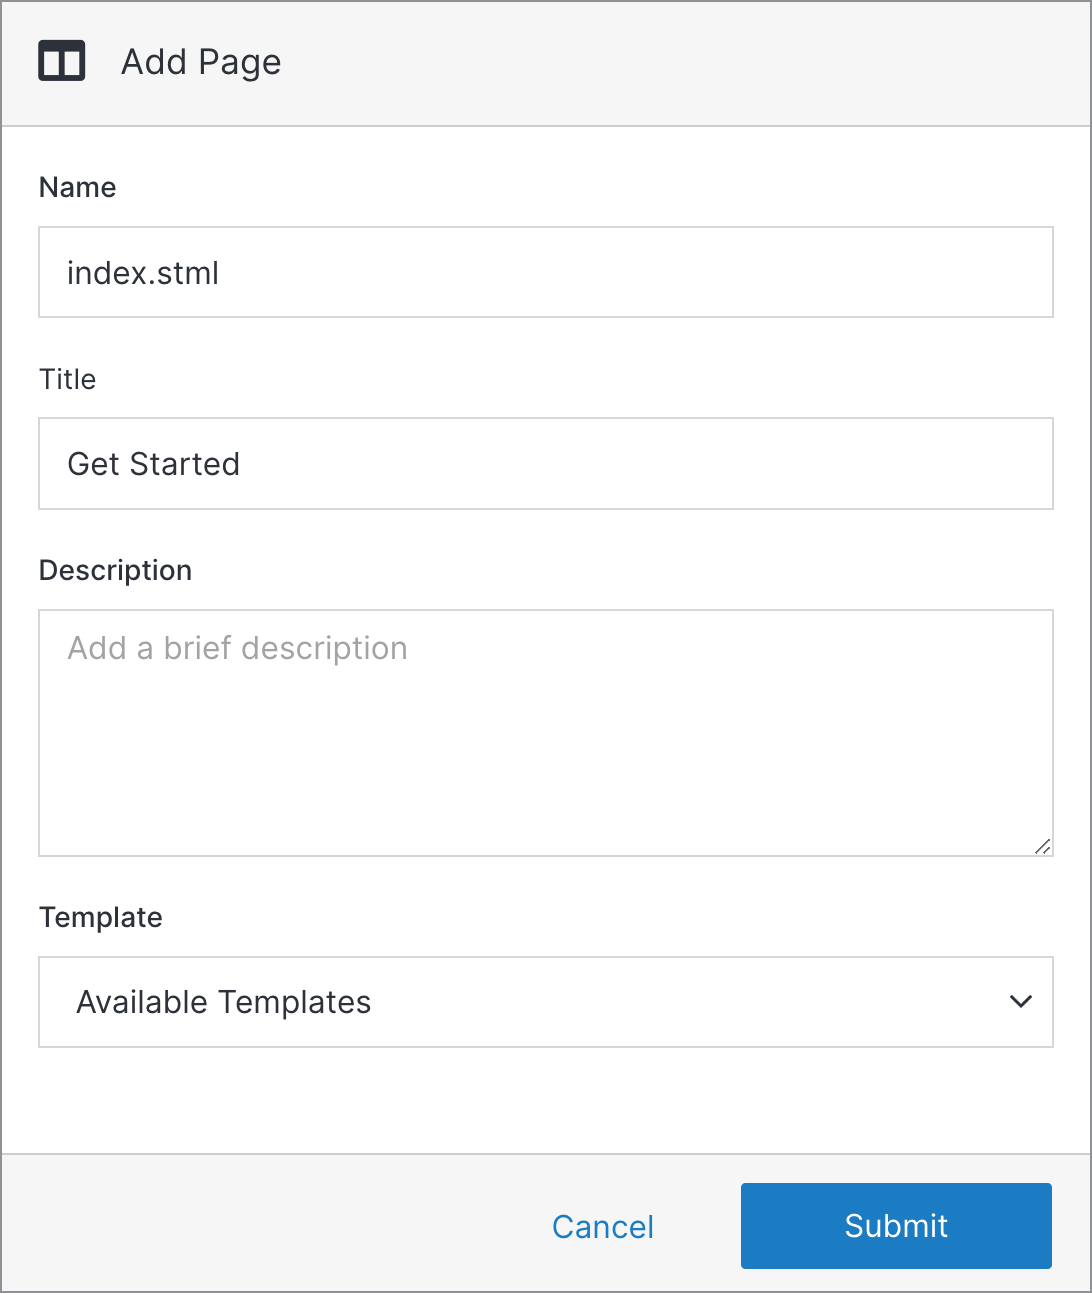
Step 3: In the right-hand menu, click Add Page. Name the page index.stml, and title it Get Started. Once complete, click Submit.
Note:
If you saved your sectional or content page as a template, you can select one as an option when creating a new page. For more details, read the Add Page article.
Step 4: In the left-hand menu, under web files, click on the content folder. In the right-hand menu, click Add Folder. Name the folder contact.
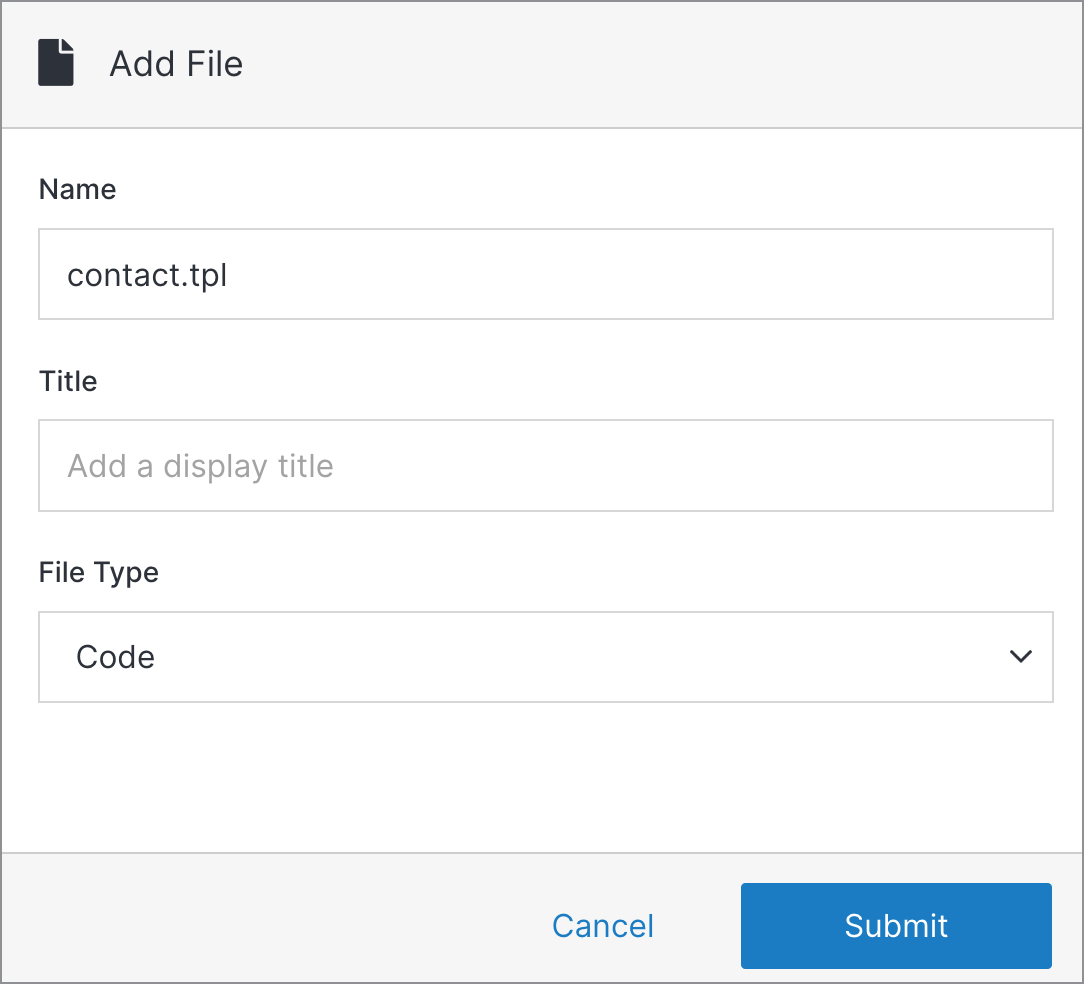
Step 5: In the right-hand menu, click Add File. Name it contact.tpl and under File Type, select Code. Once complete, click Submit.
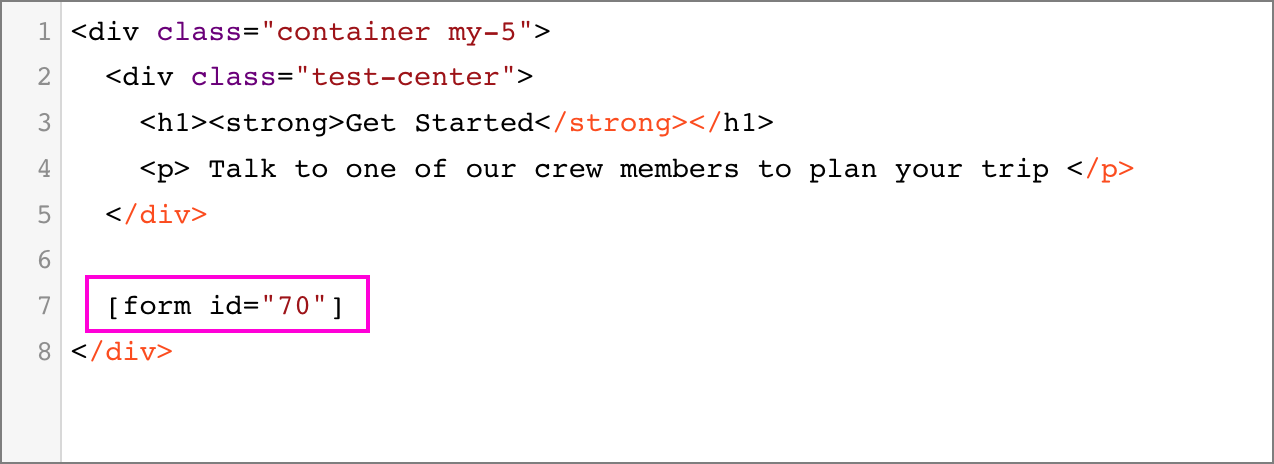
Step 6: Click on the contact.tpl file. In the code editor, add the sample code below for the SpaceJet contact page. Once complete, click Publish.
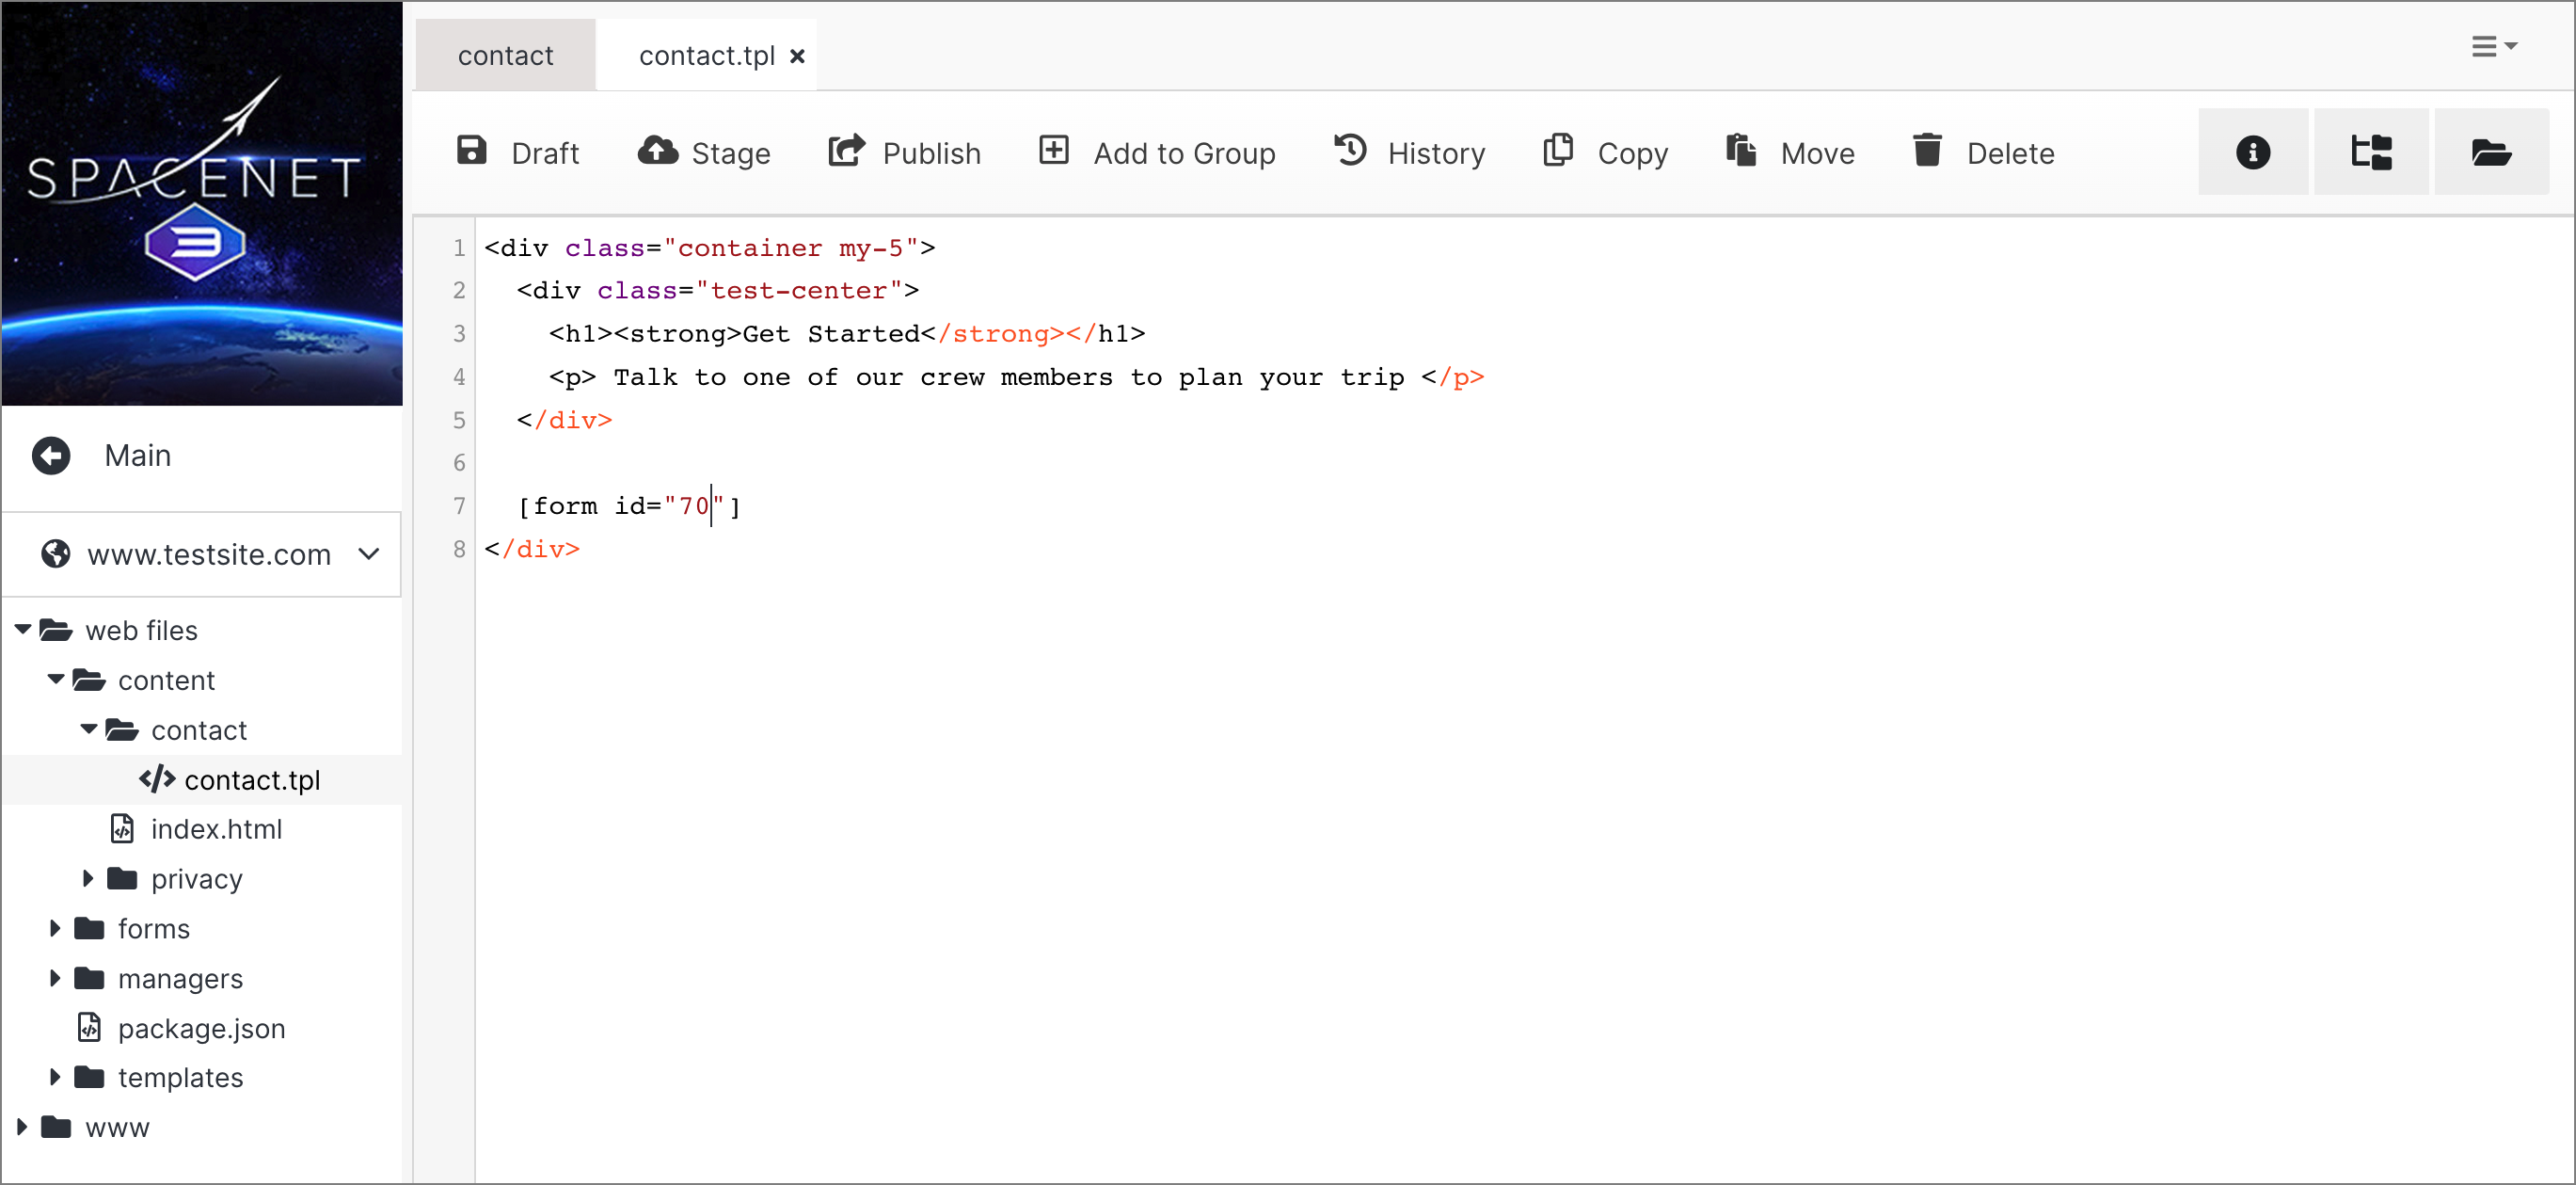
<div class="container my-5">
  <div class="test-center">
    <h1><strong>Get Started</strong></h1>
    <p> Talk to one of our crew members to plan your trip </p>
  </div>

  [form id="70"]
</div>
Step 7: Go back to the main dashboard and click on Forms in the left menu. You will see your contact-form in the central table.
Note:
In your left menu, you can also click on the forms folder under web files to access your form.
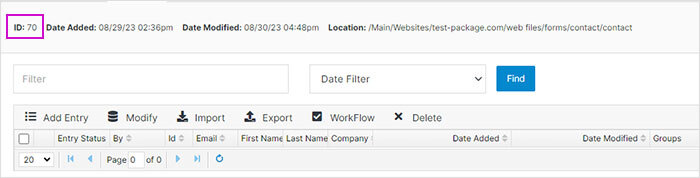
Step 8: In the data table, locate the form ID in the upper left corner. In this example, the form ID is “70.”
Step 9: Go back to web files, and under the contact folder, click on the contact.tpl file to access the code. In line 7, replace the form ID with the actual ID from your for data table. As previously noted, “70” is a placeholder. Once complete, click Publish.
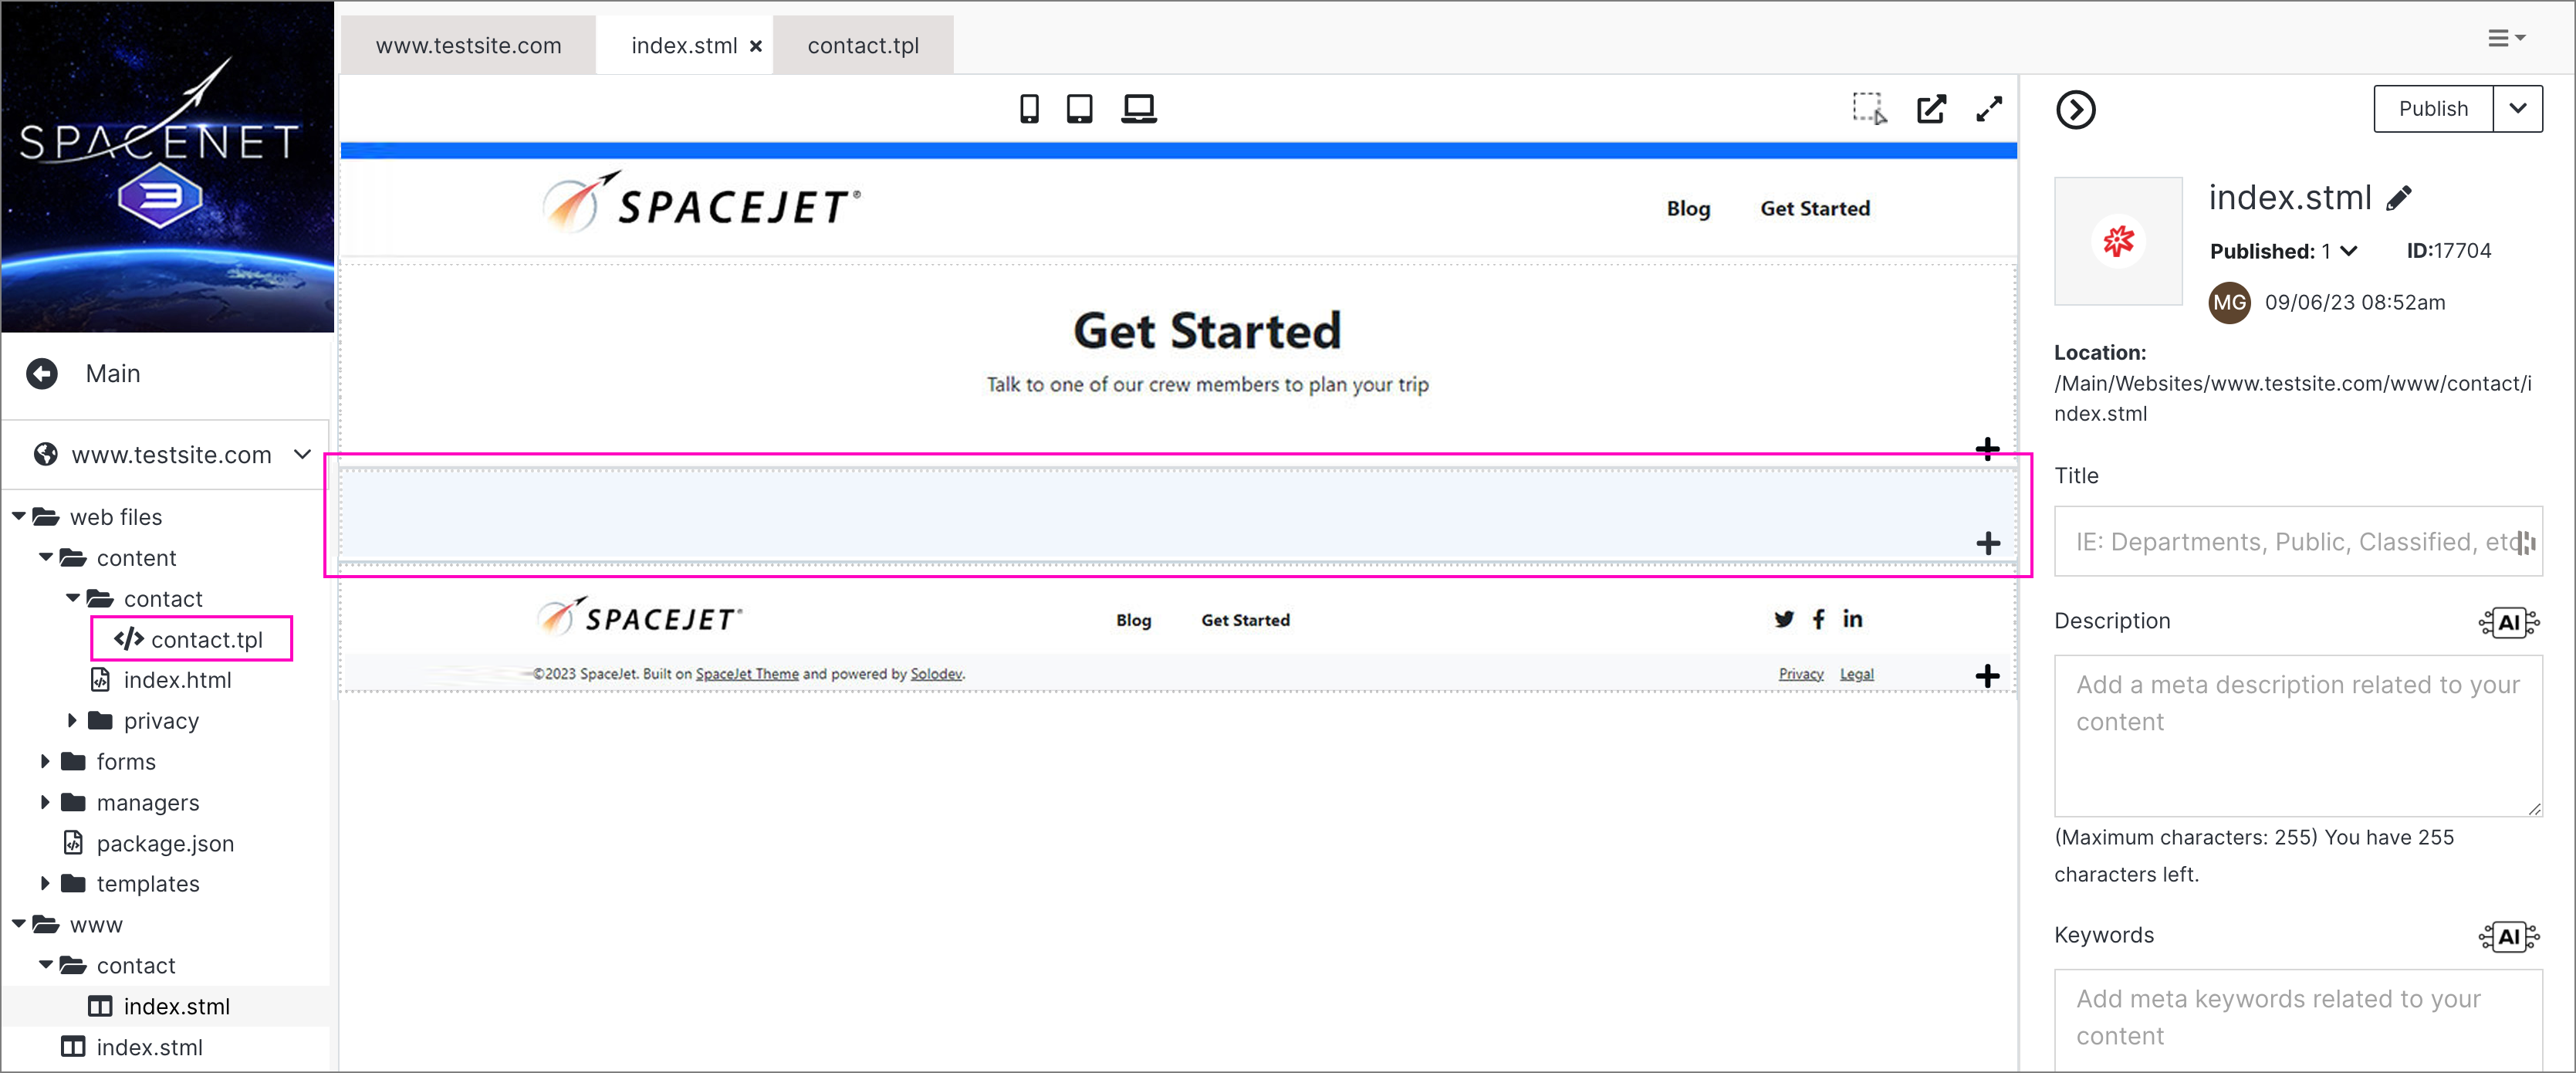
Step 10: In the www folder, click on index.stml under the contact folder. In the editor canvas, click on the appropriate div and select the contact.tpl file to apply it.
Note:
Remember to add your base template first before adding your form. For a refresher on selecting dynamic divs and applying template files, refer back to How to add a page to a website tutorial.
Once complete, click Publish.
After publishing, you will now see your form appear on your page.
#
How to add a submission message
Whether you are creating a lead form or a contact form, it is always a best practice to display that a visitor's information has been received. This is referred to as a submission or "thank you" message, and can be customized to meet your specific requirements.
For the purposes of this lesson, you can use the sample code below to create a submission message.
Step 1: Create an HTML file with the message you want to display after a form has been submitted, and save it to your local system. You can use the sample code below:
<h3 class="text-center mt-5">Thank you for contacting us. Someone will be in touch soon.</h3>Step 2: Click modify and go to the Email Options accordion.
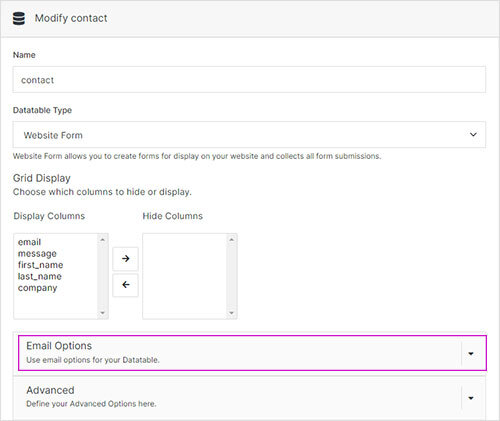
Step 3: Click Upload Return Page and select the file you previously created.
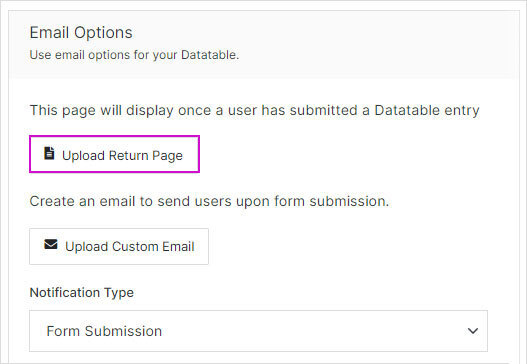
Step 4: Click Submit.
Step 5: Access your forms module from the main dashboard or via your forms folder under web files. Check the data table to confirm that your submission has been received.
#
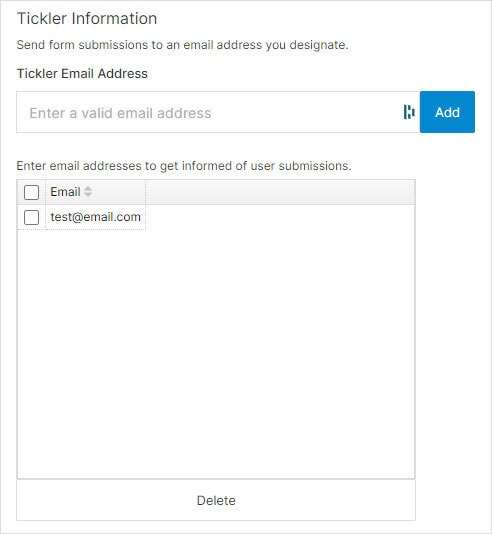
How to add an email tickler
You can use this option to send form submissions to an email address you designate. For example, when a potential customer signs up for a free trial of your product, an email can be sent to your sales team to notify them of a possible lead.
Step 1: Follow the previous step 2 to navigate to the Email Options section.
Step 2: Under tickler information, add a valid email address on the Tickler Email Address field and click the Add button. You will see the email address added to the textarea below.
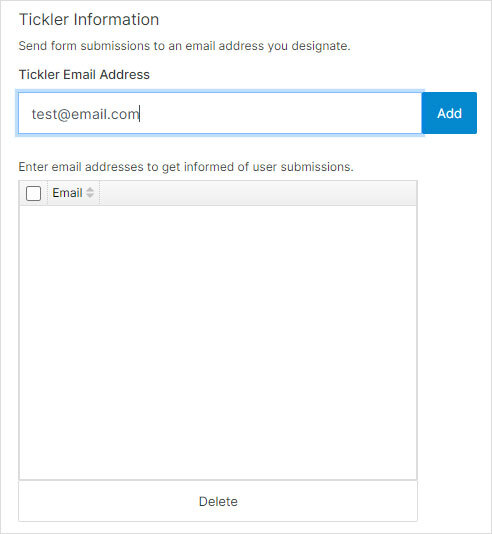
Step 3: You can add as many email addresses as you want. When you are done, click Submit.
Note:
If you need to add more options to your form submissions, like having each department on your company receive the form submission based on what the user selects on the forms, please visit workflows.