#
How to Restrict Access in Website to Authorized Users
In Solodev, you can control user access to your front-end website by implementing restrictions. This article guides you through the process of restricting access based on your website structure. You'll also learn how to create a customized login page and seamlessly link it to your restricted folders, ensuring a secure and tailored user experience.
#
Prerequisites
- You will need to add a website to your Solodev CMS.
- You will need to be familiar with using shortcodes.
#
Restrict Access
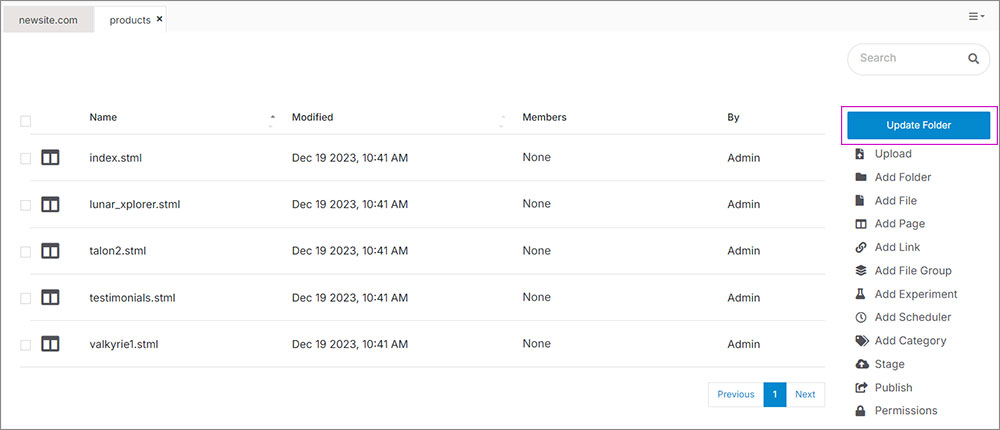
Step 1. Go to the folder you want to restrict and on the right-side menu, click Update Folder.
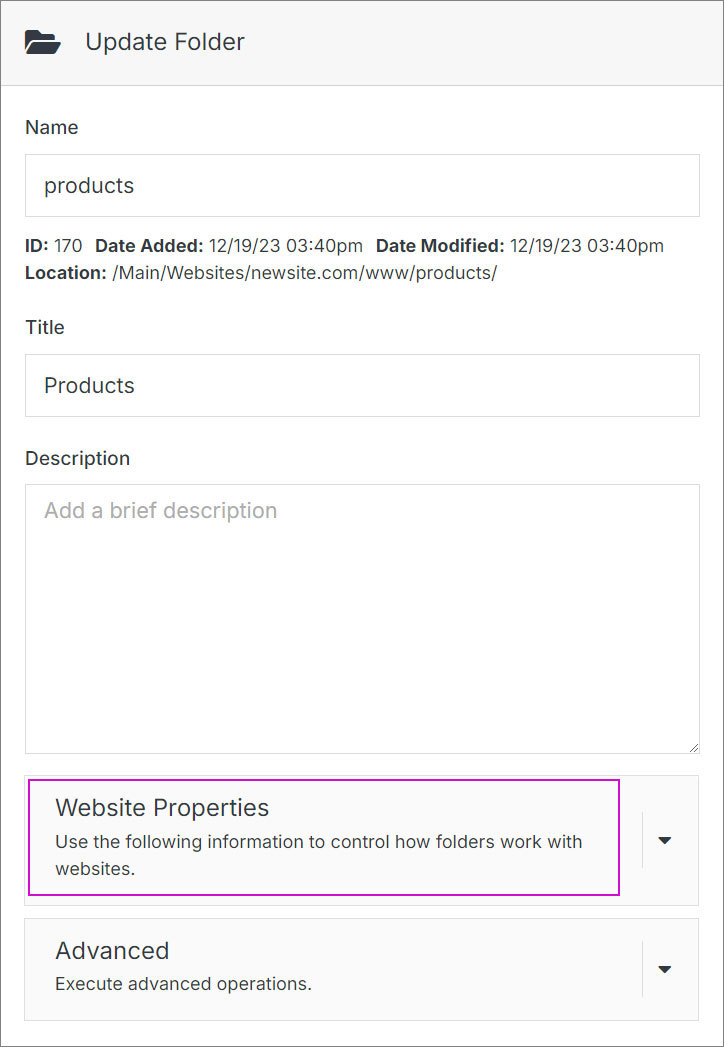
Step 2. On the modal, open the Website Properties accordion.
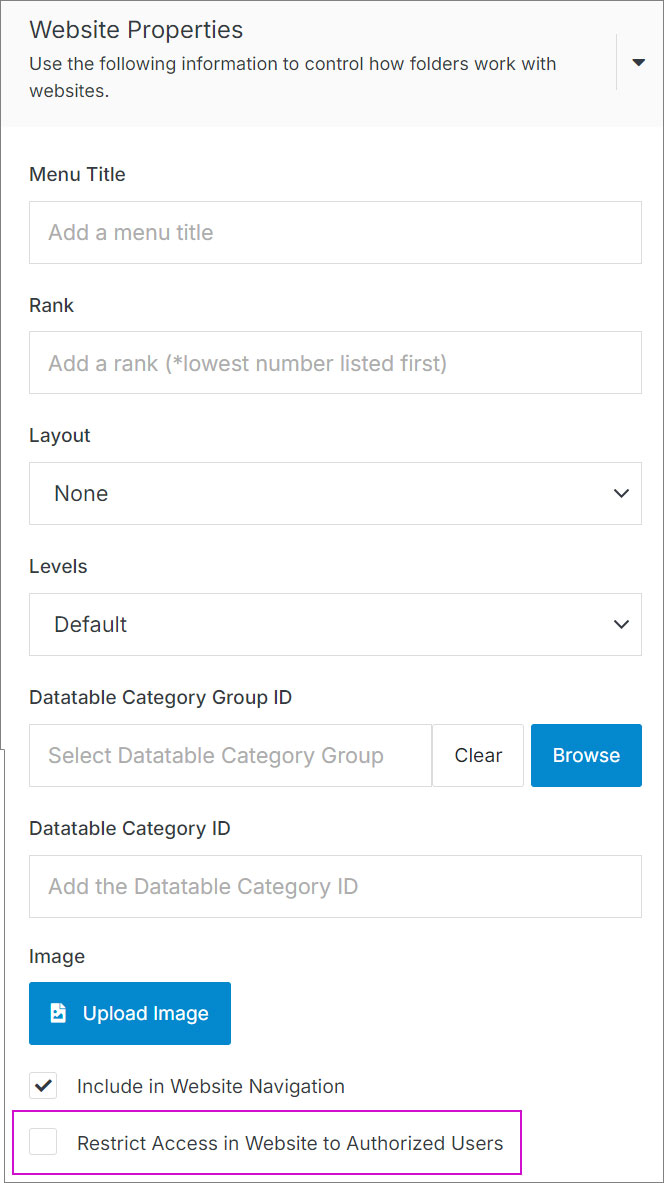
Step 3. Go to the bottom of the accordion and check the "Restrict Access in Website to Authorized Users" checkbox and click Submit.
#
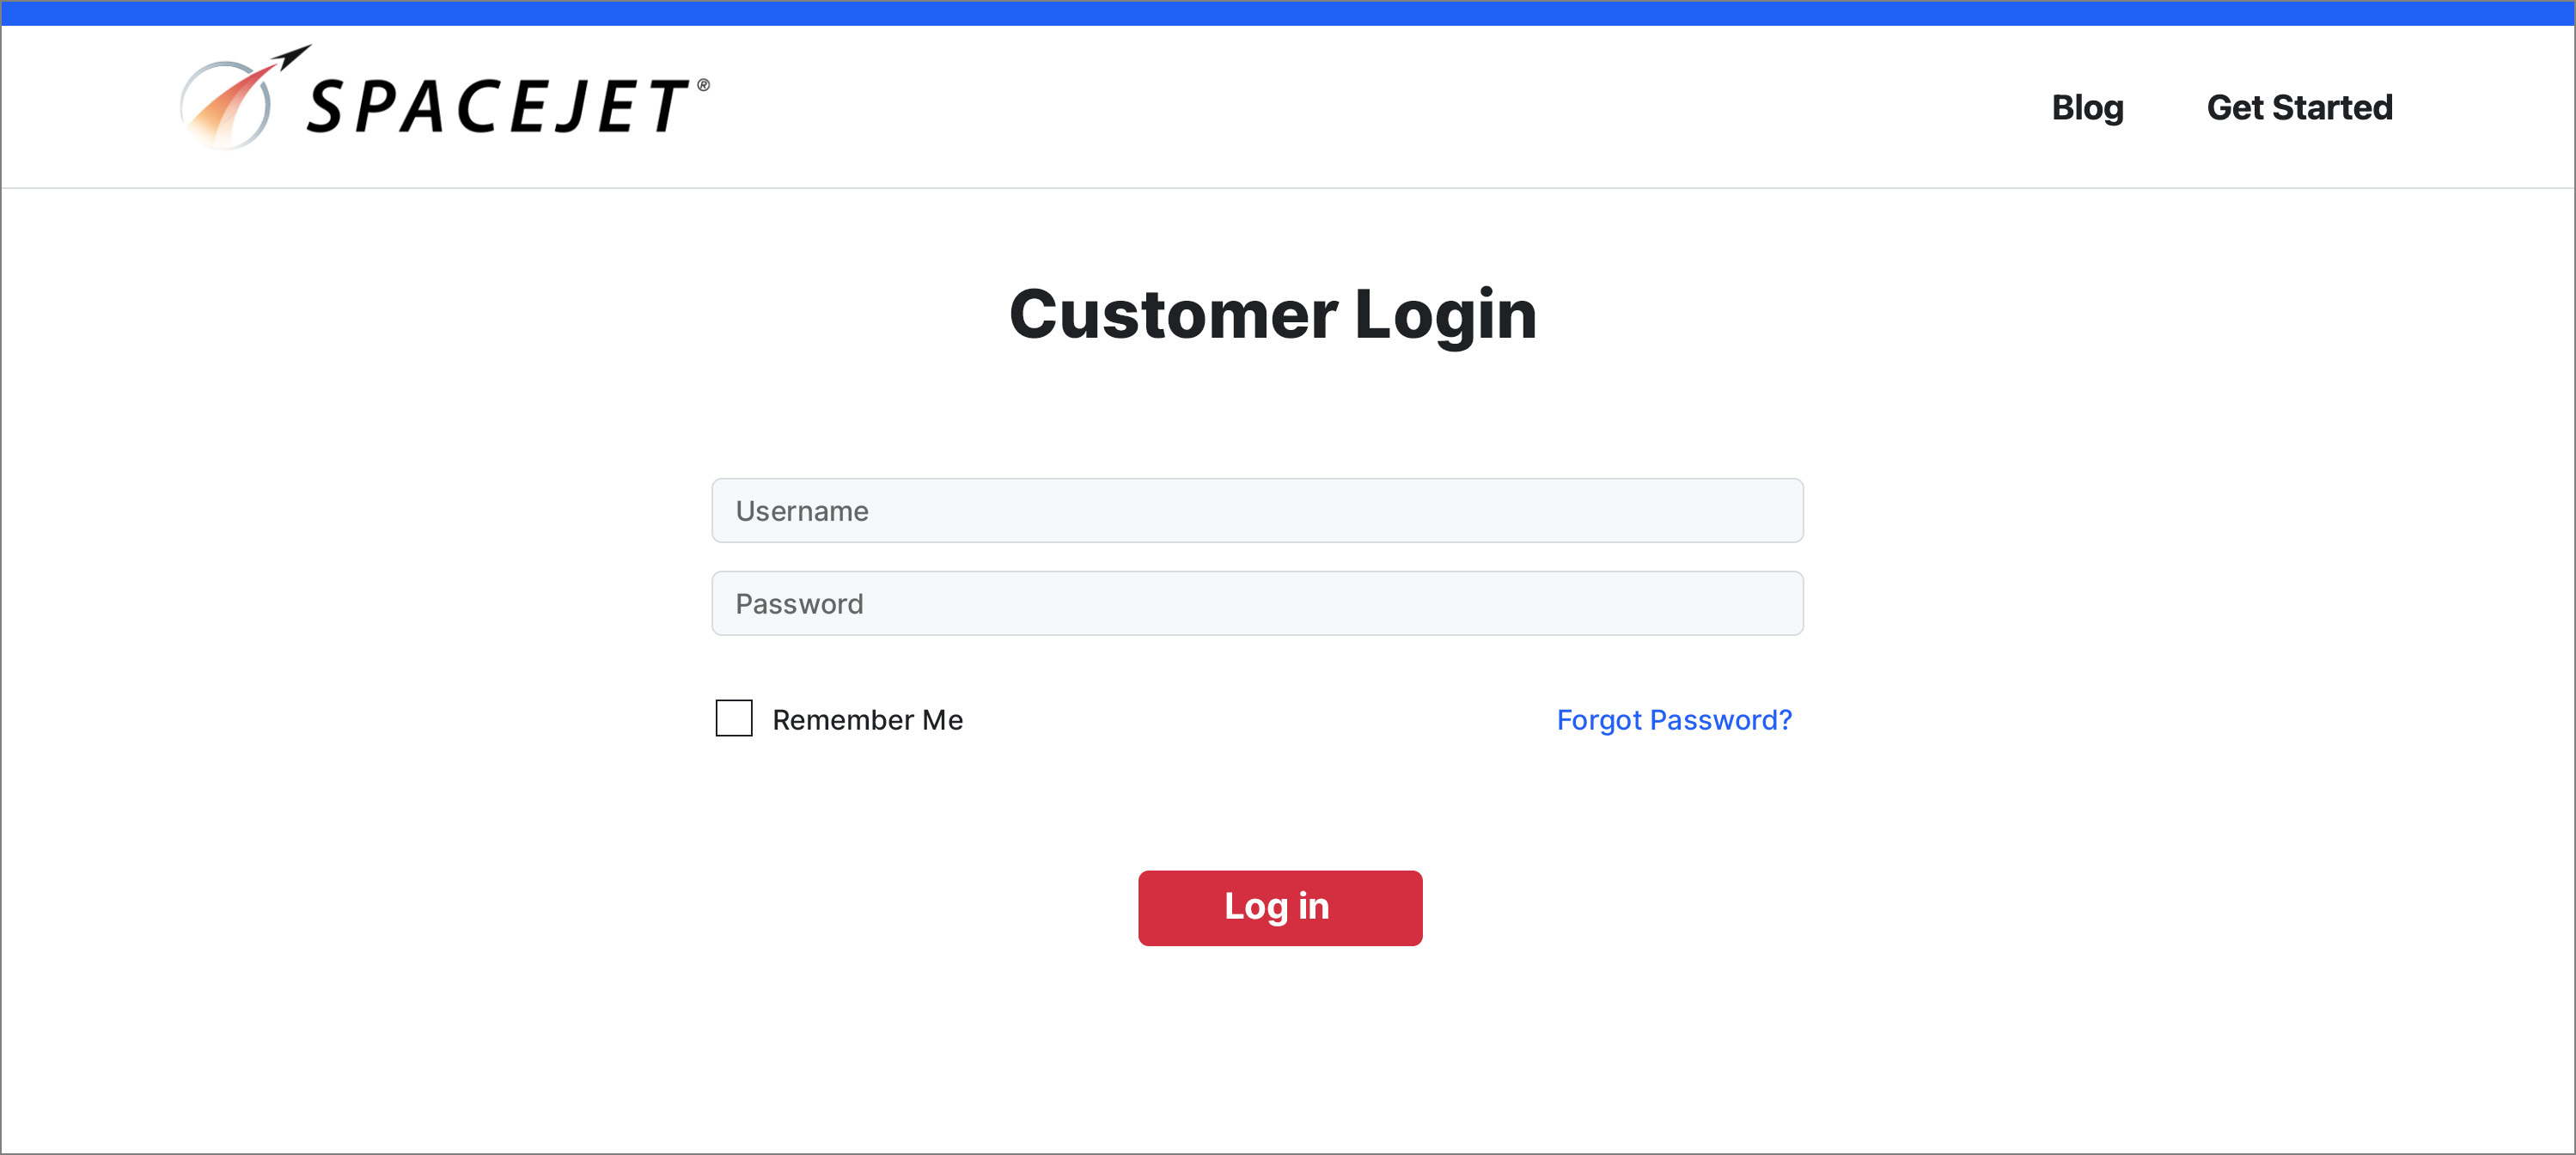
Create a login page
Step 1. Follow these steps to create a page. Shortcodes for creating a login page can be found here.
Step 2. Go back to the dashboard and on the right-side menu, click on Update Website.

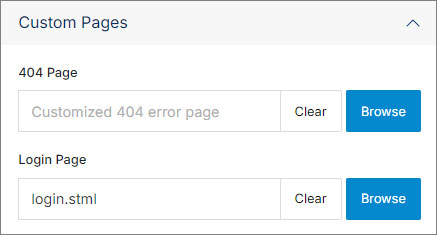
Step 3. On the Update Website modal, click on the Custom Pages accordion.

Step 4. Under the Login Page input, browse for the newly created login page and click Submit.
#
Link the login page
Step 1. Place the following shortcode on each page that needs to be secured.
[contact_form_session]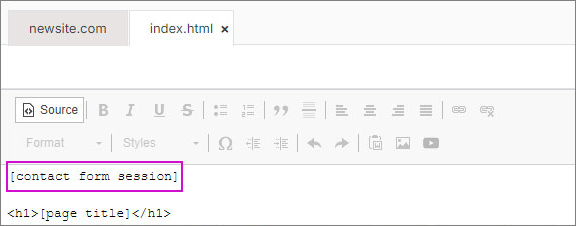
Note:
If you go to the front-end of your site before having a login page set and after adding the shortcode, the page is going to show a 404 page.
Step 2. Go to the front-end to check you see the login page when you try to go to the desired restricted page.