Modify
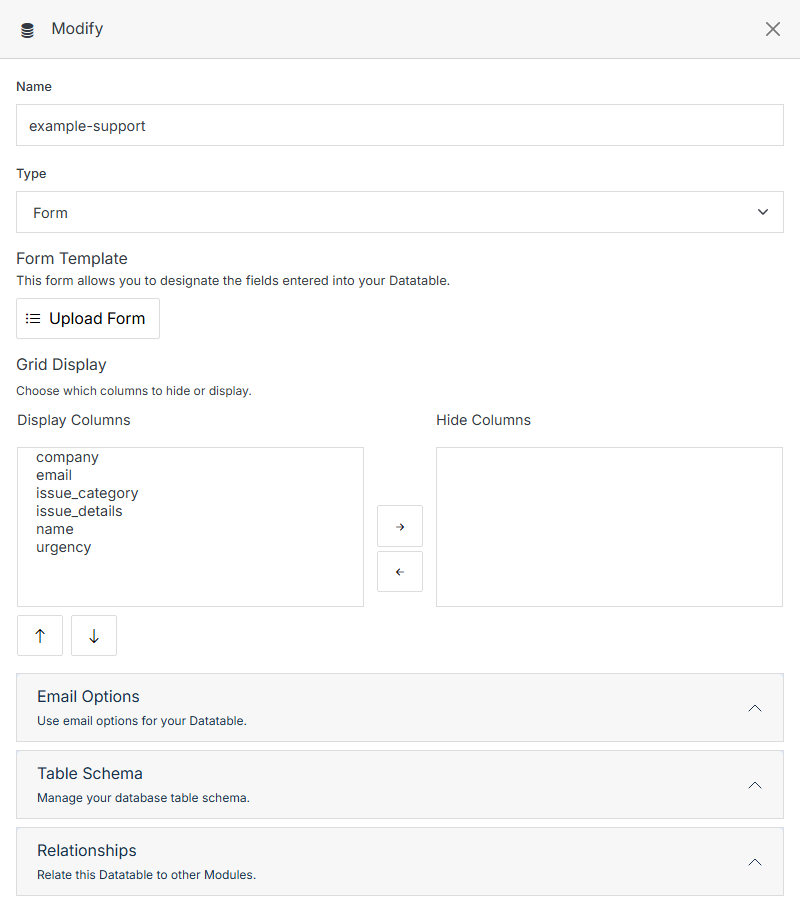
From the form's overview page, click Modify to update the form's settings. A Module Form's Modify panel is built on the same underlying schema as Module Overview's Modify — Grid Display, Table Schema, and API Info work identically — with two form-specific additions: Email Options and Relationships.
Email Options
Control what a visitor sees after submitting, who gets notified and what gets emailed out when they do.
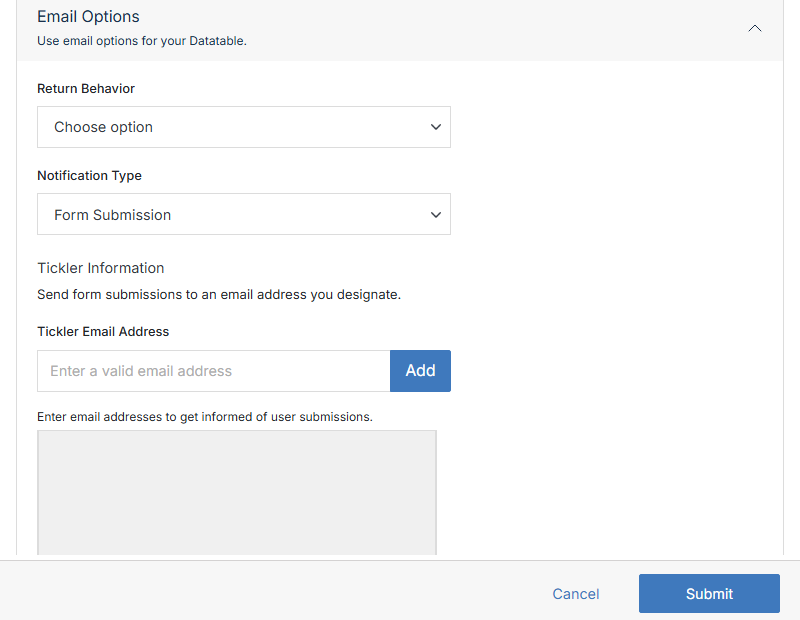
Notification Type: Form Submission (default)
Reuses the form's own Form Template (the same file uploaded at the top of this panel) to build the notification email — each field's submitted value is swapped into that template automatically. A couple of things to know if you're relying on this default:
- Give the submit input
type="submit"— otherwise the submit button itself shows up in the email body. - Input values are converted to
<p>input value</p>in the generated email. - For more layout control within this default, build the form's fields inside an HTML table.
- If no Form Template is set at all, the notification falls back to a plain two-column table of every submitted field and value — functional, but not branded.
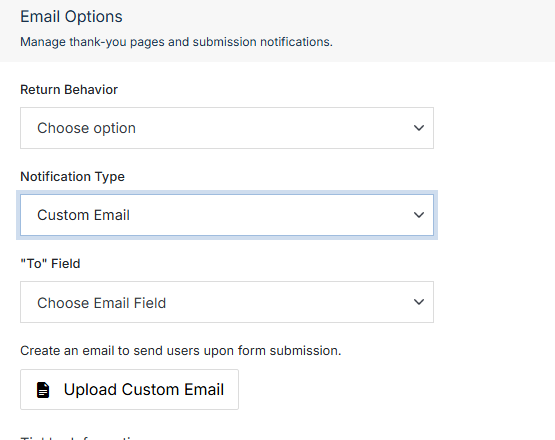
Notification Type: Custom Email
Choose this to send a fully custom-designed HTML email instead of reusing the form template — this is the option to reach for if you want a polished, on-brand results email (a nicely formatted confirmation, a receipt-style layout, etc.).
Note:
Return Behavior and Notification Type are completely independent. You do not need to set a Return Page (or anything else under Return Behavior) for a Custom Email to work — Return Behavior only controls what the visitor's browser shows after they submit; Notification Type controls what gets emailed. Leave Return Behavior at "Choose option" if you don't need a custom thank-you page.
Referencing submitted data in the HTML file
The uploaded file runs as a template with each submitted field available as a variable, so you can drop values in anywhere:
<p><strong>Name:</strong>{{ givenname }} {{ sn }}</p>
<p><strong>Email:</strong>{{ email }}</p>
<p><strong>Tour Date:</strong>{{ tour_date }}</p>
Open the form's tour_date in the example is a placeholder — your form almost certainly uses different names). A handful of built-in fields are always available too, regardless of your schema: email, givenname, sn, primaryphone, date_added, date_modified. Regular shortcodes work in this file as well.
date_added and date_modified come through as a raw Unix timestamp, not a formatted date — wrap them in PHP's date() if you want to display them:
<p>Submitted <?= !empty($assignmentVars['date_added']) ? date('n/j/Y g:ia', $assignmentVars['date_added']) : '' ?></p>Download a working sample template — a real, tested Custom Email file with a header, a clean field table, and the date formatting above already wired up. Upload it as-is to see it work, then swap in your own field names and styling.
Note:
This is HTML/CSS only — there is currently no way to send the results as a PDF attachment. If a submitter needs a polished, well-formatted copy of their answers, a styled Custom Email is the closest supported option.
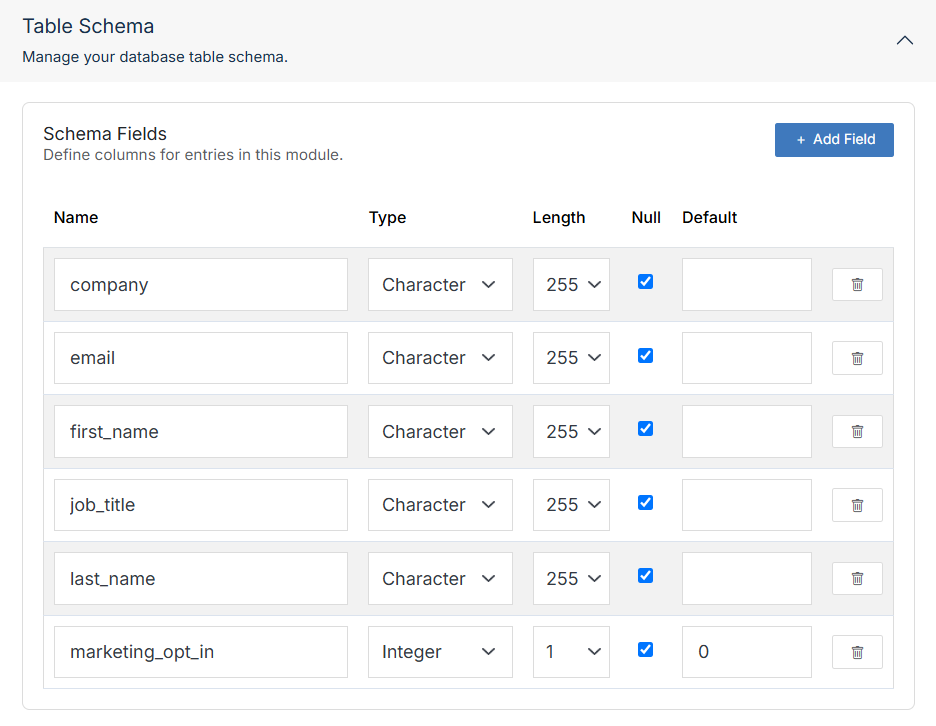
Table Schema
Add, edit, or remove the fields a submission can have — identical to Module Overview's Table Schema.
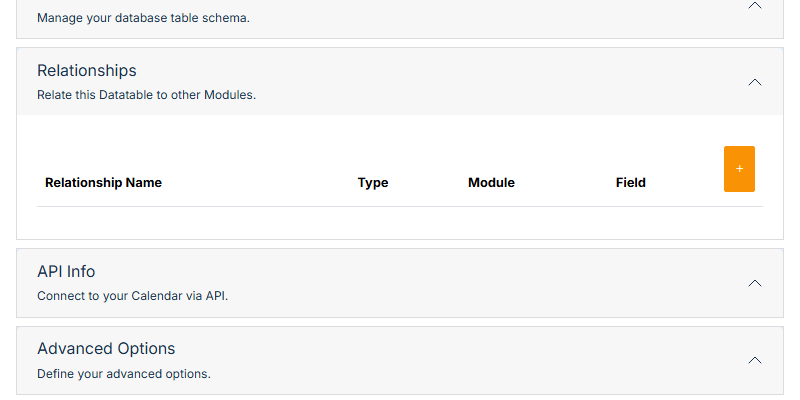
Relationships
Relate this form's entries to another module.
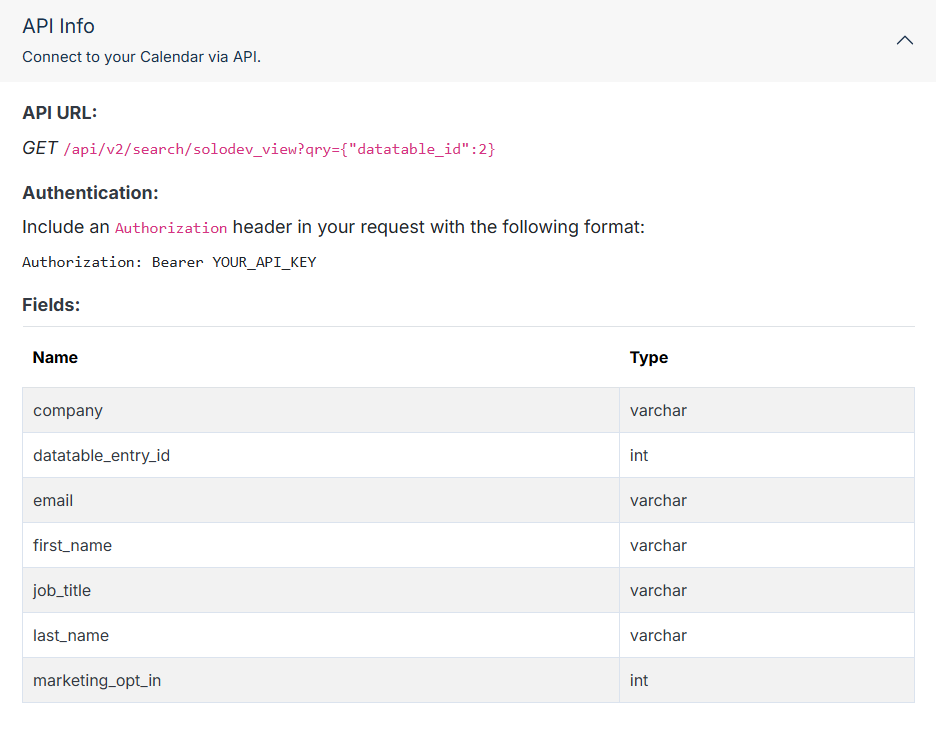
API Info
Connection details for reading this form's submissions via the REST API — identical to Module Overview's API Info.
CMS Contact Mapping
Only appears once Sync entries to CMS Contacts has been turned on for this form — either when it was added, or by switching it on here. Maps this form's own field names to the standard Contact fields, so every submission also creates or updates a Contact record alongside its entry in this module's own table.
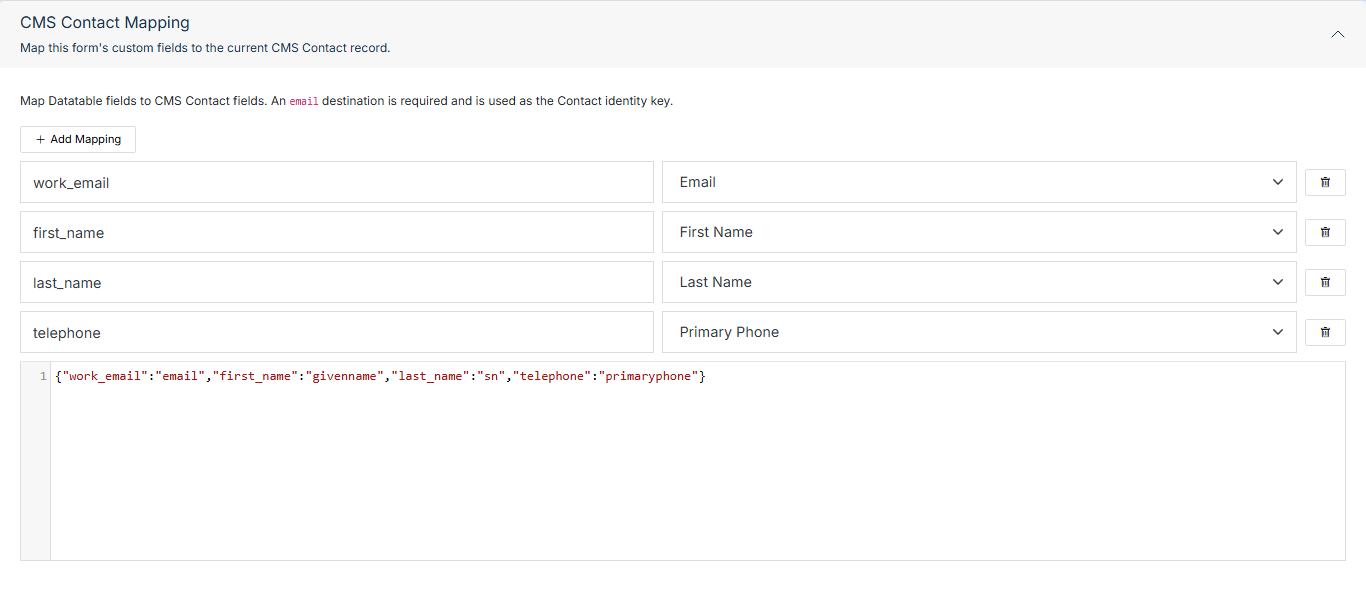
The same mapping is also editable as raw JSON underneath the row editor — {"work_email": "email", "first_name": "givenname"} — if you'd rather paste one in directly than build it row by row.
Note:
An Email destination is required. It's the one field the sync uses to decide whether a submission is a new Contact or an update to an existing one — resubmitting with the same email updates that Contact's name and phone rather than creating a duplicate. A mapping with no field pointed at Email won't save.
A form switched on via Sync entries to CMS Contacts starts with an identity mapping (email to Email, givenname to First Name, sn to Sn, primaryphone to Primary Phone) already saved — convenient if your schema happens to use those exact names, but most schemas don't, so open this section and re-point each row at your own field names once the form's fields are in place. Source fields not present in a given submission are simply skipped, so it's safe to map more fields than any one entry actually fills in.
Sync runs from the same place regardless of how an entry was created or updated — the CMS's own Add/Update Entry, a public visitor submitting the live form, the REST API, or MCP all go through it identically.
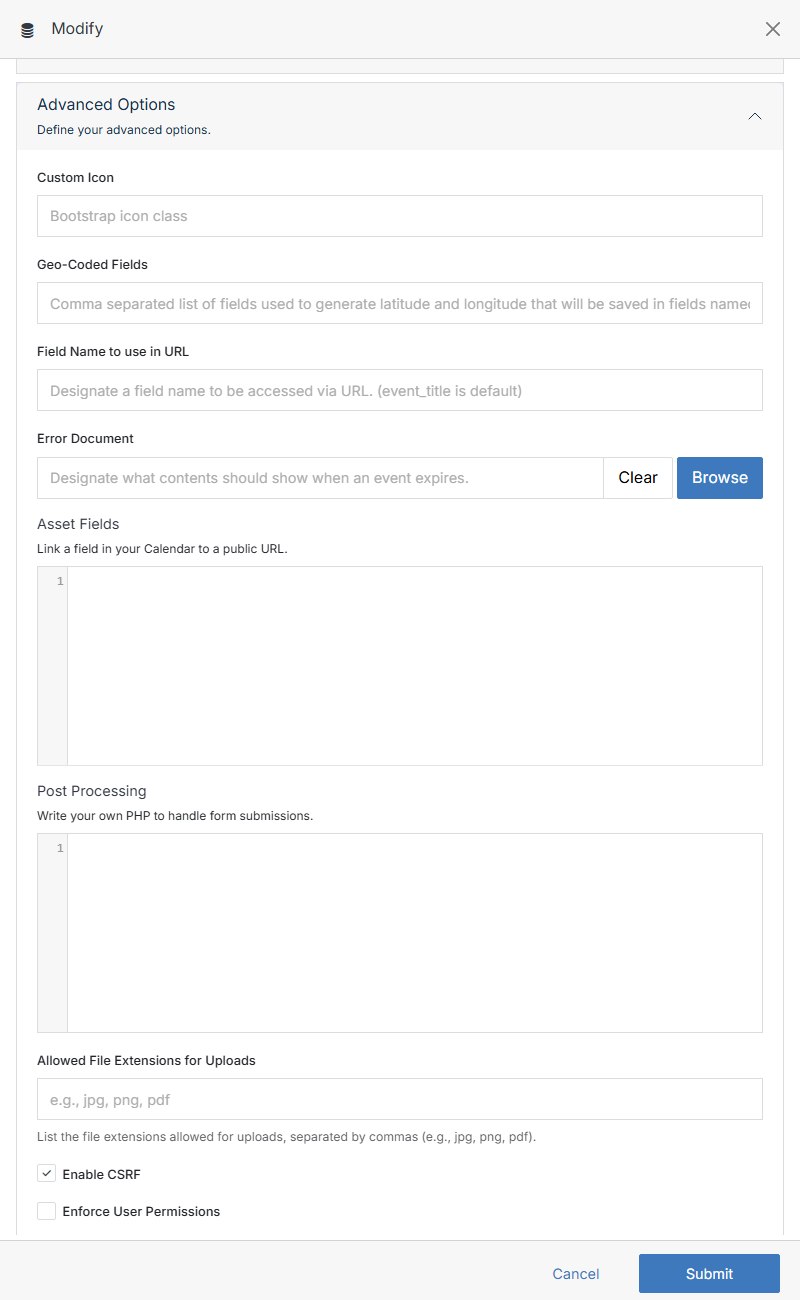
Advanced Options
Most of this section matches Module Overview's Advanced Options (Custom Icon, Geo-Coded Fields, Field Name to use in URL, Error Document, Asset Fields, Post Processing, Export/Delete), plus a few fields specific to public-facing forms: