#
Update Page
In Solodev, you can update any page on your website under the www folder. You can directly edit your page using in-line editing tools with a visual preview, or by accessing component code elements for each div on your page.
In this article, you will learn how to access a specific page in your www folder, modify it using the editing options available in your CMS, and update your page’s meta information and details.
#
Prerequisites
- You will need to add a website to your CMS.
- You will need to add a page to your website.
#
Using STML files
The most important assets in your www folder are STML files (.stml), the individual website files that are served in a browser when a user visits your website. STML files are built with templates using dynamic divs. A template imports common elements to a page such as the header and footer, while dynamic divs allow you to include unique page content, such as text, images, and more.
#
Viewing your page
The Solodev editing experience is highly visual and provides a fully rendered preview of your page’s template elements, graphics, and text.
Using the toolbar at the top of the screen, you can instantly view your page in a desktop, tablet, and smartphone format to test responsiveness and make in-line edits. You can also highlight divs, open a tab to your live page, and expand the window to maximize your viewable area.

#
In-line editing
You can directly edit a page on your website using Solodev’s in-line editing features. Click on a div or content block to access the editing features, make changes, and save your updates.
Note:
This low-code method is ideal for making quick changes to your content like updating text or modifying links. More complex changes will require editing the code on your page.
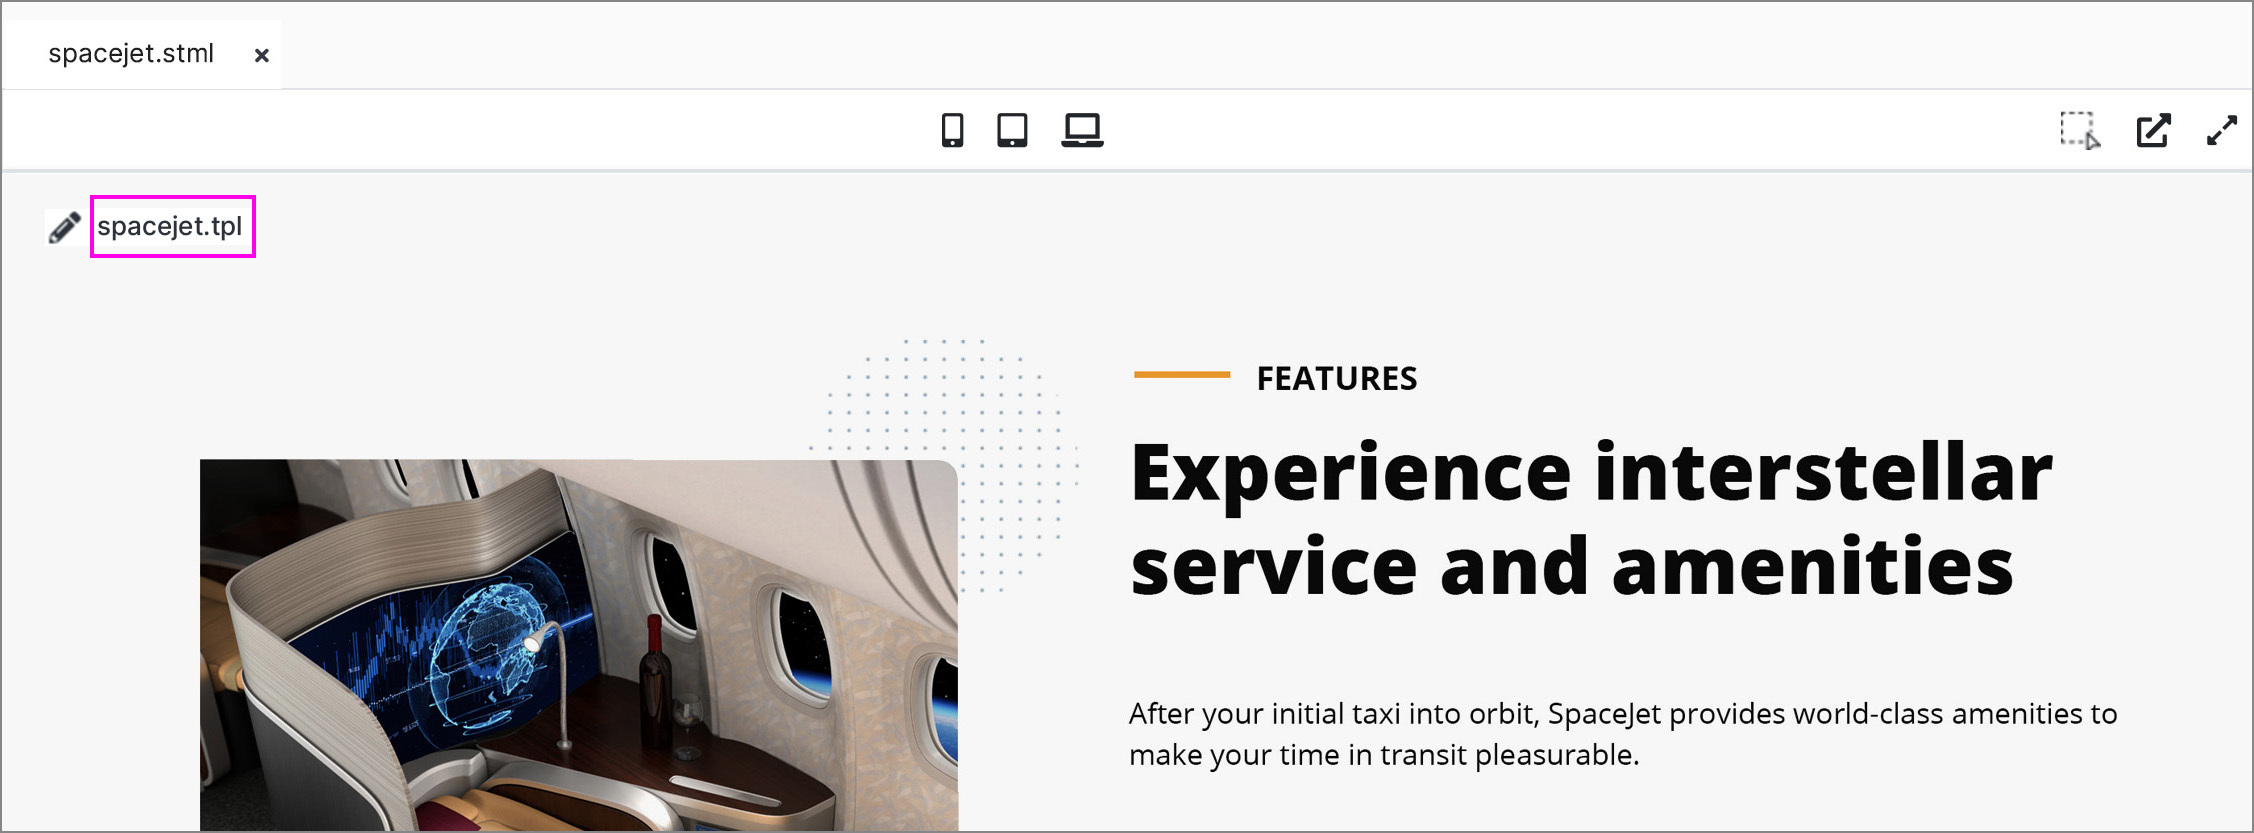
Step 1: Open the www folder in the left-hand menu and select a page to edit. Remember to click on the triangle graphic to the left of each folder to access its contents.

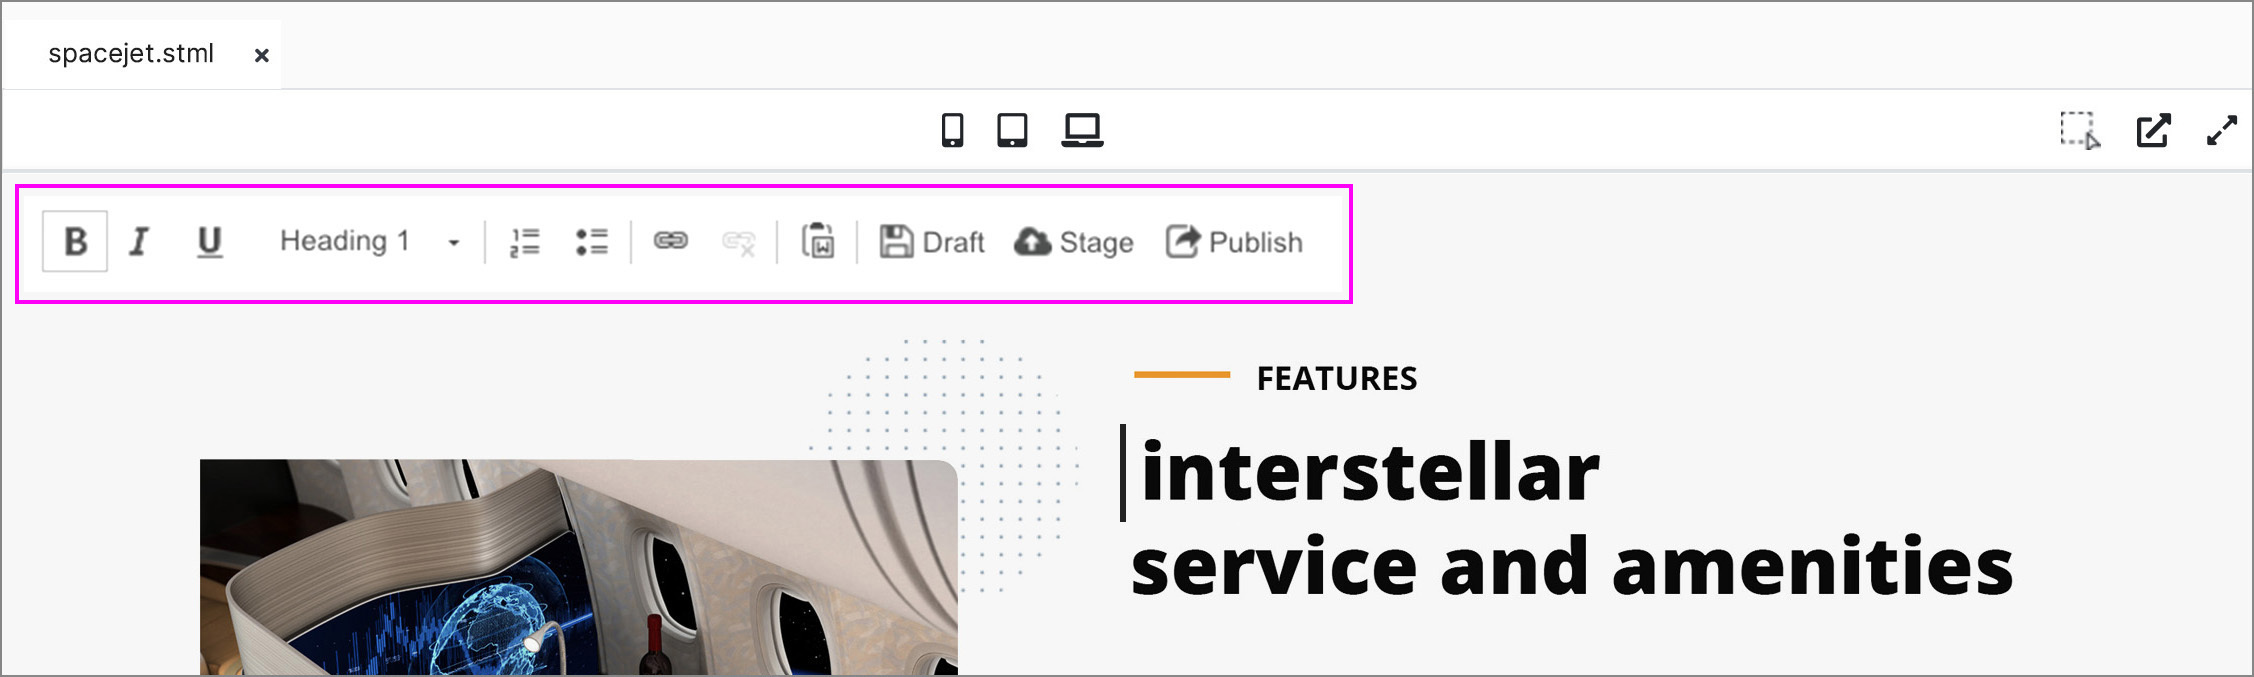
Step 2: On your selected page, click on the section you wish to edit to access the dynamic div. A small flag with a pencil icon and text will appear in the upper left corner. Click on the icon to directly edit the page.
Step 3: Once activated, an editing toolbar will appear in your div, allowing you to select text and update your page directly. You can apply styles for bold, italic, and underlined text and change the heading styles. You can also apply numbering, bullets, and links to your content.
Note:
The editing pane will only apply styling that is based on your website’s CSS.
Step 4: After updating your content, use the Draft, Stage, or Publish buttons in the editing toolbar to save your changes for review or to push live directly.
Note:
You can also use the tab in the upper right corner of the Metadata panel to Draft, Stage, or Publish your changes.
#
Accessing your code from a page
In addition to in-line editing, you can access the code to update a div or .tpl on your page.
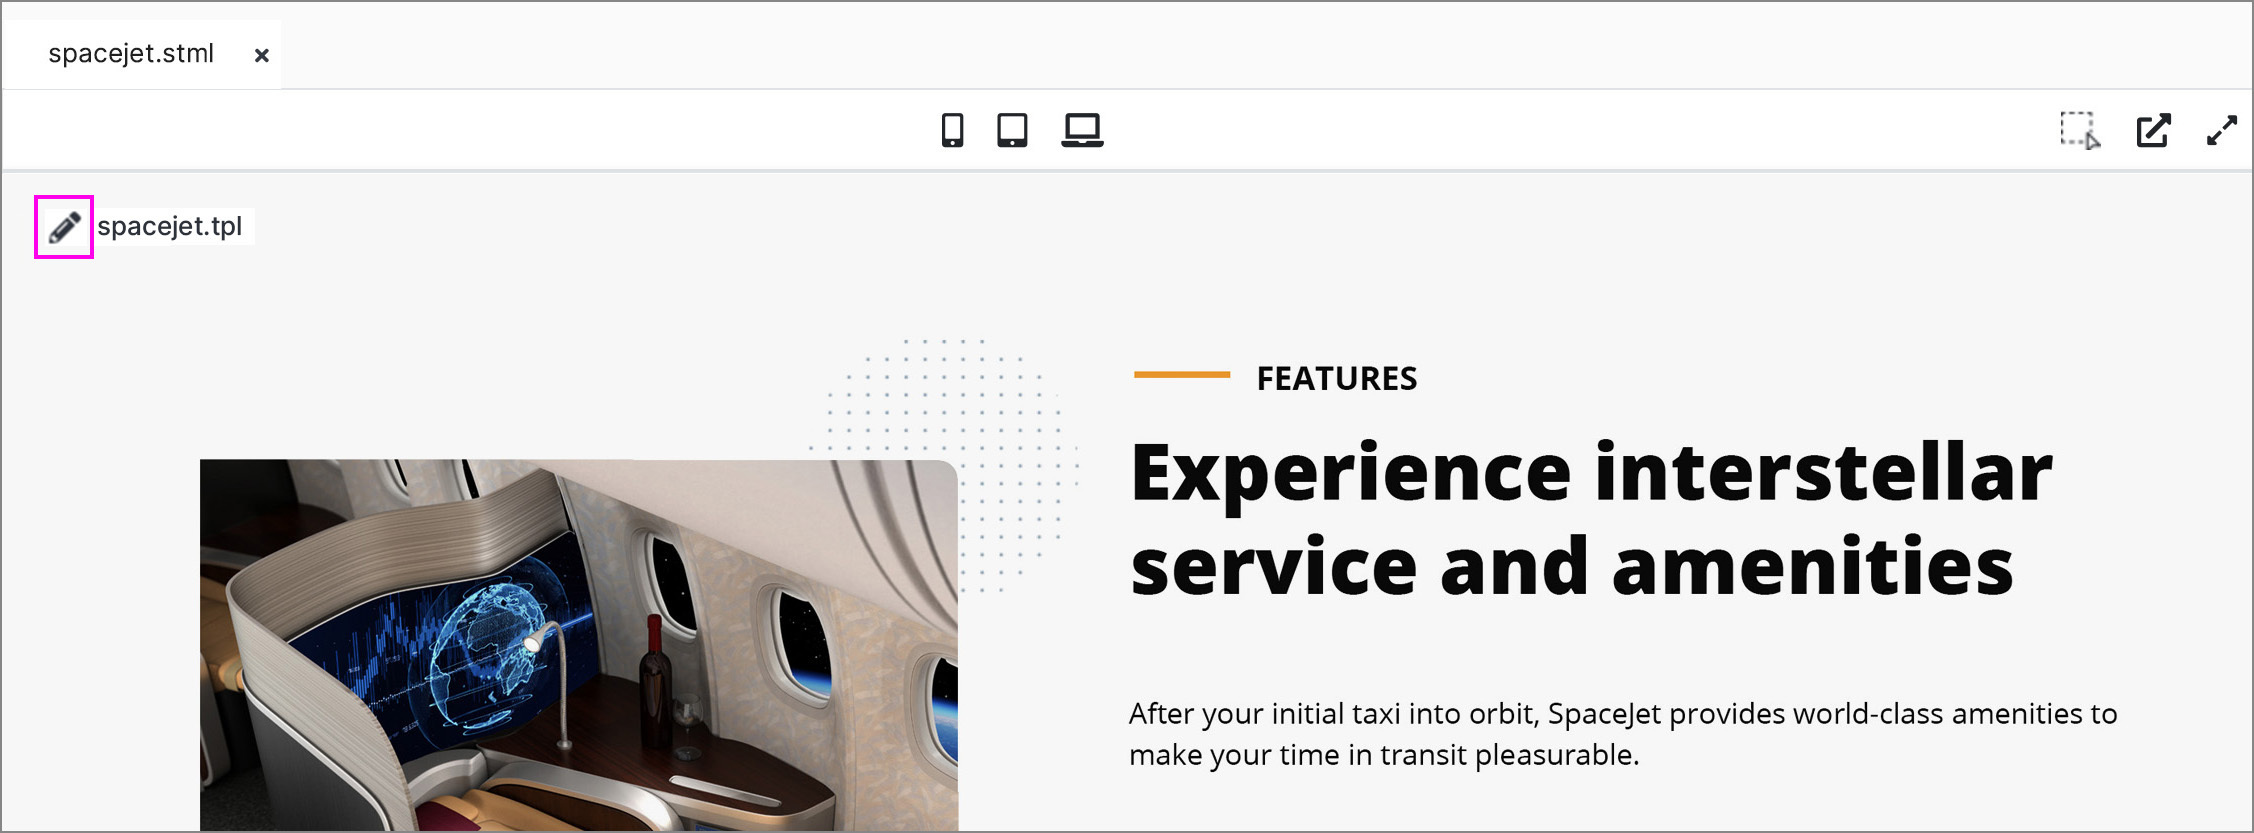
Step 1: Open the www folder in the left-hand menu and select a page to edit. Remember to click on the triangle graphic to the left of each folder to access its contents.
Step 2: On your selected page, click on the section you wish to edit to access the dynamic div. A small flag with a pencil icon and text will appear in the upper left corner. Click on the text to access the code for the div.
Step 3: Once the code appears, you can make any desired modifications by accessing the menu on the right side panel.
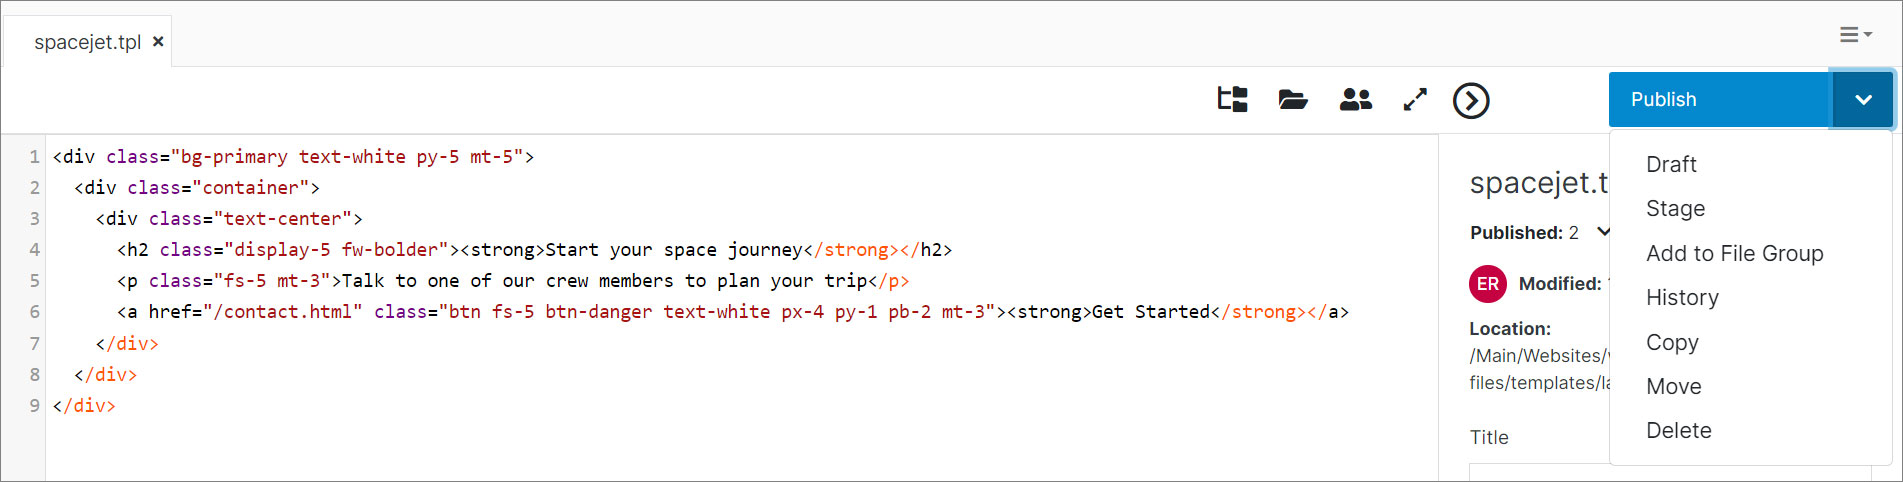
Step 4: After updating your content, use the Draft, Stage, or Publish buttons in the editing pane to save your changes for review or to push live directly.
Note:
In addition to Draft, Stage, and Publish, the editing pane offers additional features listed in the table below.
#
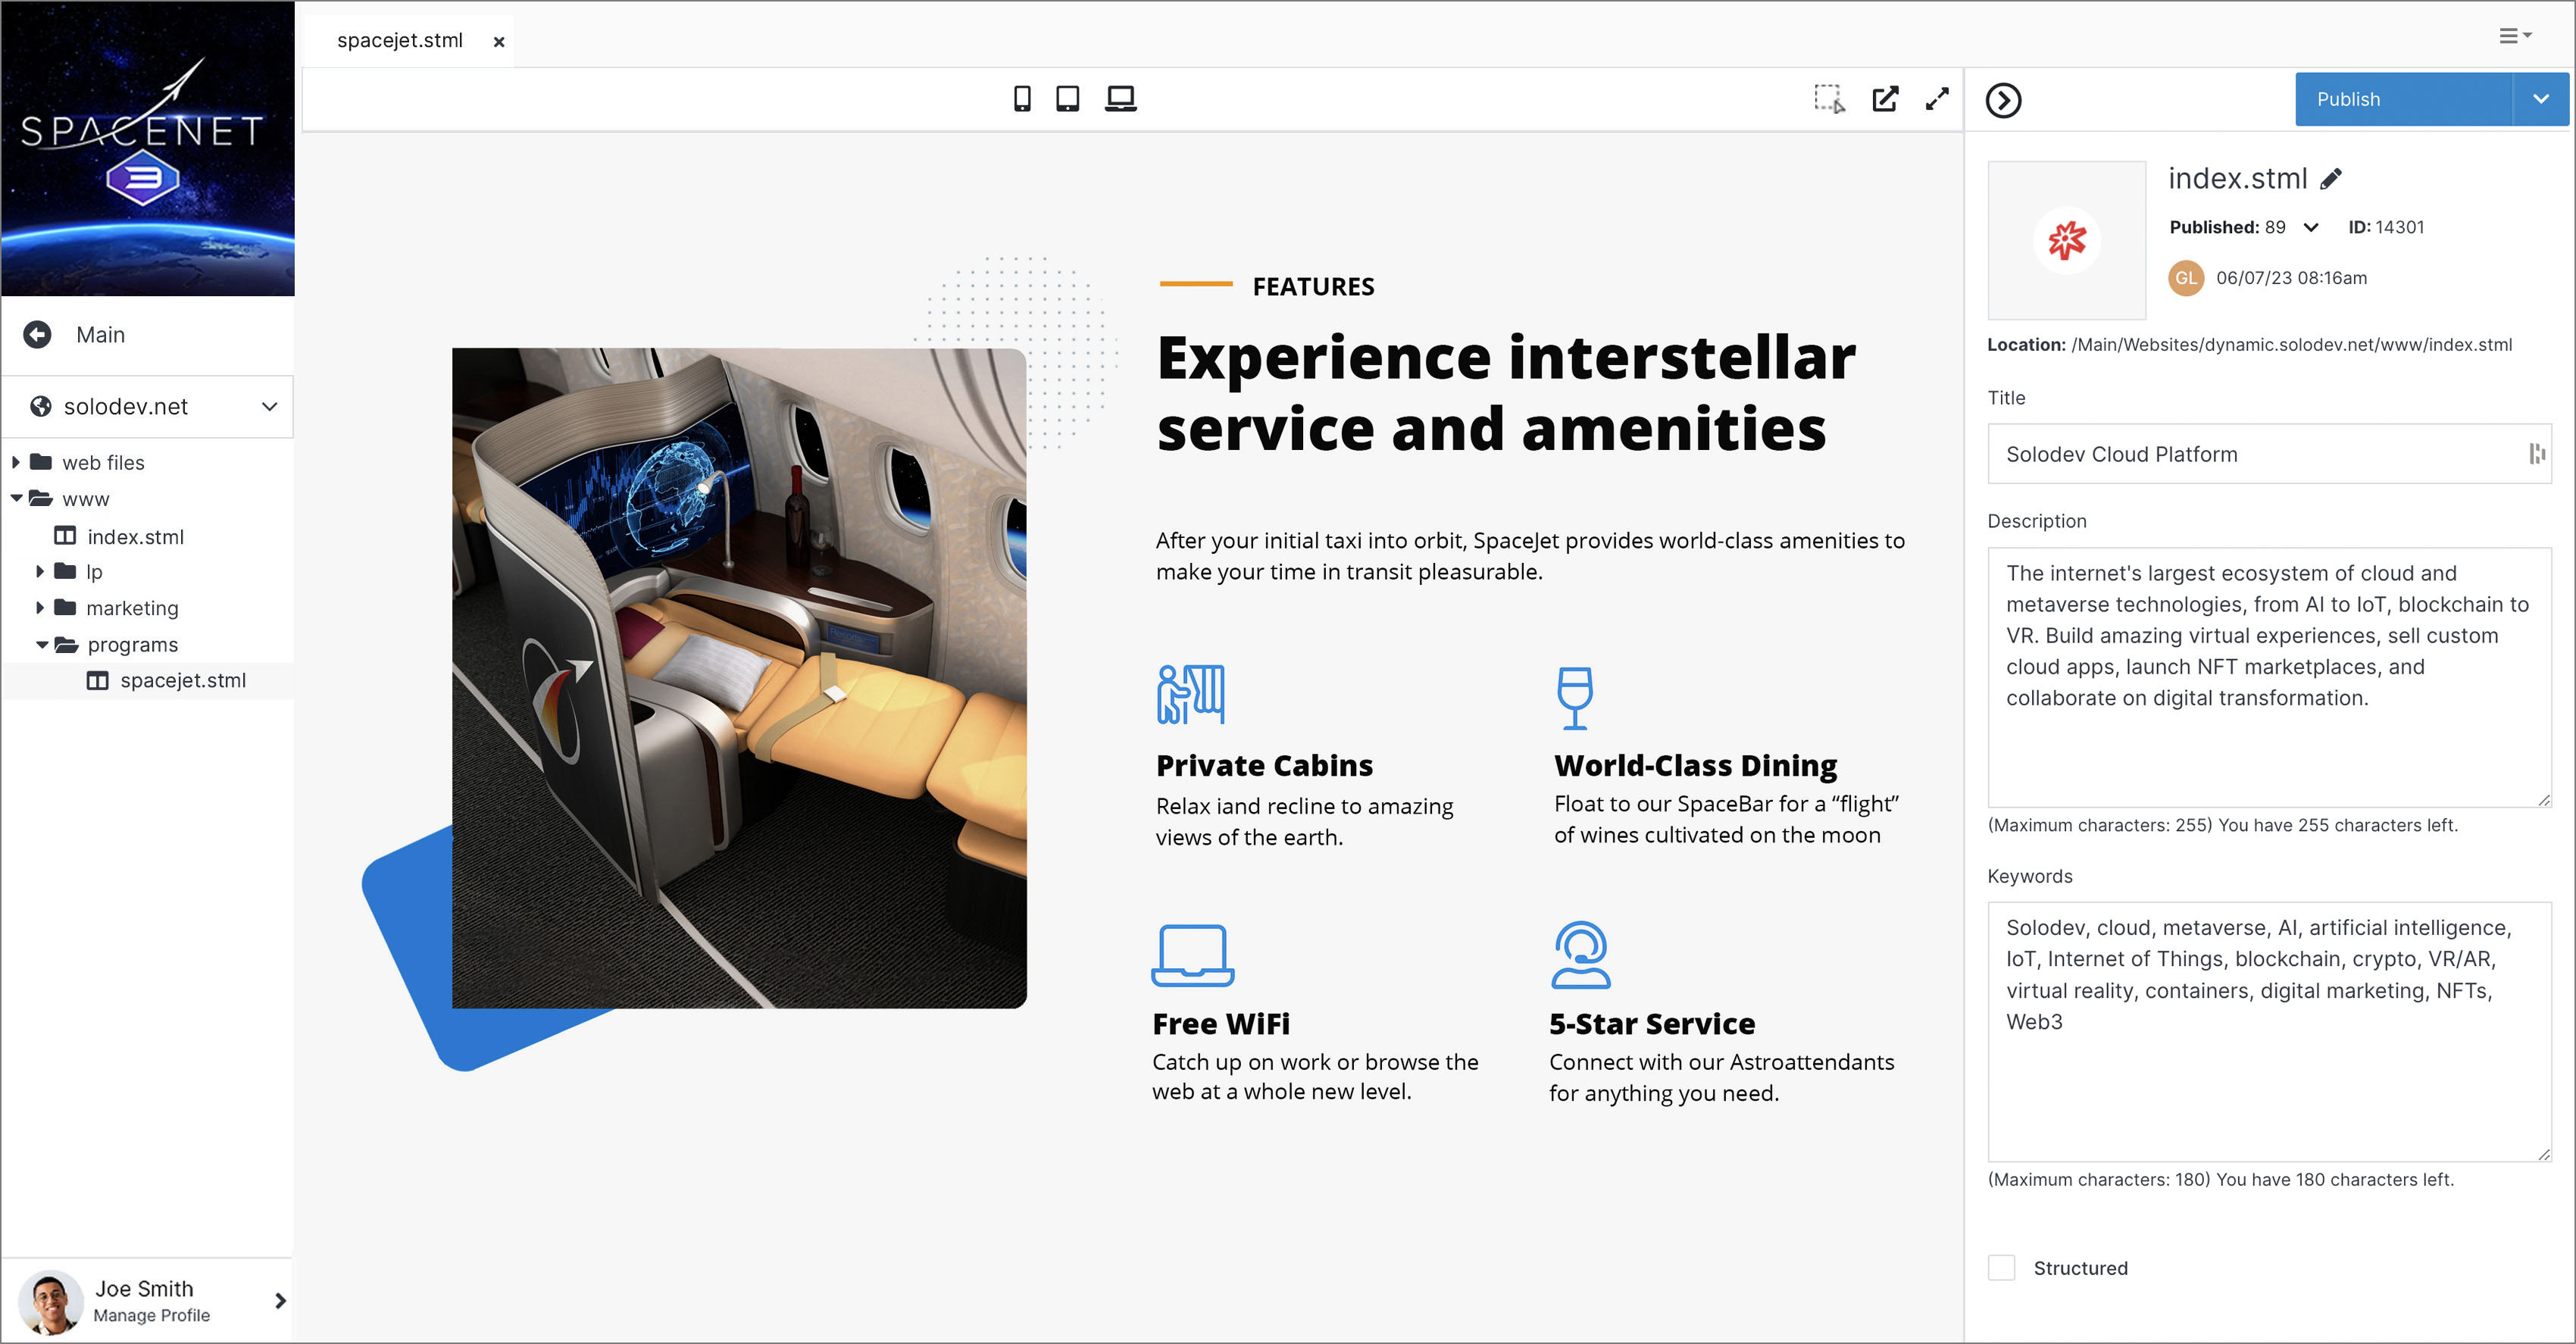
Manage meta information with the Metadata panel
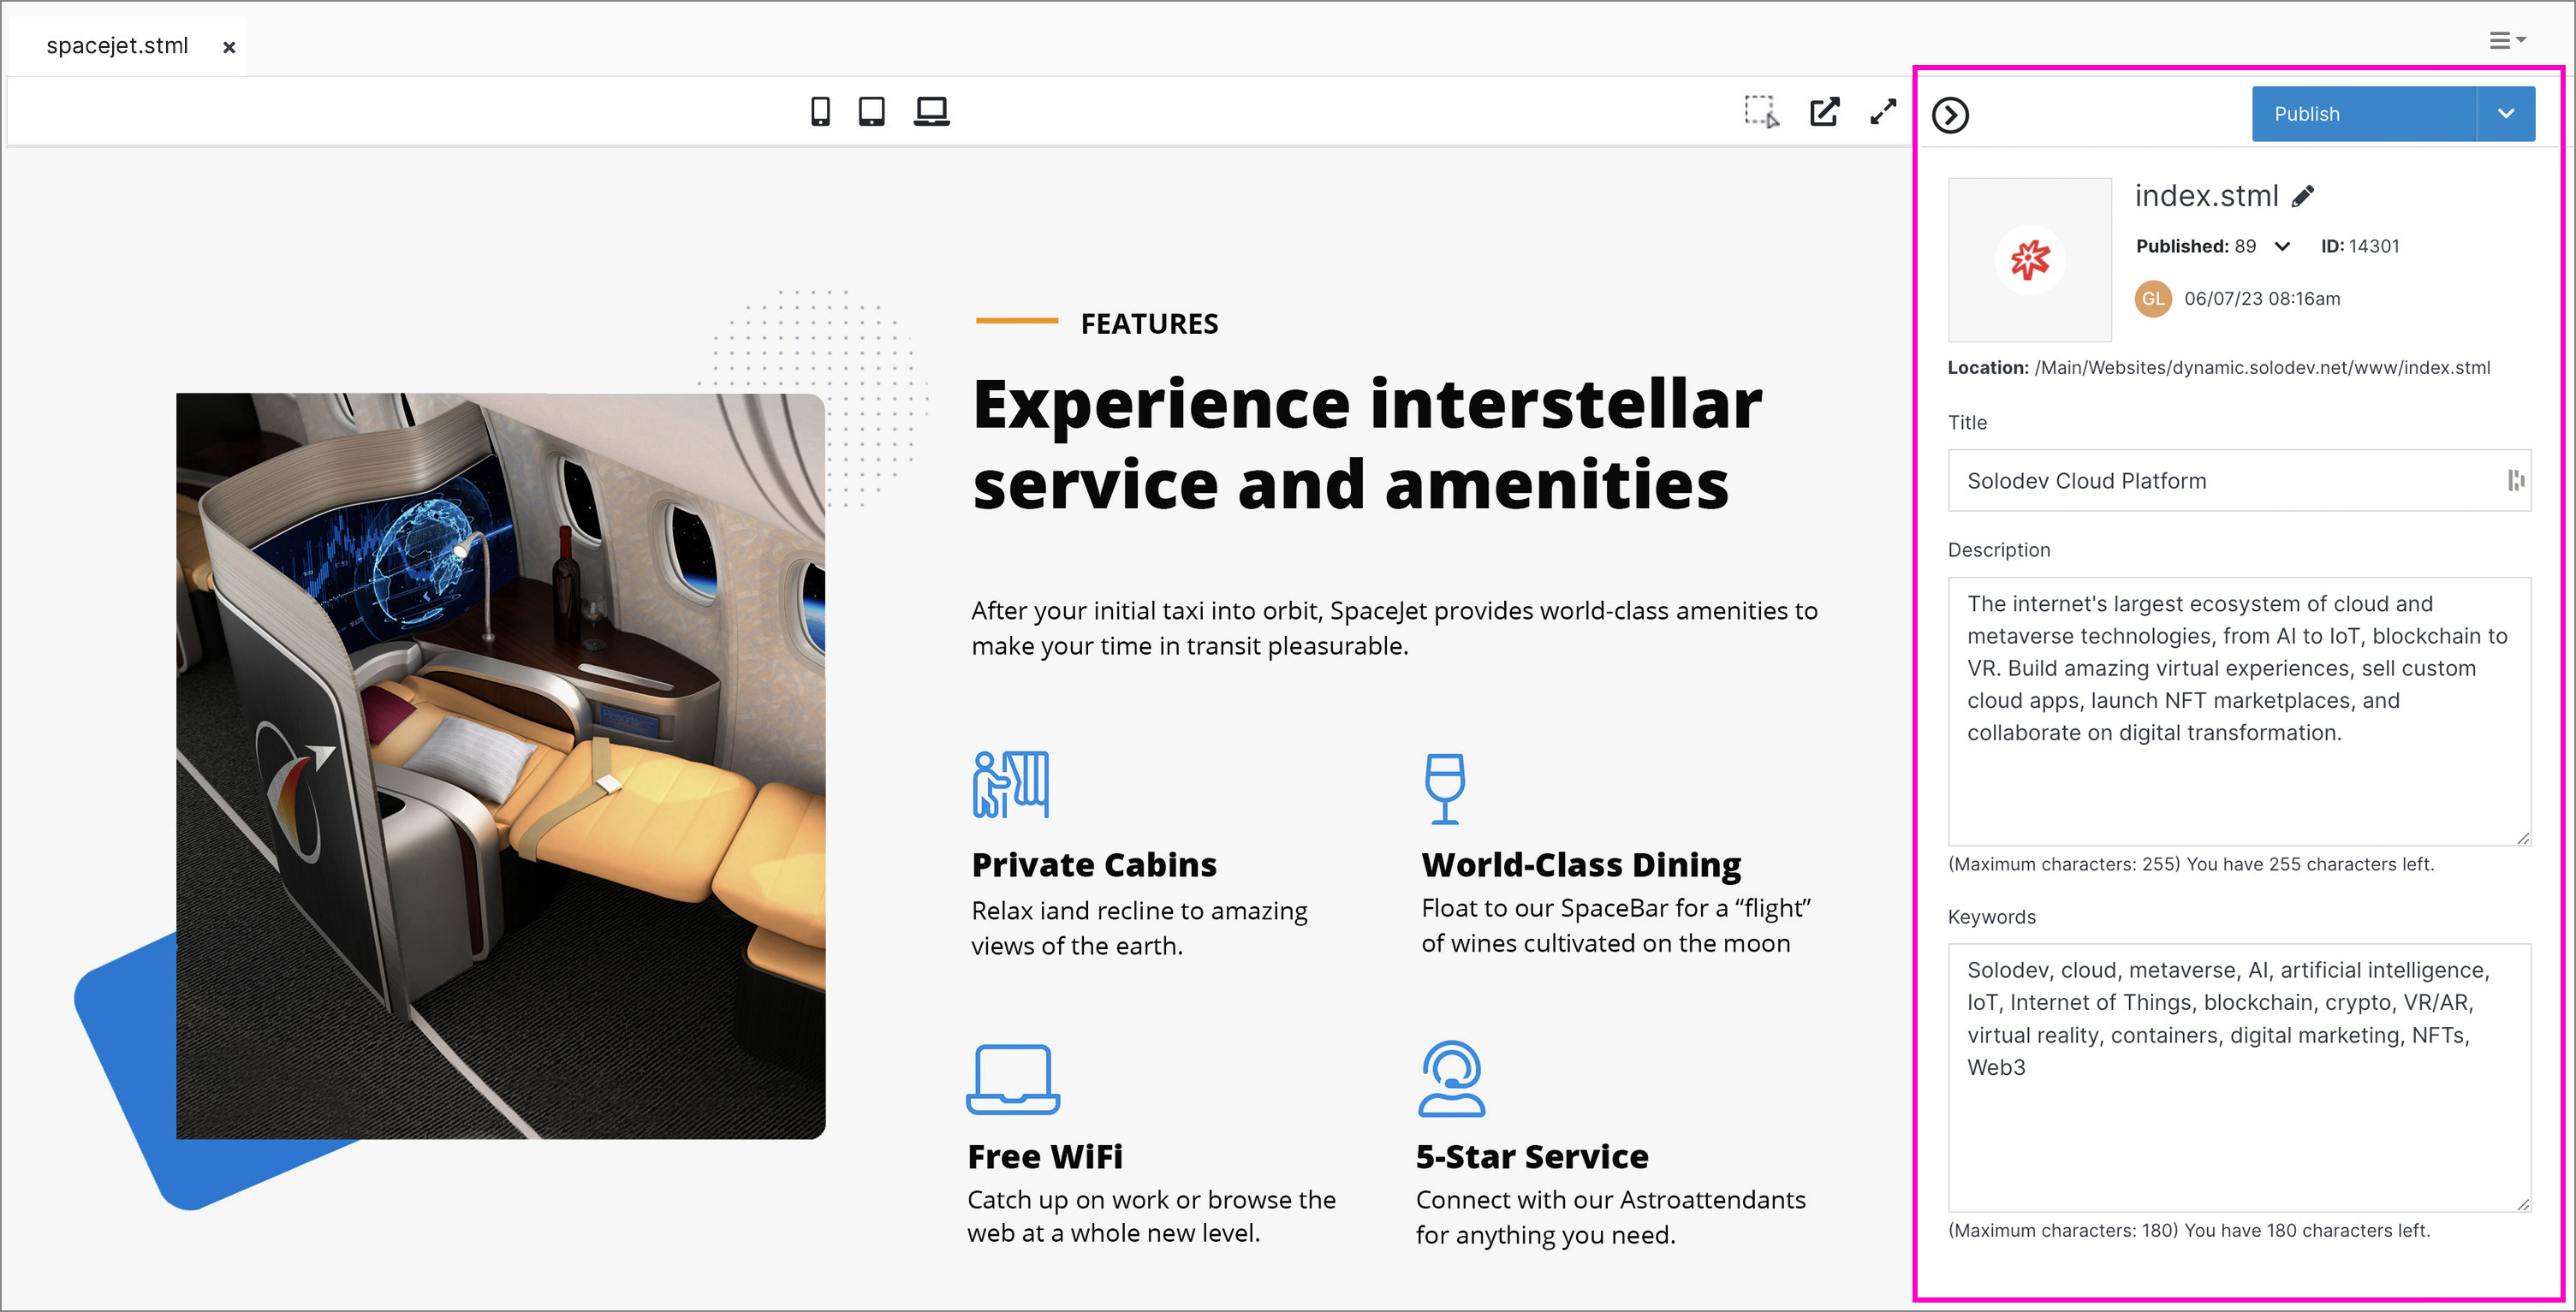
When updating a page using in-line editing, you can view and manage your meta information using the Metadata panel at the right side of the page preview.
The Metadata panel provides quick access to details such as the page ID, which team member made the last update, and the page's location in your website structure. It also provides editable components for page name, description, keywords, and more.
Note:
The Metadata panel can be collapsed using the small “>” icon in the upper left of the window.
#
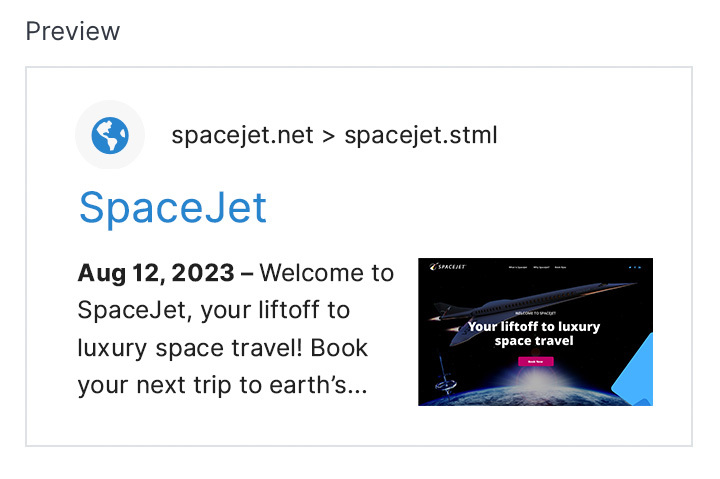
Unfurling Preview
The Metadata panel also previews how the page will unfurl in search results and other applications like Slack.
#
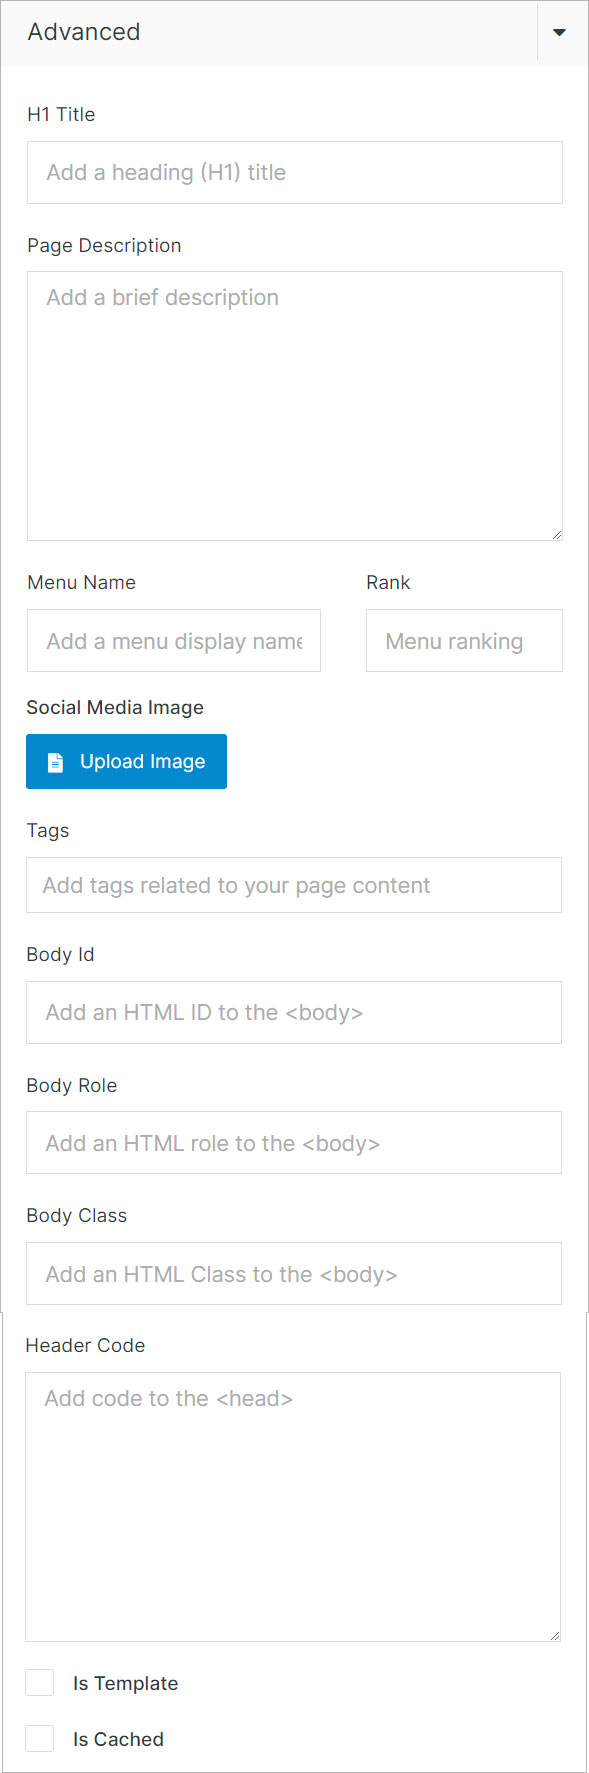
Advanced
Customize your page's behavior, appearance, and functionality with granular settings to add social media images, control rank, manage header code, and more.