Page Overview

In Solodev, you can update any page on your website under the www folder. You can build a page from scratch using a layout template and a drag-and-drop component palette, directly edit an existing page using in-line editing tools with a visual preview, or access the underlying code for each div on your page.

In this article, you will learn how to build a new page from a layout template and the component palette, access an existing page in your www folder, modify it using the editing options available in your CMS, and update your page's meta information and details.
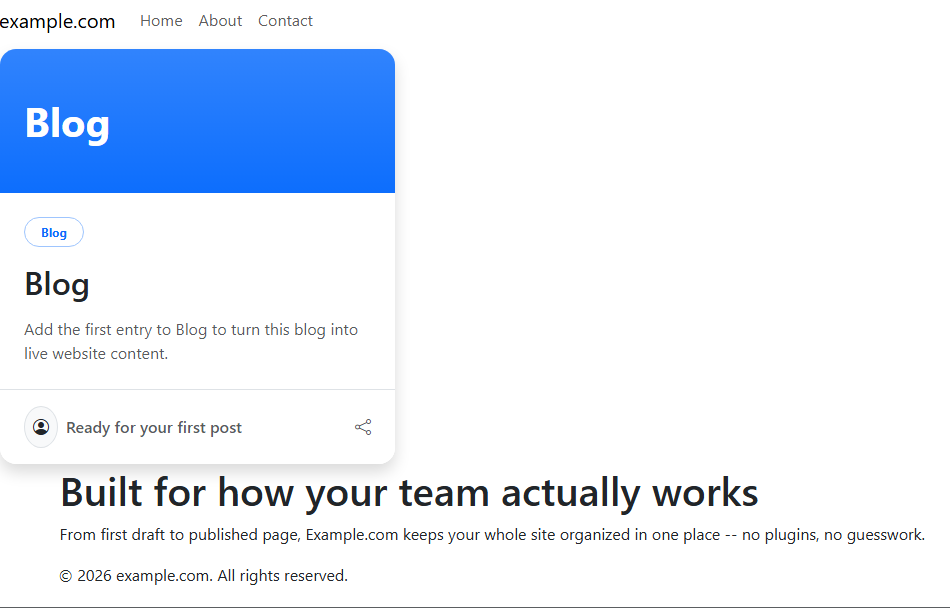
A real page built from a base template, a Blog module, and shared header/footer

The page above was built entirely with the process in this article: a layout template for the header/nav/footer, then a Module dropped in for the Blog.

Prerequisites

Using STML files

The most important assets in your www folder are STML files (.stml), the individual website files that are served in a browser when a user visits your website. STML files are built with templates using dynamic divs. A template imports common elements to a page such as the header and footer, while dynamic divs allow you to include unique page content, such as text, images, and more. In raw markup, a dynamic div is just <div class="dynamicDiv"></div> -- the connecting point between your HTML/.tpl files and an STML page.

Building a page

When you add a page, the Layouts picker determines what you start with:

Name Description
Blank Template Start from a completely empty STML page with no content.
Base Template A full-width Bootstrap shell with a reusable header, footer, and three body layout drop zones.
Homepage Template A Bootstrap homepage shell with stacked section bands and blank content regions.
Sectional Template A flexible Bootstrap shell with stacked content rows, suited to promo or landing sections.
Content Template A Bootstrap inner-page shell with a two-column content-and-sidebar layout.

The Base, Homepage, Sectional, and Content layouts are built-in Bootstrap system templates — a faster starting point than Blank Template if your page fits one of those common shapes.

Adding content with the component palette

A page you're editing has a vertical icon rail on its left edge. Each icon is a draggable component type — drag one onto an empty region of the page canvas to insert it:

Component palette rail

Name Description
Dynamic Div Inserts a new, empty dynamic div directly — no picker, ready for in-line content.
Components Insert a saved, reusable group of components.
File Insert an HTML or Template Code file from your web files.
Module Insert a module (Blog, Calendar, Datatable, and so on).
Form Insert a contact form.
File Group Insert a file group.
Scheduler Insert a scheduler.
Experiment Insert an A/B experiment.

Every picker (except Dynamic Div, which has none) shares the same layout: a searchable list on the left with a + Add shortcut if you need to create a new one on the spot, and a preview pane on the right showing the selected item's details before you commit.

Viewing your page

The Solodev editing experience is highly visual and provides a fully rendered preview of your page’s template elements, graphics, and text.

Using the toolbar at the top of the screen, you can instantly view your page in a desktop, tablet, and smartphone format to test responsiveness and make in-line edits. You can also highlight divs, open a tab to your live page, and expand the window to maximize your viewable area.

Page preview toolbar with mobile/tablet/desktop toggles and expand

Name Description
Mobile View Toggle to a responsive view for a smartphone.
Tablet View Toggle to a responsive view for a tablet.
Desktop View Toggle to a responsive view for a desktop/laptop computer.
Highlight Divs Apply a blue dotted line to identify the divs and .tpl sections of your page.
Open Live Website Launch a new browser tab to view your live, published page.
Expand Window Fully expand the rendered view of your page to remove toolbars.

In-line editing

You can directly edit a page on your website using Solodev’s in-line editing features. Click on a div or content block to access the editing features, make changes, and save your updates.

Step 1: Open the www folder in the left-hand menu and select a page to edit. Remember to click on the triangle graphic to the left of each folder to access its contents.

manage-folder

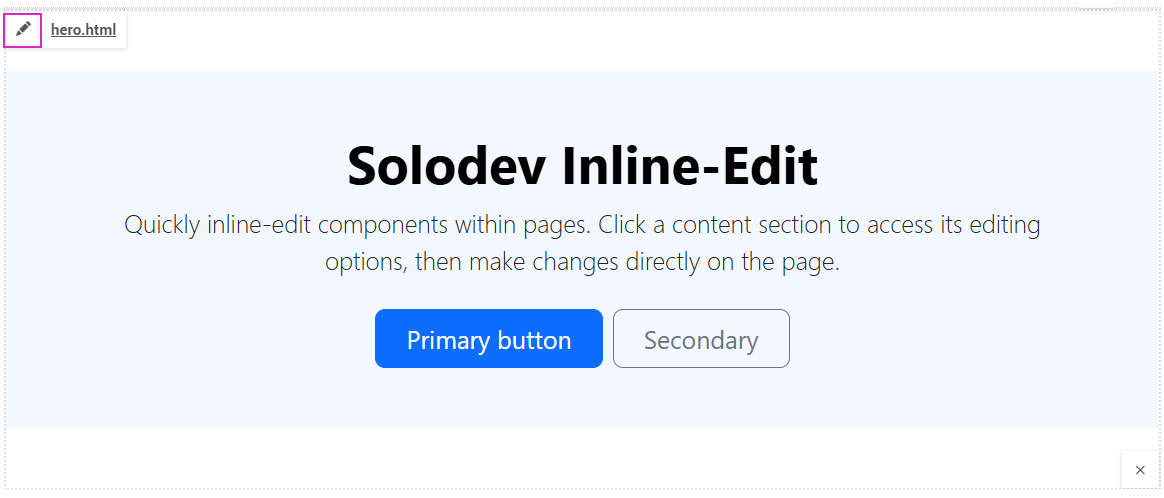
Step 2: On your selected page, click on the section you wish to edit to access the dynamic div. A small flag with a pencil icon and text will appear in the upper left corner. Click on the icon to directly edit the page.

manage-folder

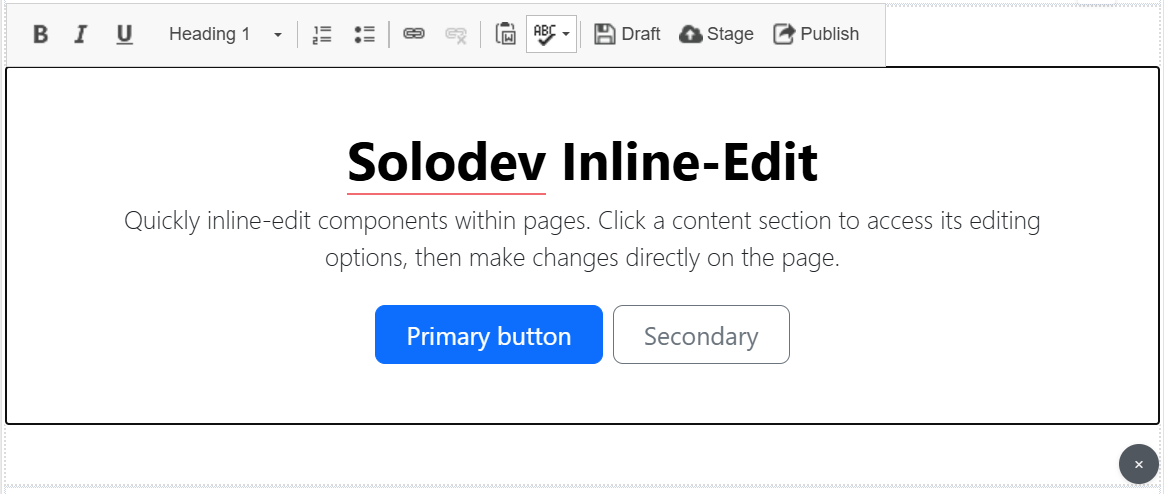
Step 3: Once activated, an editing toolbar will appear in your div, allowing you to select text and update your page directly. You can apply styles for bold, italic, and underlined text and change the heading styles. You can also apply numbering, bullets, and links to your content.
manage-folder

Step 4: After updating your content, use the Draft, Stage, or Publish buttons in the editing toolbar to save your changes for review or to push live directly.

Name Description
Bold Apply a bold version of your text style.
Italic Apply an italic version of your text style.
Underline Add a line under any text for emphasis (does not link).
Heading Change the heading status of your text (H1, H2, paragraph, etc.).
Add Link Apply a hyperlink to any text.
Remove Link Remove a hyperlink from any text.
Paste from Word Add copied text from Microsoft Word to your page content.
Draft Create a draft version of your code or content.
Stage Set up a staged version of your code or content for review as part of your workflow.
Publish Push your code or content to live production.

Accessing your code from a page

In addition to in-line editing, you can access the code to update a div or .tpl on your page.

Step 1: Open the www folder in the left-hand menu and select a page to edit. Remember to click on the triangle graphic to the left of each folder to access its contents.

manage-folder

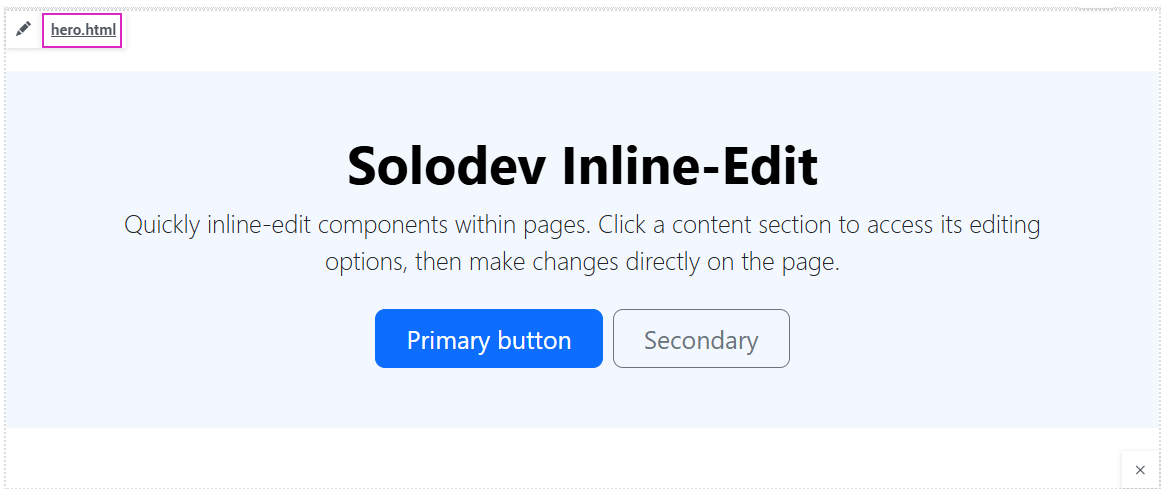
Step 2: On your selected page, click on the section you wish to edit to access the dynamic div. A small flag with a pencil icon and text will appear in the upper left corner. Click on the text to access the code for the div.

manage-folder

Step 3: Once the code appears, you can make any desired modifications by accessing the menu on the right side panel.

Update file

Name Description
Draft Create a draft version of your code or content.
Stage Set up a staged version of your code or content for review as part of your workflow.
Publish Push your code or content to live production.
History Review previous versions of your content or code and restore a saved version.
Copy Copy the file for editing or additional use elsewhere in your website.
Move Relocate the file based on your taxonomy.
Delete Permanently delete the file from your CMS.

Step 4: After updating your content, use the Draft, Stage, or Publish buttons in the editing pane to save your changes for review or to push live directly.

Name Description
Meta Add meta information and details using the right-hand panel.
File Includes Check where your file is being used across the system.
Overwrite Current File Upload a file to overwrite the current one.
Tasks Access the tasks modal.
Fullscreen Maximize your file view to fullscreen.
Collapse Menu Collapse the metadata panel.

Manage meta information with the Metadata panel

When updating a page using in-line editing, you can view and manage your meta information using the Metadata panel at the right side of the page preview.

The Metadata panel provides quick access to details such as the page ID, which team member made the last update, and the page's location in your website structure. It also provides editable components for page name, description, keywords, and more.

Metadata Panel

Name Description
Name Click the pencil icon to update the name of your page.
Published Switch between the Draft, Stage, Origin, and Published views using the picker below the name.
Title Add/Update a title to your page.
Description Provide an overview of your page for unfurling and other applications. Limit: 255 characters.
Keywords Include the top keywords from your content to improve SEO. Limit: 180 characters.
Structured When you structure a page, you ensure its visibility in your website's navigation.

Unfurling Preview

The Metadata panel also previews how the page will unfurl in search results and other applications like Slack.

Page unfurling

Advanced

Customize your page's behavior, appearance, and functionality with granular settings to add social media images, control rank, manage header code, and more.

Advanced options on metadata panel

Name Description
H1 Title The main heading of the page.
Page Description Provides a brief overview of the page's content.
Menu Name Specifies how the page is displayed in navigation menus. It can be different from the page's actual title.
Rank Determines the order in which pages are displayed in navigation menus or other listing views.
Social Media Image Image that is displayed when the page is shared on social media platforms.
Tags Keywords or labels associated with the page.
Body ID An HTML attribute that provides a unique identifier for the page's main content area.
Body Role Specifies the role of the main content area in the page's structure, following web accessibility guidelines.
Body Class HTML attribute that assigns one or more classes to the page's main content area.
Header Code Allows you to add custom code to the page's header section.
Is Template If enabled, this indicates that the page is a template for other pages.
Is Cached If enabled, the page content is cached to improve performance. See Page Cache to set the TTL.